


Release notes
New requested features and debugging based on user feedback.
Download Raise Touch 1.0.0.831
NEW FEATURES
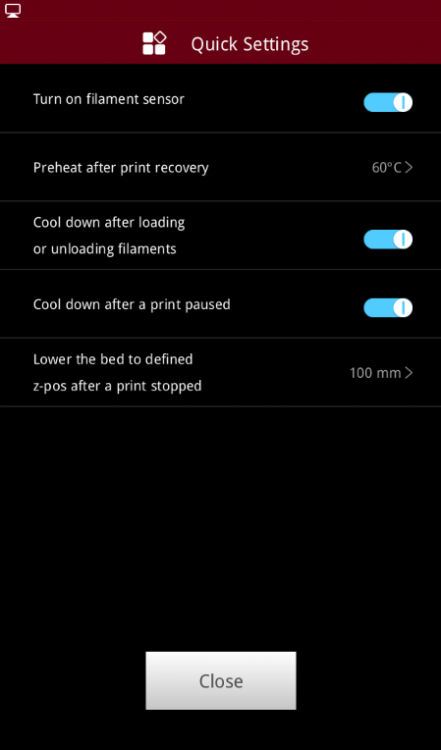
1. Added “Quick Settings” button to the Utilities Tab
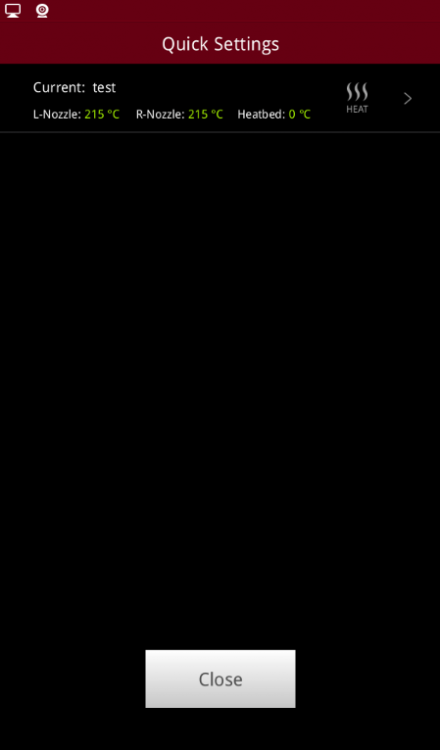
Click the “Quick Settings” button located in the top right of the Utilities tab to enter the “Quick Settings” screen, including:
1) Turn on and turn off the filament detection
2) Set temperature to preheat after print recovery
3) Cool down after loading or unloading filaments
4) Cool down after a print paused
5) Set z-pos to lower the bed after a print stopped

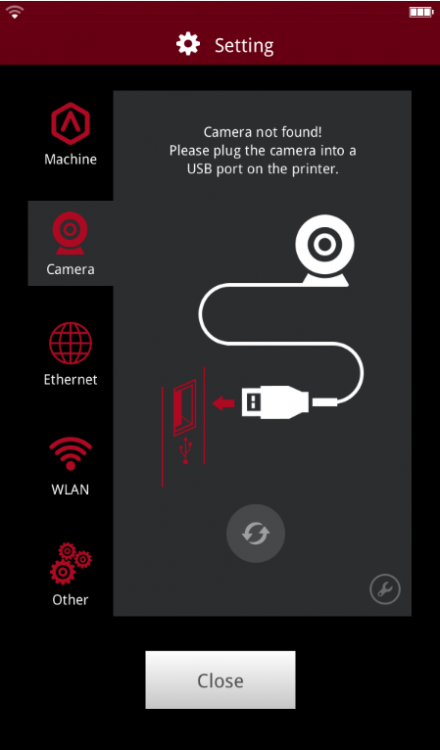
2. N series printer camera function
Click the Setting- > Camera to enter the Camera page. If the printer does not have a built-in Camera (Pro2 Series), Plug in the Raise3D Camera Upgrade into an available USB port on the printer, and click the refresh button to enter the camera selection page.
(Raise3D N Series Camera Upgrade is required, third-party webcam is not supported)
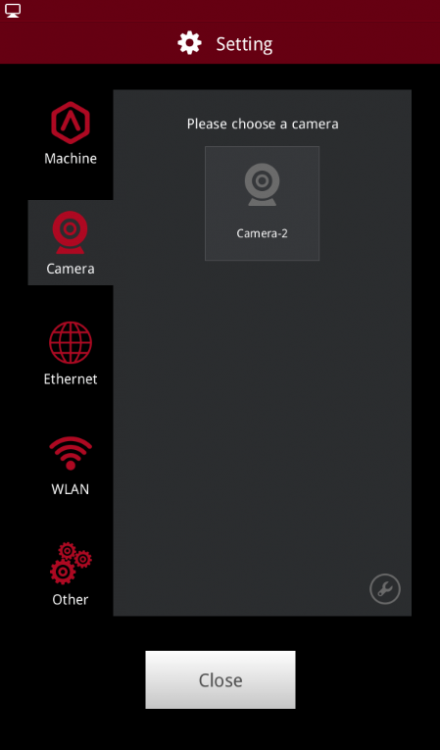
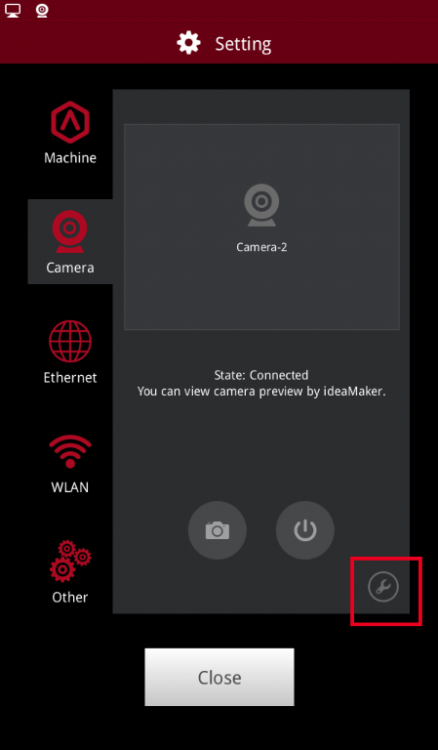
Select the camera and wait for the connection. Pictures can be viewed on RaiseTouch and ideaMaker after successfully connected. If the printer has a built-in Camera (Pro2 Series), click the Setting- >Camera to enter the Camera selection page directly.
Select the camera and click ok to connect to the selected camera. Click the camera button to view the picture taken on the RaiseTouch. Click the close button to turn off the camera function.

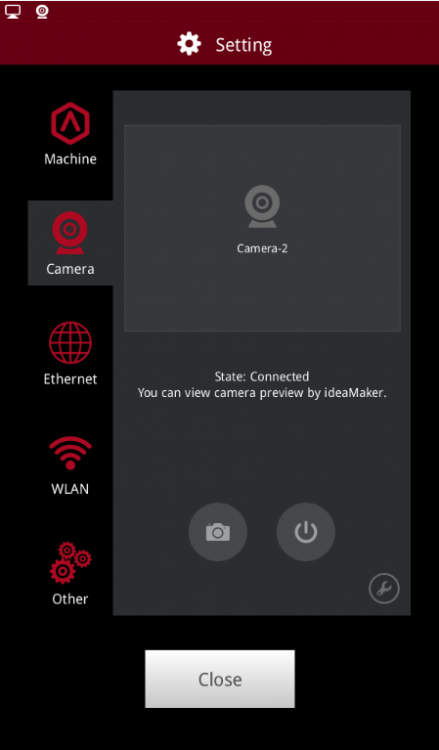
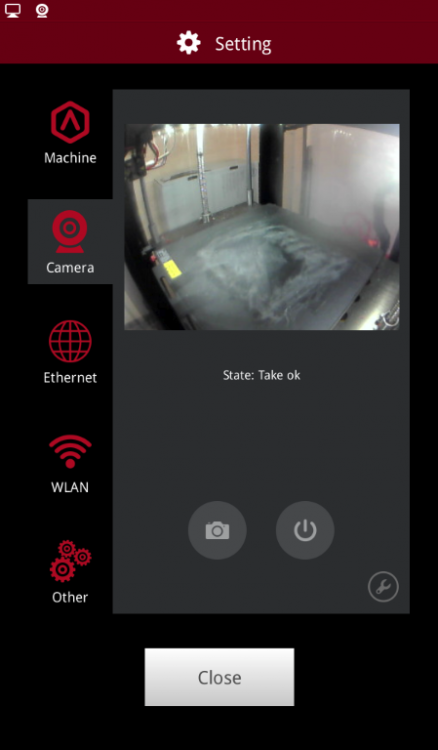
Note: 1) Camera is not accessible from your computer unless you are using ideaMaker version 3.1.7 or newer.
2) Auto connect at startup can be set in Advanced Settings.
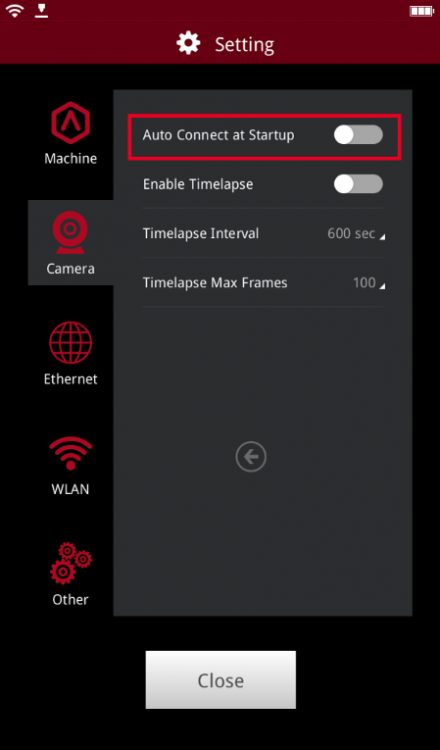
Click the advanced setting icon on the camera page and enter the advanced setting page of the camera. You can choose to enable Timelapse and set related settings.
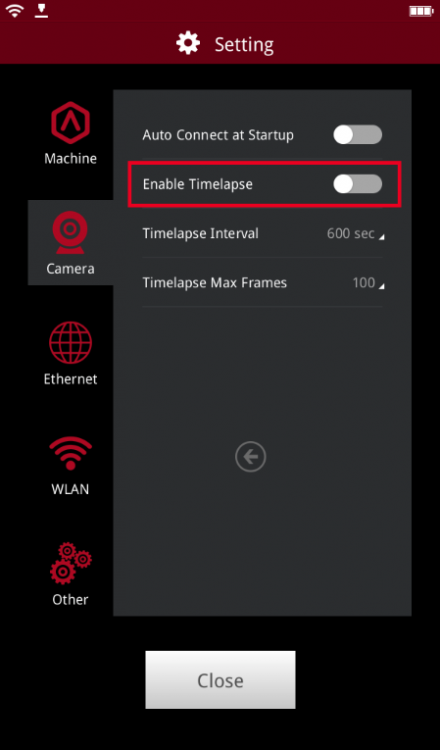
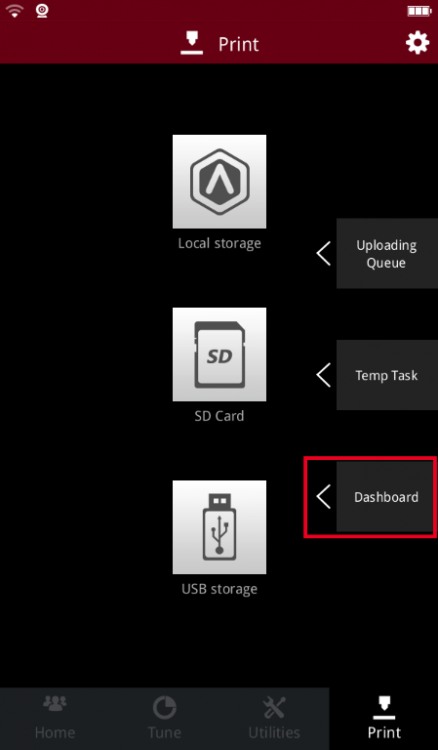
The Timelapse can be viewed on the touch screen under Print-> Dashboard
Note: 1) Timelapse can be viewed only when the print is finished.
2) Make sure the Timelapse setting was turned on at the touch screen.
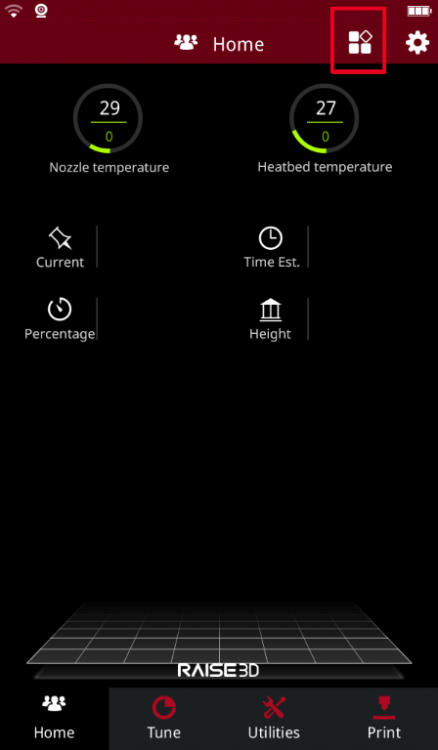
3. Added shortcut to “Quick Settings” to Home page.
You can access the new pre-heating template interface by selecting temperature template management on the new “Quick Settings” page.
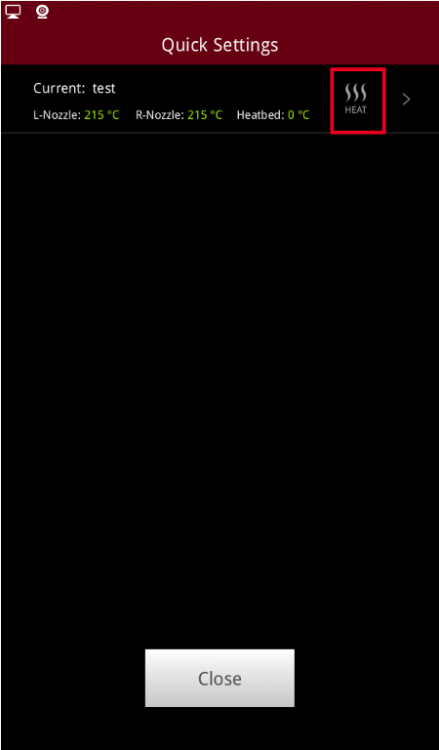
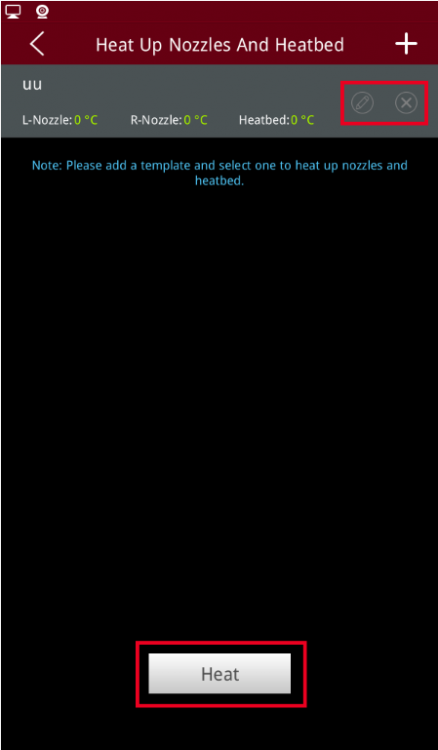
With One-button you can preheat the printer by selecting the heat icon on the template page.
Selecting the ADD icon in the upper right corner allows you to add a new template and set the new template parameters.
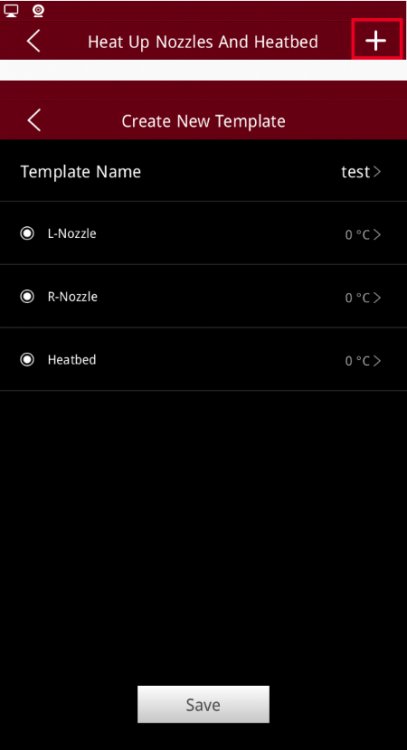
Click the modify template icon to modify the template parameters. Click the delete template icon to delete the template.
After the template is selected, the Heat button is displayed. Click the button, and the printer will start to pre-heat in accordance to the template set temperatures.
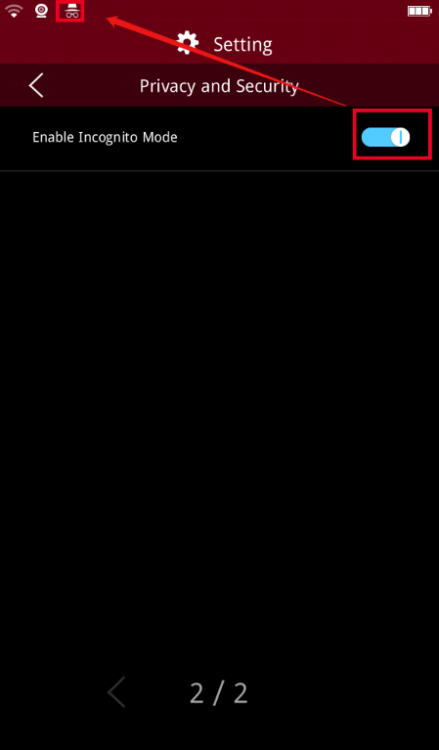
4. Added incognito mode
Incognito mode can be activated under Setting–>Machine–> More Settings–> Privacy and Security. Enable incognito mode:
1) A new icon will be displayed in the upper left corner
2) All relevant information of the print task will be deleted when print is finished. If the print is local, then the local file will be deleted and Dashboard will not record the print task.
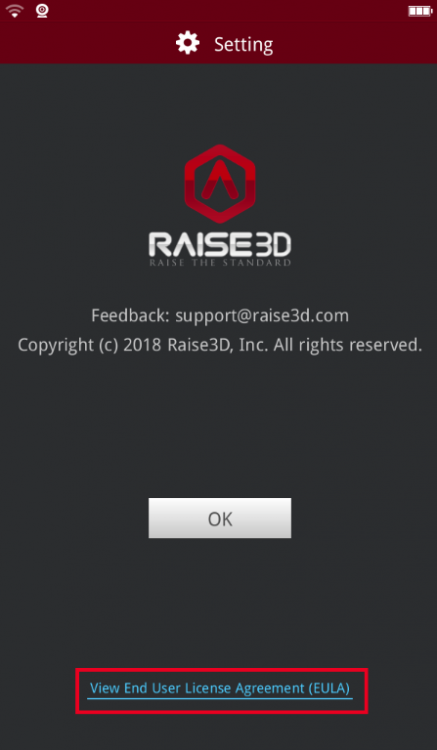
5. Added EULA confirmation before update
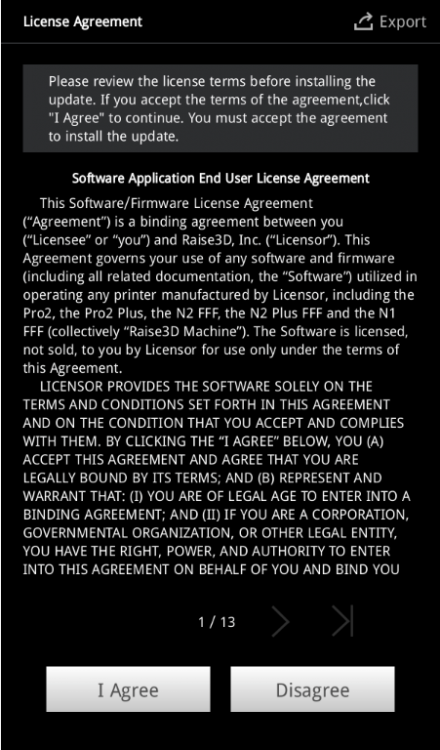
View the EULA details through Setting–> Machine–> More Settings-> About by click View End User License Agreement(EULA), which can be exported.
6. Added rsync for file synchronization on N series printer, accessible from SSH interface.
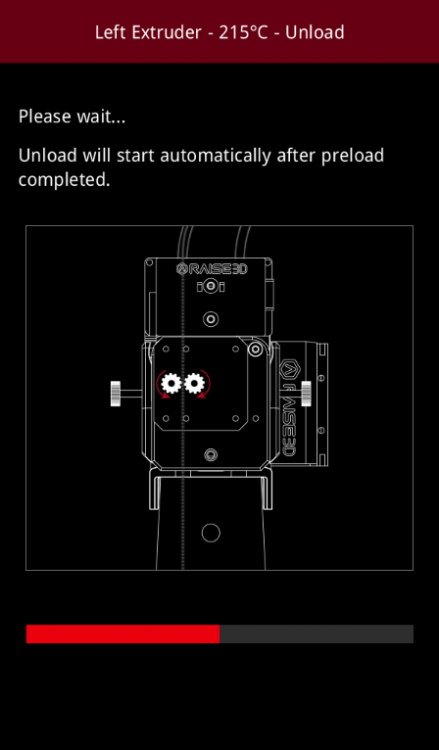
7. Automatic pre-extrusion progress is displayed when Pro2 unloads filament
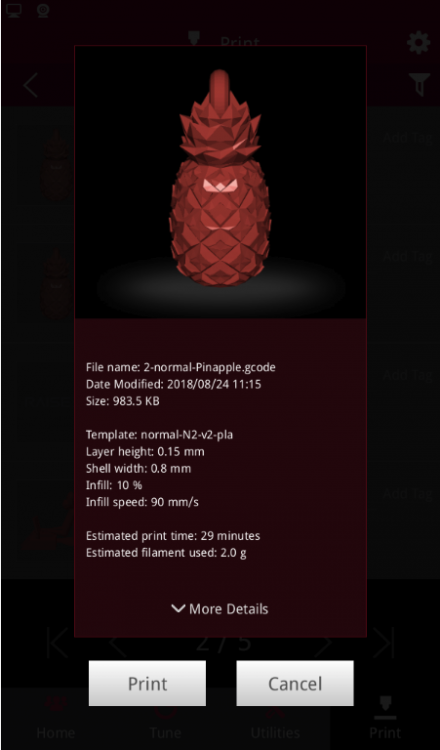
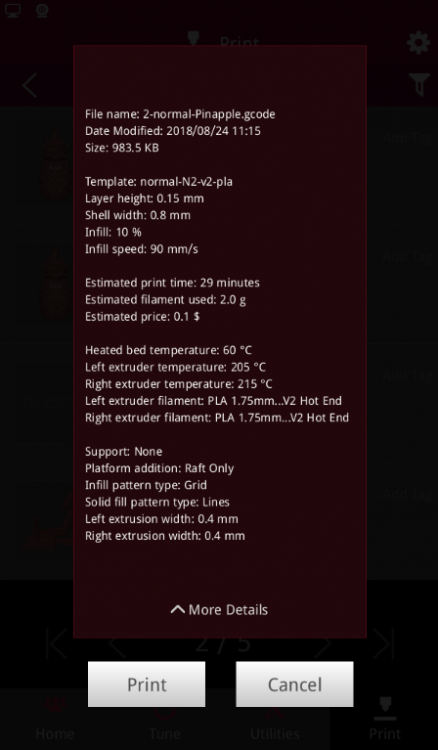
8. Added more slice parameters to model detail page
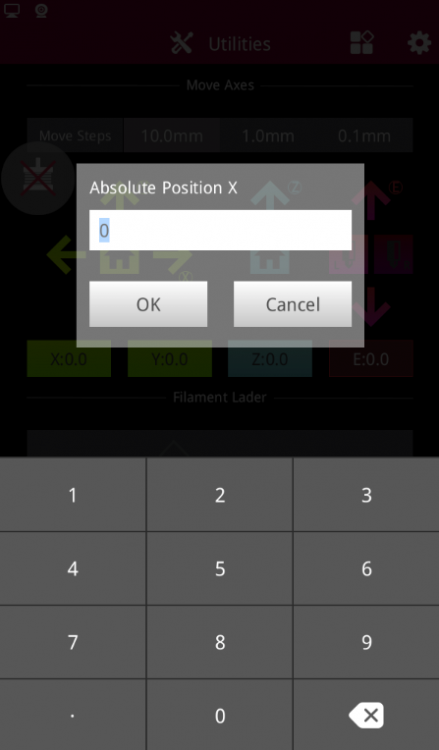
9. Movement distance to shift axis control can be manually input for convenience and speed

10. Added Polish in language Setting
11. Optimized Pro2 Series Machine Log
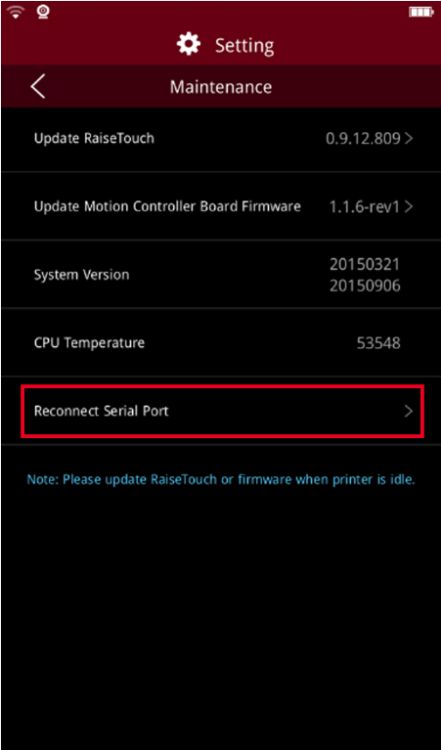
12. Added Reconnection Serial Port
After the interruption of Serial Port, it can be re-linked through Setting–> Machine–> Other–> Maintenance–> Reconnect Serial Port. If there is an interrupted printing task, you can go to Print- > Temp Task to view the file and resume printing.
BUG FIXED
1. Fixed the unconnectable issue caused by failed initialization of SSH on Pro2 series printer
2. Upgraded SSH server to resolve vulnerabilities in older versions of SSH server on N series pinrter.
Note: Please log off all SSH sessions when updating RaiseTouch.
3. Fixed the unsynchronization issue of file sorting between ideaMaker and touchscreen
4. Fixed touch false trigger issue on Pro2 series.
5. Fixed print recovery failure issue after power loss on Pro2 series printer
6. Multi-language layout adjustment
7. Fixed the bug with model preview being invisible in the Dashboard after deleting the file stored in Local Storage.