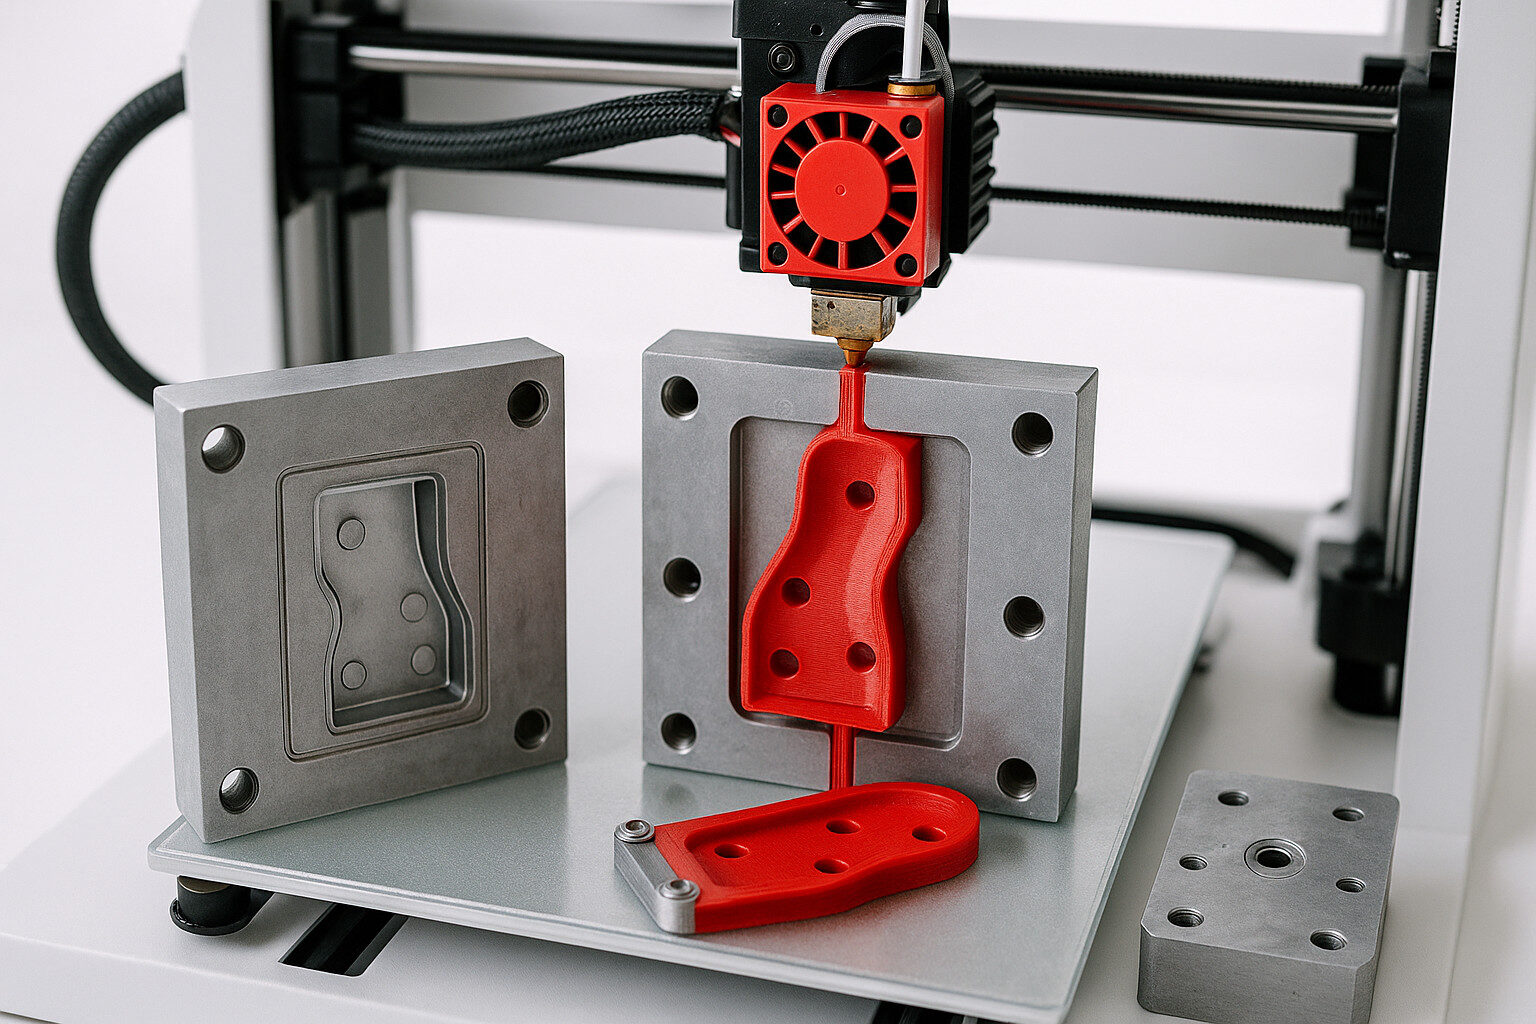
Reading Time: 23 Minutes
Glue for resin prints is what keeps your Raise3D resin models in one piece,turning delicate printed parts into durable pieces you can handle and display.
When you choose the right glue, you can join pieces together into oversized builds, repair small breaks, and hide seams so they fade under paint.
In resin printing, glue handles four main jobs: assembling multi-part resin prints, repairing broken or weak sections, attaching accessories or bases, and visually smoothing joints where parts meet.
Because resin prints are dimensionally precise but brittle, a strong bond lets you join sections too large for one build plate and reinforce tiny details that snap during cleaning or drops.
Common adhesive families include cyanoacrylate (super glue / CA glue), two-part epoxies, UV-curable “resin welding”, hot glue, silicone sealants, and polyurethane construction adhesives.
Your results rely on using the best glue, preparing the surfaces correctly, and giving each joint enough time to cure so it resists brittle fracture instead of breaking from light impact.
What is glue for resin prints?
Glue for resin prints refers to adhesives and bonding systems that bond to cured photopolymer resins instead of just sitting on top.
These resins are usually acrylate- or epoxy-based, smooth, low-porosity, and relatively low-surface-energy, which means many everyday craft glues simply do not grip them.
Good resin glue options are structural epoxies, cyanoacrylates, UV-curable resins, elastomeric silicones, hot-melt polyolefins, and moisture-curing polyurethanes that can wet and anchor to cured resin surfaces.
In industrial settings, structural “resin glues” such as epoxy, acrylic, and polyurethane adhesives can reach tensile strengths in the 5,000–10,000 psi range and shear strengths above roughly 2,500 psi, well beyond what hobby resin prints handle.
For you, that means the joint is rarely the weak link when you pick the right glue and design a decent bond area.
By contrast, many school or wood glues with PVA are made for porous surfaces; they soak into fibers rather than bonding to smooth UV resin, so they bond poorly and can be peeled off.
Is resin the same as glue?
Resin and glue are related concepts but not interchangeable. “Resin” is a broad term for reactive polymers that form solids, coatings, or adhesives based on formulation.
UV 3D-printing resins are designed for layer-by-layer curing in a vat to build bulk parts, while adhesive resins are tuned for bond strength, flexibility, and surface wetting.
You can use UV resin like glue by placing a thin layer between parts and curing it with light, often called “resin welding,” but its brittleness, shrinkage, and need for light access make it a niche option rather than a universal solution.
Many commercial “resin glues” are actually two-part epoxies or acrylics engineered for predictable viscosity, high tensile and shear strength, chemical resistance, and reliable cure schedules.
In practical terms, glue joins parts, while resin is the base material, not always suited for bonding.
Why does adhesive choice matter for resin 3D prints?
Adhesive choice matters because resin prints behave very differently from flexible FFF plastics.
Photopolymer resins tend to be hard, brittle, and relatively low-surface-energy, so stress builds at joints and tiny flaws can cause cracks.
If you use the wrong glue, joints fail by brittle fracture, layers peel near the seam, or parts simply pop apart when you bump a model.
Choosing an adhesive with enough shear strength, peel resistance, and toughness for your use case, you greatly reduce the chance of failure under impact, vibration, or constant gameplay handling of resin models.
Gap-filling epoxies can reinforce thin parts or repair chipped edges, while thin super glue or UV “welds” deliver nearly invisible seams on high-end display pieces.
Environmental factors like humidity, temperature, UV, and chemicals affect bond durability.
Moisture-resistant epoxies or polyurethanes suit outdoor or marine-adjacent setups, while basic CA may craze or weaken over time.
Cure times vary; epoxies often need 24–72 hours at room temperature to reach full properties, whereas CA reaches handling strength in seconds but remains more brittle.
A mis-matched adhesive, such as plastic cement designed for polystyrene, can seem to hold at first but fails quickly because it cannot dissolve or chemically fuse cured UV resin.
Which adhesive types are commonly used on resin prints?
Most resin print projects use a six main adhesive types:
- cyanoacrylate (super glue / CA glue
- two-part epoxies
- UV-curable “resin welding” using uv resin
- hot-melt glue sticks
- silicone sealants and adhesives
- polyurethane construction glues
Each offers a distinct balance of strength, flexibility, cure speed, and gap-filling ability, so you match the glue to the job.
Cyanoacrylate is the go-to for rapid assembly of small mating areas, especially when you need to hold tiny parts together on miniatures or repair snapped thin features.
UV-curable resin systems shine when you want nearly invisible seams on clear or translucent parts, cosmetic crack filling, or local surface repair where color and refractive index must match.
Hot glue is useful for temporary fixtures, attaching scenery to bases, or quick, non-critical joints on terrain pieces. Silicone adhesives provide flexible, vibration-damping interfaces, especially when joining resin to glass or metal where movement is expected.
Polyurethane glues offer tough bonds between resin and dissimilar materials and can accept some foaming gap-fill where appearance is less critical.
Many general-purpose products in these families advertise tensile strengths around 3,000–4,000 psi and service temperatures up to roughly 250–550 °F, far above the loads your printed parts will see.
Water-based craft glues like PVA remain limited mostly to temporary or low-stress uses.
Here is an overview of
| Adhesive Type | Typical Best Use on Resin | Working Time / Open Time | Time to Handling Strength | Gap Filling | Structural Strength (on Resin) | Brittleness vs Flexibility | Durability (Water / Heat) | Surface Prep Sensitivity | Notes / Watch-outs |
| Cyanoacrylate (CA) | Miniatures, small details, clean breaks, hard-to-clamp joints | ~5–30 s (faster with accelerator) | ~10–60 s | Low–Med (Med for Gel) | Medium – strong on small, tight joints | Brittle; poor peel/impact resistance | Medium – fine indoors; softens with heat; limited long-term water resistance | Needs very clean, dry resin; ideally washed, de-greased, lightly abraded | Great for precision and speed. Can “frost” surfaces (white bloom), and joints can snap under shock or twisting. |
| Epoxy (2-Part) | Large joints, structural limbs, heavy parts, mixed materials | 3–30 min (5-min to slow-cure types) | 15–60 min (full cure 4–24 h) | Excellent – fills gaps, uneven joints | High – tough, good shear & peel | Tough / Semi-rigid; much less brittle than CA | High – good moisture and moderate heat resistance | Benefited by clean, scuffed surfaces; more tolerant of imperfect fit | Go-to for structural bonds. Requires mixing and clamping; can be messy and may yellow slightly over time. |
| UV Resin | Clear parts, seamless cosmetic repairs, hairline cracks, blending seams | Unlimited until UV exposure | Seconds–2 min under UV light | Good for thin joints; weaker in thick blobs | Medium – similar to base resin, not structural on large areas | Brittle; cracks under heavy shock or bending | Medium – fine indoors; prolonged UV can embrittle | Needs clean resin and line-of-sight to UV; shadowed areas may under-cure | Fantastic for invisible, cosmetic joins and “welding” prints. Not ideal as the only adhesive for high-load joints. |
| Hot Glue | Terrain, scenery, dioramas, temporary fixtures, test fits | 5–20 s before skin forms | ~30–60 s | High – bulky beads fill voids | Low – weak on smooth resin; easy to peel | Flexible / Rubbery; decent shock absorption | Low–Med – softens in heat; OK in dry indoor use | Sticks to almost anything, but poor grip on very smooth resin | Great for non-structural, removable, or fast prototyping bonds. Bulky, stringy, and unreliable for load-bearing parts. |
| Polyurethane (e.g. foaming “Gorilla” type) | Bases and large contact areas, resin to wood/stone/foam, outdoor pieces | ~10–20 min | 1–2 h (full cure 24 h) | High – foams and expands into gaps | High when clamped well | Semi-rigid / Tough; less brittle than CA | High – very good water and weather resistance | Needs slightly damp surfaces and firm clamping; sensitive to joint alignment | Excellent for large, multi-material bases and outdoor use, but expansion can distort or ooze over fine details; overkill for tiny parts. |
Cyanoacrylate (super glue)
Cyanoacrylate, usually called super glue or CA glue, is a fast-curing, one-part adhesive that polymerizes in the presence of trace moisture on surfaces.
It is the default choice for most hobby-scale resin assembly because it wets smooth resin well, reaches handling strength in about 10–60 seconds, and performs best on the small contact patches typical of wrists, weapons, and thin limbs.
CA forms a thin, rigid thermoplastic layer with high compressive and tensile strength but limited impact and peel resistance, so joints can snap if they are leveraged or twisted.
For you, it is ideal for quick repair of snapped details, attaching miniatures to bases, and assembling multipart kits where clamps are awkward.
Accelerators (“kickers”) can be sprayed on one side while glue is applied to the other; pressing parts together for a couple of seconds locks delicate parts together without clamping, which is very handy for intricate wargaming pieces.
Cured CA is usually paintable and sandable, although heavy application can cause white “blooming” on dark or glossy resin in still air. It is less suitable when you must fill large gaps, expect frequent flexing, or need long open time to adjust alignment.
How should you apply cyanoacrylate on resin?
Thin CA works best on tight, well-fitting joints, where it can wick into microscopic gaps and hairline cracks through capillary action.
Gel CA is better when surfaces are slightly uneven or when you need a bit of gap-fill and more control over where the glue goes.
- Before applying either type, lightly scuff the bonding areas with 400–600-grit abrasive to add micro-roughness, then remove dust and oils with mild detergent and water. You can use isopropyl alcohol on uncured or raw surfaces, but avoid soaking painted parts.
- Dry-fit components and consider drilling small “pinning” holes so metal pins share the load in high-stress joints such as large arms or wings.
- Apply a small bead or thin film of CA to one surface only, and if you use accelerator, apply it to the mating surface instead.
- Bringing the parts together and holding with your fingers or a light clamp for 10–30 seconds is usually enough for a strong bond.
For complex multi-angle assemblies, jigs, masking tape, or poster putty can help maintain alignment while the joint sets.
What safety precautions apply to cyanoacrylate?
Cyanoacrylate vapors can irritate your eyes and respiratory tract, so you should work in a well-ventilated area and avoid leaning directly over open bottles or fresh joints.
CA reacts exothermically with cotton, wool, and some paper tissues, sometimes generating heat, smoke, and even charring, so never use cotton rags to wipe up spills.
Wear nitrile gloves to reduce the risk of bonding skin; if your fingers do stick, soak them in warm soapy water and gently peel them apart instead of pulling hard.
Eye protection is a good idea, especially when using accelerators or squeezing thick gel from a partially clogged tip.
Keep uncured CA out of reach of children and pets, and store bottles upright, tightly sealed, in a cool, dry place to extend shelf life and reduce fumes.
What are the key pros and cons of cyanoacrylate?
Pros:
- Very fast fixture time, often 10–60 seconds, and nearly instant when used with an accelerator, so you can get parts together and keep moving.
- Readily available and inexpensive per joint, making it easy to keep as your everyday adhesive.
- Excellent performance on small mating areas, detailed resin models, and emergency repairs.
- Cures clear when applied correctly and is generally paintable and sandable after full cure.
Cons:
- Forms a brittle bond layer prone to cracking under impact or repeated flexing, so it is not ideal for large load-bearing joints or long lever arms.
- Limited gap-filling; thick beads cure from the outside and may remain weak inside.
- Can cause “blooming” or whitening on nearby surfaces if over-applied or used without airflow.
- Short working time with little chance to reposition once surfaces touch.
- Sensitive to contamination and some specialty resins, so a quick test on scrap is wise when you use a new material.
Epoxy adhesives
Epoxy adhesives are two-part systems consisting of a resin and a hardener that react to form a tough, cross-linked solid.
They outperform other glues when you need maximum strength, reliable gap-filling, and the option to sand, drill, or sculpt the joint after cure.
Properly formulated epoxies regularly reach tensile strengths in the 5,000–10,000 psi range and shear strengths above about 2,500 psi, which makes them suitable for large joints, heavy assemblies, and structural repairs where you want a strong bond that outlasts the base resin.
They match the hard, slightly “plasticky” feel of most resin prints, so filled seams and rebuilt edges can be sanded flush without leaving soft spots.
Quick-setting epoxies offer 5–10 minutes of working time, handling strength within roughly an hour, and full cure in about 24 hours.
Structural grades may provide longer working time but can require 48–72 hours for peak performance.
You should reach for epoxy when joining large flat sections, reinforcing load-bearing parts, filling air bubbles or voids, smoothing stepped seams, and bonding resin to metals, ceramics, or wood.
They are less convenient for tiny parts because of mixing and application complexity and are sometimes more glue than you need for simple, low-stress fixes where super glue is enough.
How should you apply epoxy on resin?
With epoxy, accuracy and mixing matter as much as where you place the glue.
- Follow the manufacturer’s specified mix ratio: many hobby syringes use 1:1 by volume, but some systems differ, and wrong ratios lead to soft or under-cured joints.
- Dispense a small batch onto a disposable surface such as a plastic tray or card and mix thoroughly for at least a minute, scraping through the puddle to eliminate streaks.
- Lightly sand and clean the bonding areas on your resin prints.
- For large flat joints, apply a thin, even film to both faces so you “wet out” each surface before bringing them together. Ideal bondlines are thin and uniform; use gentle clamp pressure, elastic bands, or tape to hold parts aligned without squeezing all adhesive out.
- Expect a sequence of stages: an initial open time in which you can position parts, a gel phase where the epoxy thickens and you can trim squeeze-out, handling strength after 30–60 minutes for many quick systems, and full cure after 24 hours or more.
- Mild warmth within product limits can speed curing, while cold conditions slow or even prevent proper cross-linking.
What safety precautions apply to epoxy?
Many epoxy systems contain reactive components that can cause skin sensitization or allergic reactions over time, so you should always wear nitrile gloves and avoid direct skin contact.
Eye protection helps shield you from splashes during mixing or application. Work in a well-ventilated space so any amine odors or volatile components do not build up uncomfortably.
Clean spills and squeeze-out while the adhesive is still liquid or just beginning to gel, using manufacturer-recommended solvents such as isopropyl alcohol, acetone, or branded cleaners on disposable cloths.
Once fully cured, epoxy is generally inert and safe to sand or drill, but you should still control dust with masks or extraction to avoid respiratory irritation.
Some formulations contain substances like bisphenol-A or notable VOC levels; if you have specific health concerns, check the technical data sheet and favor low-VOC or food-contact-rated variants.
What are the key pros and cons of epoxy?
Pros:
- Produces very strong, durable bonds with high tensile and shear strength, suitable for structural and load-bearing joints.
- Excellent gap-filling performance; thick pastes and gels can fill seams, voids, and pinholes while maintaining strength.
- Sandable, drillable, and sculptable after cure, which lets you rebuild surfaces and refine contours around joints.
- Compatible with many materials: resin, metal, ceramics, wood, and many rigid plastics.
- Good resistance to moisture, many chemicals, and temperature cycles; some grades tolerate temperatures of several hundred degrees Fahrenheit.
Cons:
- Requires careful mixing, correct ratios, and patience with cure times; mistakes lead to weak, tacky, or brittle bonds.
- Longer full-cure times (often 24–72 hours) than CA or UV systems, which slows project turnaround.
- Many epoxies yellow or haze under UV light, which is problematic for clear resin seams.
- Can be messy, and fully cured excess usually demands mechanical scraping or re-machining.
- Often more expensive per millilitre than basic CA, though still economical relative to the value of complex resin prints.
What is the strongest epoxy resin glue?
“Strongest” is a moving target because actual performance depends on joint design, bond area, surface preparation, and loading rather than a single psi number.
Many structural epoxies advertise tensile strengths in the 3,000–4,000 psi range, while some metal-focused systems quote adhesive strengths nearer 4,600–4,800 psi and service temperatures up to about 550 °F.
For your resin prints, those figures are usually beyond what the base material can handle; the resin around the joint or the printed geometry often fails first.
In practice, you gain more by improving joint geometry—larger bonding patches, better alignment, and optional pins—than by chasing the absolute highest advertised strength.
Steel-reinforced or paste-style epoxies make sense when resin parts attach to metal in automotive-like or marine environments and face vibration, chemicals, and heat.
For general resin-to-resin and resin-to-metal joints, clear, medium-viscosity structural epoxies in the 3,000–4,000 psi range are more than adequate and easier to mix, apply, and finish.
UV-curable resin “welding”
UV-curable resin welding means using a thin layer of UV-curable resin between parts as an adhesive and curing it with a UV light source to lock pieces together.
Often, you use the same uv resin that produced the print, which helps the joint match in color and optical properties.
This technique is most attractive when seam invisibility is critical: clear or translucent miniatures, display busts, lenses, spell effects, or cosmetic crack repairs where you want the joint to disappear. It relies on UV light reaching the bondline, either directly or by scattering, so fully opaque parts or deeply shadowed joints may not cure properly.
The cured material is hard and can be a bit brittle, but it can be sanded and polished so the seam nearly vanishes. UV curing is very fast: local exposure of 10–30 seconds often gives enough tack for handling, followed by longer post-cure for full depth.
In many cases, you treat resin welding as a cosmetic tool and back it up with CA or epoxy if you need a truly structural strong bond.
How should you perform UV resin welding?
To perform UV welding, gather a compatible UV resin, a fine applicator such as a micro-brush or needle bottle, and a focused UV lamp or flashlight.
- Start by cleaning and dry-fitting the parts so you know exactly how they align.
- For hairline cracks, touch a small drop of resin to one end and let capillary action draw it into the gap. For joints, apply a very thin film; thick layers increase shrinkage and risk leaving uncured pockets inside the joint.
- Hold the pieces together and “spot-tack” the joint by shining the UV light on one area for 10–30 seconds, then move around the seam in stages until everything is fixed in place.
- Surface tackiness from oxygen inhibition can be reduced with longer exposure, a temporary clear film barrier, or a quick wipe with isopropyl alcohol after cure.
- Finish with a global post-cure, giving the joint several minutes under the lamp or in a curing chamber so the entire bondline reaches full strength before you sand, polish, or load it.
What safety precautions apply to UV curing?
UV curing requires attention to both light and uncured resin. Intense UV sources can damage eyes and skin, so you should wear UV-blocking safety glasses and keep the beam off exposed skin as much as possible.
Uncured resin is an irritant and potential sensitizer, so handle it with nitrile gloves and clean drips promptly.
Work in a well-ventilated area or use local extraction, since vapors from uncured material can be unpleasant and may cause headaches or irritation for some users.
Keep UV lamps away from bystanders and pets, and shield resin bottles so ambient light does not partially cure them during a session.
What are the key pros and cons of UV welding?
Pros:
- Outstanding seam quality; with careful sanding and polishing, joints on clear or tinted parts can be nearly invisible.
- Uses material you already have for SLA/MSLA printing, so hardness and color usually match your resin prints closely.
- Very fast, on-demand curing with UV; you can position, inspect, then lock parts together within seconds.
- Fully reworkable before light exposure; if you change your mind, you can wipe off the resin and start again.
Cons:
- Requires a clear light path; opaque pigments or deeply hidden joints limit cure depth and reliability.
- Cure shrinkage in thick beads can introduce tension or slightly distort geometry.
- Bonds tend to be rigid, so they can crack if used as the only structural adhesive in high-stress locations.
- Handling uncured resin adds safety and cleanup complexity compared with squeeze-and-go CA tubes.
Hot-melt glue
Hot-melt glue is a thermoplastic adhesive supplied as solid sticks that melt in a heated gun and solidify as they cool.
For resin prints, hot glue is a niche but useful option for non-structural jobs where speed and reversibility matter more than clean seams.
You can use it to temporarily hold terrain pieces to gaming boards, attach figures to painting handles or bases, or quickly assemble scenery where joint aesthetics are not critical.
These bonds are relatively weak in shear and soften dramatically with heat, so they are not suitable for fine miniatures that will be handled roughly or left in hot cars or sunny windows.
Glue beads are typically a few millimetres thick and visually bulky, making them hard to hide on detailed surfaces.
Low-temperature glue sticks and dual-temperature guns are safer for thin resin parts because they reduce the risk of heat warping.
One clear advantage is that many hot-melt bonds peel away cleanly from smooth resin when reheated or pried, which is handy when you only need to keep parts together temporarily.
How should you apply hot-melt on resin?
Before applying hot-melt glue, clean any dust or oils and lightly scuff glossy spots so the molten adhesive can grip rather than skate across the surface.
- Use a low- or dual-temperature gun and let it warm up for several minutes; test a small dot on scrap to confirm it does not deform the resin or paint.
- Apply short beads or discrete dots rather than long continuous strings, then quickly press parts together while the glue is still fluid.
- You usually have 30–45 seconds before it solidifies enough that repositioning becomes difficult.
- For flat bases or large contact areas, light clamping or simply resting weight on top helps ensure full contact as the glue cools.
- When the fixture has served its purpose, you can typically peel the hot glue away by hand or slice it off with a hobby knife.
What safety precautions apply to hot-melt?
Hot-melt systems carry burn risks. The gun nozzle and fresh adhesive can reach temperatures around 150–180 °C, so accidental contact can cause painful burns.
Keep your fingers clear of the bead when you press pieces together and consider using tools, sticks, or clamps instead of direct finger pressure.
Do not leave a powered gun lying on its side; always rest it on its stand so molten glue does not flow uncontrollably.
Some fumes arise if glue overheats or chars, so basic ventilation helps keep the air comfortable and you should discard any discolored or scorched adhesive.
Unplug the gun and let it cool completely before changing nozzles, storing it, or leaving your workspace.
What are the key pros and cons of hot-melt?
Pros:
- Extremely fast setting; parts are often ready to handle in under a minute.
- Simple, inexpensive equipment, and glue sticks are widely available.
- Bonds are reversible and can be peeled or cut away, which makes them ideal for temporary mounts and jigs.
Cons:
- Low structural strength and poor heat resistance, so bonds can creep or fail in warm environments.
- Bulky, visible beads that are difficult to disguise on detailed miniatures.
- Not suitable for very small contact areas or precise, thin bondlines.
- Potential for warping or surface damage on thin resin if you use a high-temperature gun.
Silicone adhesives
Silicone adhesives and sealants cure into flexible, rubber-like materials rather than rigid solids. They are the right glue when you need a soft interface or vibration damping instead of a hard structural joint.
Typical uses include mounting resin panels to glass or metal backplates, sealing LEDs and electronics inside resin shells, and creating flexible interfaces in props that will move slightly during use.
Many silicone formulations show excellent water and chemical resistance, tolerating oils, alkalis, solvents, and wide temperature swings without degrading.
Their shear strength is modest and they are almost impossible to sand or paint successfully; cured beads stay glossy, slightly tacky, and elastomeric.
This makes them less attractive for visible seams but very useful for sealing gaps and allowing controlled movement where you do not want a brittle interface.
Bondlines around 1–2 mm thick allow the silicone to flex and absorb shock effectively.
How should you apply silicone on resin?
Silicone demands very clean surfaces. Degrease both the resin and any mating material thoroughly before application, since contamination can prevent proper cure or adhesion.
Understand whether you are using an “acetic cure” grade, which releases acetic acid and smells like vinegar, or a “neutral cure” grade that is safer around electronics and sensitive metals.
Mask visible edges to keep lines neat, then apply a controlled bead with a cartridge or tube.
Tool the bead with a gloved finger or spatula to achieve an even profile and a thickness around 1–2 mm where flexibility is desired.
Skin formation may happen in minutes, but full-depth cure often takes 24–48 hours or longer depending on bead size and humidity. Avoid sanding; once cured, silicone is best trimmed with a sharp blade.
What safety precautions apply to silicone?
Acetic-cure silicones emit acetic acid vapors while curing, which can sting your eyes and irritate the respiratory tract, so you should work with decent ventilation and avoid hovering over fresh beads.
Wear gloves to avoid prolonged contact with uncured material, as it can irritate some skin types.
Neutral-cure variants also benefit from airflow because they release small reactive molecules during cross-linking.
Protect clothing and porous work surfaces, since silicone is stubborn to remove from fabrics and can embed in textured materials.
What are the key pros and cons of silicone?
Pros:
- Excellent flexibility and vibration damping; joints tolerate movement, shocks, and thermal expansion mismatch.
- Outstanding moisture and chemical resistance, ideal for damp, outdoor, or chemically aggressive situations.
- Good electrical insulation and temperature tolerance, which suits sealing electronics and LEDs inside resin enclosures.
Cons:
- Low structural strength in thin sections, so it should not be the main load-bearing adhesive for stressed resin joints.
- Nearly impossible to sand, carve, or paint convincingly; cured beads usually remain obvious.
- Long cure times, often 24–48 hours or more for full depth, slowing progress on multi-step builds.
- Residual silicone can contaminate nearby areas and interfere with later painting or gluing unless carefully removed and abraded.
Polyurethane adhesives
Polyurethane (PU) adhesives are moisture-curing glues that form tough, slightly flexible bonds.
They shine when you need to join resin to dissimilar or porous materials such as wood, stone, or some metals, and you want impact resistance plus tolerance for vibration.
Many PU products expand and foam as they cure, which helps them fill irregular gaps and bond rough surfaces.
That same expansion, however, can create cosmetic problems on fine models if the glue is not constrained, so they are better for terrain, scenic bases, and display stands where you can hide seams under texture.
Compared with super glue, cured PU is more forgiving under impact and better at handling moderate thermal expansion mismatches without cracking. It is a good choice when you mount resin prints on large scenic bases and do not mind trimming away excess foam.
How should you apply polyurethane on resin?
Because PU cures by reacting with moisture, very dry conditions or bone-dry substrates can slow the process. On porous materials like wood, a light mist of water can help, but you usually do not need to add moisture to smooth resin.
- Apply a thin, continuous film rather than large blobs; excessive adhesive will foam aggressively and create messy squeeze-out.
- Firm clamping or weighting for at least the first 1–2 hours limits expansion and keeps parts aligned as they cure.
- Uncured or early-gel PU can usually be cleaned with company-recommended solvents or careful scraping.
- Once fully cured, the foam is tough and best removed mechanically with cutting and sanding.
What safety precautions apply to polyurethane?
Many PU adhesives contain isocyanate-bearing components, which can sensitize your lungs and skin.
Always work with good ventilation and avoid breathing vapors directly; for extended use or in tight spaces, follow local guidance for respiratory protection.
Wear nitrile gloves to prevent skin contact, since cured foam sticks stubbornly and often must wear off over days.
Store containers tightly sealed to prevent ambient humidity from curing the glue in the bottle or nozzle, which leads to clogs and waste.
What are the key pros and cons of polyurethane?
Pros:
- Tough, impact-resistant bonds with modest flexibility, useful for mixed-material assemblies and terrain projects.
- Good gap-filling capacity via controlled foaming, which can fill irregular cavities and join uneven surfaces.
- Strong adhesion to many substrates, including the wood and stone bases often paired with resin prints.
Cons:
- Foaming can distort alignment, push parts apart, or create thick squeeze-out that requires trimming.
- Cured foam is hard to sand to a crisp edge and may remain visible unless covered with texture or ground effects.
- Longer clamp and cure times than CA or hot glue, reducing throughput when you need fast assembly.
- Reactive components carry more health considerations than simple PVA or many CA products, so you must take safety more seriously.
What adhesive is best for resin miniatures and wargaming models?
Resin miniatures and wargaming models place unique demands on glue because they combine tiny contact patches, frequent handling, transport vibrations, and the need for clean seams under paint.
For small, delicate joints such as hands, weapons, spines, and backpack mounts, fast-setting CA is usually the best glue.
You get near-instant grab, and with pinning you can keep even awkward parts together during heavy gameplay.
For medium joints with imperfect fits—torso halves, large cloaks, or armor plates—gap-filling epoxy excels. It gives you a few minutes of working time, cures to a strong rigid seam, and lets you sand joints smooth before priming.
For clear spell effects, energy blades, or lenses, UV resin welding is the premium option because it visually merges the printed parts while preserving transparency, provided you have UV access to the bondline.
Terrain and bases can use hot-melt or PU glues, which quickly fix rocks, trees, and scatter pieces in place and allow you to hide glue lines under texture paste and flocking.
Many hobbyists rely on CA for most assembly because of its speed and convenience, then reserve epoxy for problem joints that repeatedly fail.
As you assemble complex characters, dry-fit the entire pose, plan sub-assemblies for easier painting, and think carefully about where glue lines will hide under cloaks, armor, or basing elements.
What are the best resin glues on the market?
This section focuses explicitly on brands and product families so you can move from theory to products that actually help your resin prints.
There is no single “best glue” for every scenario; instead, you pick the right glue within each category: cyanoacrylate (super glue), fast 5-minute epoxies, tougher structural or metal-filled epoxies, UV-curable resins, hot-melt guns, and flexible or solvent-based adhesives.
For SLA/DLP display models and tabletop miniatures, user-friendly CA gels from well-known manufacturers are widely recommended because they grab quickly, form clear bond lines, and cure in about 10–45 seconds.
These gels often use impact-resistant formulations and come in 15–20 g bottles with anti-clog caps, which makes them practical for frequent use.
For general hobby and reinforcement work, 5-minute epoxies from familiar brands provide about 5–10 minutes of pot life, handling strength in 30–60 minutes, and full cure in roughly 24 hours, with tensile strengths around 3,000–4,000+ psi.
Structural and mechanical applications benefit from toughened and steel-filled formulations such as original metal epoxies, slow-curing pastes with strong chemical resistance, and industrial structural epoxies that balance 20-minute work times with very high shear and impact strength.
Many of these advertise 4,250–5,000+ psi tensile strengths and high heat resistance, which is far above what normal resin models require. UV-curing kits and your printer’s own resin paired with a UV clamp lamp cover invisible welds on clear parts.
Flexible adhesives like E6000 or industrial flexible sealants serve resin-to-metal or resin-to-wood joints that need shock absorption and waterproof properties.
A simple comparison table can summarize categories, typical brands, key properties, and approximate price ranges for your local market.
| Category | Glue Name | Key Properties (Bond, Cure, etc.) | Why Preferred for Category | Approx. Price (USD) |
| SLA/DLP Models | Loctite Super Glue (CA Gel) | Instant set; strong but thin bond; clear drying | Quick assembly of small resin parts; precise and no-mix | ~$5 (5g tube) |
| SLA/DLP Models | Loctite Clear Epoxy (5-min) | High strength; 5-min work time; dries transparent, no shrinkage | Strong invisible joints on larger models; fills gaps and resists impact | ~$5 (25mL syringe) |
| SLA/DLP Models | UV-Curing Resin (photopolymer) | Same material bond; cures on demand with UV; seamless finish | “Welds” resin pieces with nearly invisible seam; ideal for repairs | ~$20 (UV glue kit / resin bottle) |
| Castable Jewelry | Super Glue (Cyanoacrylate) | Very fast cure; strong small-area bond; rigid hold | Attaches resin patterns to wax sprues in seconds; minimal residue if used sparingly | ~$3 (2–3g tube) |
| Castable Jewelry | 5-Min Epoxy (Fast Set) | 2-part adhesive; cures in <1 hr; handles stress | Secures larger jewelry prints or multiple parts firmly; gives working time to align pieces | ~$5 (small set) |
| Tabletop Miniatures | Gorilla Super Glue Gel (CA) | Instant grab; gel viscosity (easy to apply); impact-tough formula | Standard for minis – bonds tiny parts quickly and strongly; gel avoids mess | ~$6 (20g bottle) |
| Tabletop Miniatures | 5-Min Hobby Epoxy | 2-part epoxy; ~5 min pot life; very strong rigid bond | Best for large or heavy minis (big models/terrain) – stronger hold and gap fill than CA | ~$5 (dual syringe) |
| Mechanical Prototypes | Loctite HY 4070 Hybrid | Hybrid CA/Epoxy; 60-sec fixture; gel consistency; temp & moisture resistant | Industrial-strength quick bond for plastic parts – combines fast cure with high durability for functional assemblies | ~$20 (11g kit) |
| Mechanical Prototypes | 3M Scotch-Weld DP420 Epoxy | Toughened structural epoxy; 20 min work time; high shear & impact strength | Structural bonds on load-bearing resin parts – replaces screws/rivets; survives vibration and extremes | ~$12 (50mL cartridge) |
| Mechanical Prototypes | J-B Weld Original Epoxy | Steel-filled epoxy; ultra high strength (5000+ PSI) and heat resistance; slow cure | For heavy-duty fixes – extremely strong permanent bond for broken or metal-reinforced resin components; stands high heat | ~$6 (2 oz tubes set) |
| General Purpose | All-Purpose Super Glue (CA) | Quick one-part adhesive; moderate strength; clear rigid bond | Good for everyday resin fixes and small assemblies – fast and easy for non-structural use | ~$4 (5g tube) |
| General Purpose | Multi-Purpose 5-min Epoxy | Two-part; ~5–10 min set; strong, waterproof bond | Versatile heavy-duty glue – bonds resin to various materials with durable, water-resistant hold | ~$5 (25mL syringe) |
| General Purpose | E6000 Flexible Adhesive | Solvent-based elastomer glue; cures in 24 h; remains flexible; waterproof | Multi-surface bonding (resin to metal/wood/etc.) where a bit of flex or shock absorption is needed; outdoor-safe and durable | ~$5 (1 oz tube) |
| General Purpose | Hot Glue (Hot-Melt) | Thermoplastic adhesive; sets in seconds as it cools; fills gaps; semi-flexible | Quick temporary bonds or crafting – great for positioning resin pieces or scenery with no curing wait, though weaker hold | ~$15 (mini gun + sticks) |
Which adhesives won’t work on resin prints and why?
Not every glue that works on plastic or wood will behave properly on cured resin prints.
Traditional “plastic cements” and model glues formulated for polystyrene rely on dissolving the surface plastic and re-fusing it, but cured photopolymer resins do not dissolve in those solvents, so the bond is weak and fails easily.
Acetone welding methods used on ABS or PLA similarly depend on softening the thermoplastic; acetone has little effect on most cured resins beyond hazing or embrittling the surface.
PVA-based wood and school glues are optimized for porous materials, where the water carrier can penetrate and the polymer locks into fibers. On low-surface-energy resin, they tend to form brittle films that peel or shear off.
Some specialty resins, such as very flexible or high-temperature photopolymers, add further compatibility questions, so always test a new adhesive on scrap before trusting it.
Using the wrong glue does more than fail; it can contaminate the surface, making future repairs harder.
Why don’t plastic cements (styrene “solvent welding”) bond UV resin?
Styrene cements are engineered for polystyrene kit plastic, not for photopolymer resins.
They contain solvents that partially dissolve styrene, allowing softened surfaces to merge and re-solidify as a fused mass. Cured UV resins are cross-linked thermosets with a different chemistry, and the solvents in styrene cements do not dissolve or significantly swell them.
At best, the cement leaves a slightly tacky residue that seems to stick for a short time but does not create a real mechanical bond. Under modest bending or impact, the joint fails instantly.
For that reason, you should not rely on styrene solvent cements for any structural resin joint; on resin prints they behave much closer to weak surface coatings than to real glues.
Why is acetone ineffective as a bonding method?
Acetone welding works on some thermoplastics because it partially dissolves their surface, which then resolidifies as a continuous piece once the solvent evaporates.
Cured photopolymer resin, however, is a cross-linked network with very limited solubility in acetone.
Long exposure may dull or haze the surface but does not create a true weld at the joint.
While acetone is useful for cleaning tools or removing certain uncured residues before they harden, it is not a reliable method to glue resin prints or keep parts together.
Overuse of acetone can even embrittle thin sections or damage paint layers, so you should use it sparingly and test in inconspicuous areas first.
Can wood glue (PVA) be used on resin prints?
Wood glue and other PVA-based adhesives are designed for porous, absorbent substrates like wood, paper, and cardboard.
They work by soaking into fibers, then forming a film as the water carrier evaporates.
On smooth, non-porous resin prints, these glues simply sit on the surface, often forming skins that shear off easily or peel away as single pieces.
That said, PVA can be useful deliberately when you need a weak, reversible bond, such as temporarily attaching a resin figure to a painting handle or jig.
For any permanent or load-bearing joint in resin models, you should avoid PVA and choose CA, epoxy, PU, or silicone instead, depending on whether you need rigidity or flexibility.
How do you select the best glue for your specific project?
Choosing the best glue for resin prints is easier when you treat it as a checklist instead of guessing.
- Start with substrate compatibility: what are you bonding—resin to resin, or resin to metal, wood, or plastic?
- Next, consider the required strength and how the joint will be loaded: mostly shear, peel, impact, or vibration.
- Evaluate gap size and fit; tight joints favor thin CA or UV systems, while larger gaps call for epoxy or PU.
- Decide whether you want a rigid seam or some flexibility, which pushes you toward CA/epoxy or silicone/PU respectively.
- Working time matters too: CA and UV give you seconds, quick epoxies and some PU offer minutes, and silicone can remain adjustable for much longer. Think about full cure time and your schedule; rushing a 72-hour structural epoxy into service early reduces its performance.
- Clarity and finish are important on clear parts, where UV welding or transparent epoxy is ideal.
- Post-processing needs such as sanding and drilling usually favor epoxy or CA over silicone.
- Environmental conditions—humidity, water exposure, temperature swings, and chemicals—may push you toward moisture-resistant epoxies or flexible sealants.
- Safety, ventilation, and the cost and availability of products in your region also play a role.
For any project near food contact, only use resins and adhesives explicitly rated for such use and cured fully according to instructions.
Are any adhesive options food-safe for resin prints?
Some epoxy systems are formulated and certified for incidental food contact when fully cured, but this must be stated explicitly in their technical documentation.
Standard hobby-grade resins and glues should not be assumed food-safe. If you plan a project that might touch food, you need to verify that both the resin and the adhesive comply with relevant regulations in your region.
Full cure is essential: correct mix ratios, adequate time, and appropriate temperature reduce residual monomers and solvents.
Smooth, non-porous seams are also easier to clean and less likely to harbor bacteria than rough or foamed joints.
Even with rated products, treat food-adjacent resin items cautiously and consider using removable liners or inserts that are specifically designed for food contact, rather than relying on printed parts directly.
How should you prepare resin surfaces before gluing?
Good prep is what turns a random tube from the drawer into the right glue for your project.
- Start by fully post-curing your resin prints so dimensions and surface hardness are stable; this keeps joints from shifting later.
- Wash away uncured residue using methods appropriate for your resin—often an isopropyl alcohol bath followed by thorough drying—while avoiding long soaks on finished, painted parts.
- Lightly sand the bonding areas with 400–600-grit abrasive to create a matte, micro-textured surface that improves mechanical grip for CA and epoxy.
- Remove sanding dust with a damp cloth and mild detergent or clean water, then let everything dry completely.
- Avoid strong solvents such as acetone on detailed or painted surfaces, as they can erode features or haze the finish.
- Dry-fit parts and mark alignment with pencil or light scribe lines so you can reposition quickly once glue is present.
- For long or high-leverage parts like staffs, wings, or banners, drill small holes and add metal pins; these help carry loads that would otherwise stress the adhesive alone.
How to glue resin prints?
When you glue resin prints, treat the process as a structured workflow rather than a single step.
Here is our simple step-by-step checklist:
- First, post-cure and clean parts to remove any uncured film, then remove supports and sand contact areas smooth and slightly textured.
- Test-fit all components and decide which adhesive family suits each joint: CA for tiny parts, epoxy for large or gapped connections, UV for cosmetic welds, and PU or hot glue for scenic bases.
- Prepare fixtures such as clamps, tape, jigs, or pinning wires so you can hold parts steady without juggling tools once adhesive is applied.
- Mix any two-part products like epoxy or PU in small batches, following ratio instructions carefully; for CA or UV resin, decant a small amount into a secondary container for finer control.
- Apply a controlled amount of adhesive, aiming for thin, continuous films rather than blobs.
- Assemble the parts and hold or clamp them for the recommended initial set time—anything from 10–30 seconds for CA up to around 10 minutes for many epoxies. Clean or shape squeeze-out within the liquid or gel window.
- Finally, allow a full cure, often 24 hours or more, before you sand, paint, or put the joint under serious load.
Large, complex builds often benefit from sub-assemblies, where you glue a few pieces together, let them cure, then attach those sub-assemblies to each other.
How should you apply glue to resin prints for best results?
Precise application helps you avoid mess while keeping parts together securely.
Always, use fine applicators—needle tips, micro-brushes, toothpicks, or syringes—for small joints and delicate details.
Thin, uniform bondlines generally produce stronger joints than thick blobs, so aim to wet both surfaces lightly without visible puddles, except where a structural gap-filler is needed.
Work from the least accessible joints to the most accessible, so you do not accidentally bump fresh bonds while reaching around a model.
Control squeeze-out by designing joints and choosing orientations so any excess emerges on hidden sides; remove or shape it during the gel stage before it hardens.
Each adhesive benefits from different handling: CA wants firm contact with minimal movement, epoxy prefers a gentle sliding motion to spread before clamping, UV resin requires careful alignment followed by local light exposure, and hot glue needs quick placement with no repositioning once it starts to cool.
Choosing the right applicator for each situation improves repeatability and reduces rework.
How should you handle mixing ratios (where applicable)?
Two-part systems such as most epoxies and some PU adhesives depend on accurate mixing ratios for full performance.
Deviating from the recommended stoichiometry produces joints that remain soft, rubbery, or overly brittle.
When possible, use pre-metered dual syringes that dispense equal volumes automatically. For simple 1:1 systems without syringes, mark disposable cups or mixing cards so you can match puddle sizes by eye.
Mix thoroughly for at least a minute, scraping sides and bottom until you see no streaks. Be aware of exotherm: larger batches generate heat and shorten working time, and extreme cases can deform plastic mixing cups.
To keep control, mix multiple small batches instead of one deep pool.
If the adhesive starts to thicken noticeably, treat that batch as spent and mix a fresh one rather than trying to stretch its pot life.
What’s the right way to apply the adhesive?
Match your application method to the joint geometry:
- For tiny contact pads on miniatures, use micro-brushes or toothpicks to dab small amounts of CA or epoxy exactly where they are needed.
- For narrow seams, syringes or needle bottles can lay down controlled beads without flooding surrounding detail.
- For larger faces or bases, small spatulas or flat sticks help you spread epoxy evenly. With epoxy and PU, coat both surfaces lightly to ensure full wetting
- With CA you usually apply to one side only to keep the bondline thin. Capillary techniques work well for hairline cracks and tight joints: place thin CA or UV resin at one end of the gap and let it wick along.
- When using epoxy on larger faces, gently rock or slide parts together after first contact to distribute adhesive before clamping.
- For clear parts, it is often better to start with less glue and add more via capillary action than to over-apply and trap bubbles.
How long should you allow for curing and handling?
Each adhesive has three important timeframes: fixture or tack time, handling time, and full cure.
- Fixture time is when the joint can support its own weight
- Handling time is when you can continue assembly with moderate care
- Full cure is when the adhesive reaches maximum strength and chemical resistance.
CA typically tacks in 10–60 seconds, reaches functional strength within minutes, and benefits from a full 24 hours before heavy use.
Quick epoxies set in roughly five minutes, allow handling after 30–60 minutes, and reach full cure in about 24 hours.
Structural epoxies may require several hours before you can move the assembly and 24–72 hours to fully cure at around 20–25 °C.
PU and silicone often skin within minutes but may take 24–48+ hours to cure through thick sections.
UV systems can harden the surface in seconds, but deep curing still requires several minutes of exposure.
Remember that low temperature and low humidity slow most chemistries, while warmer, more humid conditions speed them up within product limits.
How to remove squeeze-out or excess glue cleanly?
Clean excess glue at the right moment to maintain a neat finish. The easiest removal happens while the adhesive is still liquid or just entering the gel stage.
Keep recommended solvents ready: specialized debonders for CA, isopropyl alcohol or acetone for uncured epoxy and PU (if the manufacturer allows them), and appropriate cleaners for flexible adhesives.
Once CA cures, you usually need to carefully scrape or chip it away with a blade and then sand.
Cured epoxy and PU can only be removed mechanically, so plan for that by shaping fillets while they are soft.
Hot glue can be peeled or sliced away once cooled, and residual smears can be softened with gentle reheating.
Silicone should be wiped off while fresh; fully cured beads must be cut and peeled.
For clear parts, plan to sand and polish cured resin or epoxy in stages to restore transparency at the joint.
Aggressive solvents may damage paint or some plastics, so always test in a hidden spot first.
How to troubleshoot weak bonds or failed joints?
When a joint fails, treat it as a diagnostic problem instead of blaming the tube immediately.
First, check for contamination: oily fingerprints, dust, or uncured resin residue can block adhesion.
Clean with detergent and appropriate solvents, lightly sand, and try again. If the contact areas are glossy and polished, introduce micro-texture with 400–600-grit abrasive.
Review whether you chose the right adhesive family; if you used plastic cement or PVA, remove as much residue as possible and switch to CA, epoxy, or PU. Look at bondline thickness; CA in thick layers is prone to internal weakness, so use less glue and add pins for high-stress joints.
For epoxies and PU, lack of clamping can leave gaps that compromise strength, so re-glue with proper pressure.
Ask whether you moved the parts before full cure; even if they feel hard, structural epoxies in particular need their full specified time.
Environmental conditions matter too: cold or very dry rooms slow curing and can prevent full cross-linking, while modest warmth improves results.
Finally, consider adhesive age. Old CA that has thickened or epoxies that have crystallized or separated may not perform as specified; replacing them often solves mysterious failures.
When you try a new process, destructive testing on sacrificial printed parts helps you refine your method before committing to a showcase model.
How can you bond resin to other materials?
Resin prints rarely live alone; bases, hardware, and other printed parts often involve plastics, metals, or wood.
For resin to common 3D-printing plastics such as PLA, PETG, and ABS-like materials, light sanding on both sides followed by CA for small joints or epoxy for larger, stressed areas works well.
PLA and PETG respond well to abrasion, while ABS can benefit from solvent welding on its side plus CA or epoxy on the resin side.
For metals like steel, brass, and aluminum, epoxies and some PU adhesives are ideal; roughen the metal with abrasive paper, degrease thoroughly, and use a thin, well-clamped bondline.
Resin-to-wood joints take advantage of wood’s porosity; PU or epoxy provides deep penetration into the wood fibers while still gripping the smooth resin surface, with CA reserved for smaller decorative attachments.
Adhesion promoters and primers can improve bonds to difficult plastics, but in most hobby settings, sanding and careful cleaning deliver adequate performance.
Matching stiffness also helps: combining stiff resin with very flexible materials is usually more reliable when you use slightly flexible adhesives, such as PU or silicone, that allow movement.
Whenever possible, add mechanical features—pins, screws, keyed recesses, or textured pockets—so the glue does not carry the entire load alone.
How to glue resin to plastic?
Different plastics call for slightly different strategies. Common hobby plastics include PLA, PETG, ABS-like resins, and polystyrene kit parts, while engineering plastics such as nylon or polypropylene are harder to bond.
For PLA, PETG, and ABS-like prints, scuff both surfaces with fine abrasive and clean them, then use CA for quick small joints or epoxy for larger connections where you want more working time and higher strength.
Polystyrene model parts can still use plastic cement on the polystyrene side, but the resin half of the joint must be bonded with CA or epoxy; you should not rely on solvent cement alone.
For harder-to-bond plastics like some nylons, epoxy paired with aggressive surface prep (heavier abrasion, possibly flame or plasma treatment in professional shops) plus testing on scrap pieces may be necessary, and bonds still may be the weak link.
Primers designed for plastic adhesion can improve wetting and bond strength, though most everyday combinations of resin with PLA or ABS-like materials do not strictly require them.
Conclusion
A compact toolkit of three or four adhesive families is enough to handle almost every resin-printing situation: CA for fast assembly, epoxy for strength and gap-filling, UV resin welding for premium seam quality, and optionally hot glue or PU for terrain and mixed-material bases.
Success depends more on surface preparation, joint design, and patience with curing than on buying exotic specialty products.
When you take the time to post-cure, clean, roughen, and dry-fit your parts, the right glue keeps your printed parts together through games, transport, and display.
If you want extra confidence, build a small test board from resin offcuts and experiment with different glues, bondline thicknesses, and pinning patterns until you see how and where each joint fails.
Once you understand how each adhesive behaves, you can choose the best glue for each project based on whether you care most about strength, speed, seam invisibility, or flexibility.
FAQs
Is wood glue suitable for resin parts?
Wood glue based on PVA is generally unsuitable for permanent resin joints. It is designed for porous substrates such as wood and paper, where water carries the polymer into fibers and the dried film locks everything together.
On smooth, cured resin, it usually forms a weak skin that peels or shears off under light impact or when humidity changes.
You can, however, use wood glue intentionally when you want a weak, reversible bond—for example, to tack a resin miniature onto a painting handle or jig that you plan to remove later.
For any structural or long-lasting connection on resin models, rely on super glue, epoxy, polyurethane, or silicone (for flexible seals) instead of PVA.
Does plastic glue work on resin prints?
Most hobby “plastic glues” are either polystyrene cements or solvent blends tailored to ABS/PLA. They work by dissolving a thin layer of those specific thermoplastics so surfaces fuse when the solvent evaporates.
Cured resin prints are cross-linked thermosets that do not soften in those solvents, so any apparent bond is superficial and usually fails under modest force. You can still use plastic cement on the plastic half of a resin–plastic joint, but the resin side must be glued with CA or epoxy at the same time.
For practical purposes, consider “plastic glue only” as non-functional on resin prints and always pair it with a compatible adhesive whenever resin is involved.
Does gorilla glue work with resin?
Products sold under similar branding can refer to two different chemistries, so you need to read the label.
Instant-set cyanoacrylate gels are essentially standard CA glues, and they bond resin well when you prepare the surfaces properly and apply a thin film.
Foaming polyurethane construction glues, on the other hand, expand significantly as they cure. They can bond resin to wood, stone, or other materials for scenic bases but tend to create messy, expanded squeeze-out that is hard to hide on fine miniatures.
For detailed resin models, CA-type versions are usually the right glue, while PU types are better for large, rough, or hidden joints where appearance is less important.
What is stronger, resin or super glue?
Comparing resin and super glue directly is misleading because one is a bulk material and the other is a thin adhesive layer.
A well-designed CA joint often reaches a strength similar to or greater than the local strength of the resin itself. Under high loads, brittle photopolymer resin may crack just outside the glue line, giving the impression that the adhesive failed when, in reality, the substrate broke.
In practice, the weakest point is often the small contact area or the geometry of the printed parts rather than the CA film. To maximize performance, focus on increasing bond area, adding pins, and using epoxies for highly stressed joints instead of worrying about whether resin or super glue is “stronger” in isolation.