Reading Time: 25 Minutes
Not long ago, high-detail resin 3D printing was something only big companies with deep pockets could afford. But today, thanks to LCD 3D printing, you and I can produce incredibly precise parts right from a desktop machine. Using a 405 nm UV-LED array shining through an LCD mask, entire layers of resin cure at once. This means print time depends on layer height, not how complex your model is, even the most intricate designs won’t slow you down.
What makes LCD 3D printers even more appealing is their price. You can get started for around $200, while more advanced prosumer models rarely go over $2,500. Since 2020, monochrome LCD screens have changed the game, quadrupling optical throughput and lasting up to 2,000 hours. And while DLP projectors might last longer, replacing an LCD screen costs only about $50 and takes just minutes.
As LCD panel technology keeps improving, we now have 4K, 6K, and even 8K models, with pixel sizes dropping below 30 µm. This level of detail lets consumer-grade LCD printers compete closely with industrial DLP systems, but at a fraction of the cost.
In this article, we’ll discuss how LCD 3D printing works, why it’s growing so fast, and what you need to know if you’re thinking about using it.
What is LCD 3D Printing?
LCD 3D printing, also known as Masked Stereolithography (MSLA), belongs to the vat polymerization family of 3D printing technologies. In simple terms, this process uses an LCD screen to selectively block or allow UV light to pass through, curing liquid resin layer by layer into solid parts. You are essentially creating your model one flat layer at a time, where each exposure hardens the resin in the exact shape defined by your sliced 3D model.
The key component is the liquid crystal display acting as a dynamic mask. Thousands of pixels function as tiny shutters that either permit or block the UV light source beneath. The UV light engine, typically operating within the 385–405 nm band, projects light through the LCD panels with high precision. If you happen to mismatch the resin formulation and light wavelength, curing may fail entirely, highlighting the importance of proper material selection.
Because the light travels in parallel paths, LCD 3D printers minimize pixel distortion across the entire build platform. This advantage offers you consistent accuracy, even toward the edges of your build area, where some DLP printers may struggle. While LCD, SLA, and DLP all require post-processing steps such as washing and post-curing, switching between these technologies involves minimal retraining, making LCD 3D printing highly approachable for both personal and professional use.
A Brief History of LCD 3D Printing
LCD 3D printing emerged as an accessible alternative to traditional stereolithography (SLA) and digital light processing (DLP) methods. Its development reflects how advancements in LCD technologies, consumer demand, and affordable components combined to transform resin 3D printing. While SLA had been used since the late 1980s, and DLP systems developed with micromirror devices like those from Texas Instruments, the first LCD-based printers appeared much later.
Between 2015 and 2017, hobbyists started experimenting with LCD 3D printers by repurposing smartphone screens and UV nail lamps. These early machines introduced the idea of using liquid crystal displays as dynamic masks in vat polymerization processes. You could now build highly detailed parts without the expensive laser spot or projection systems found in SLA or DLP 3D printers.
The real turning point arrived in 2019 when manufacturers replaced 2K color panels with 4K monochrome LCD screens. This upgrade quadrupled both cure speed and screen lifespan, making printing significantly faster while reducing maintenance. By 2022, desktop models with 8K resolution and pixel sizes under 30 µm entered the market. These printers offered build areas up to 220 × 124 × 245 mm, bringing their capabilities closer to professional-grade DLP printers.
Falling LCD panel costs and the rise of open-source slicers like ChiTuBox and Lychee pushed prices down even further. Today, you can purchase highly capable LCD 3D printers for under $300, making resin 3D printing accessible to both hobbyists and professionals who need precision without the high price point.
How Does LCD 3D Printers Work?
The entire process begins when you prepare your 3D model using slicing software. This software divides the model into thin layers, typically 0.02–0.05 mm thick, and converts them into a series of masked bitmap files. These files guide how the printer’s liquid crystal display blocks or allows light for each voxel during the printing process.
Once printing begins, the UV light source, usually a 405 nm back-light array, shines through the LCD screen. Each exposure lasts about 1–3 seconds per layer, depending on resin pigment and layer height. Because the light travels in parallel paths through the lcd screen, pixel distortion is minimal, even at the build platform edges. This ensures consistent print quality across the entire build area.
After curing a layer, the build plate lifts 6–10 mm to allow the resin to flow beneath before returning at a controlled speed. This movement reduces suction forces on the FEP film covering the resin tank, preserving part quality and preventing layer separation. Calibrating the lift speed, often set around 50 mm per minute, helps minimize mechanical stress and ensures accuracy in z axis positioning.
Once the print completes, you need to wash away uncured resin. A two-stage wash using fresh isopropyl alcohol (IPA) for several minutes removes surface residue. After washing, a post-curing step under UV light for 5–10 minutes finalizes polymerization, improving both strength and surface finishes. Fine-tuning anti-aliasing settings, usually between 2 and 16 levels, helps mitigate light bleed along edges and enhances part precision.
What are the Key Components of an LCD 3D Printer?
To understand how LCD 3D printing works, you need to look closely at its primary components. Each part of the system plays a direct role in how your 3D model is converted into a physical object with high accuracy and surface finishes.
- LCD Screen
The LCD screen serves as the digital mask controlling which areas of the resin tank receive UV light exposure during each layer’s curing process. Thousands of individual pixels operate like tiny shutters, either blocking or allowing the light to pass. The screen’s resolution directly influences print quality and pixel size. Today’s consumer LCD printers offer several panel options, including 2K (2560 × 1620), 4K (3840 × 2400), 6K (~5760 × 3600), and even 8K (~7680 × 4320) models. For example, a 6K 9.25-inch panel can achieve pixel sizes around 34 µm, producing detailed resin parts that rival professional-grade equipment. High-contrast monochrome panels with contrast ratios exceeding 350:1 further sharpen fine features while reducing over-curing on delicate structures like micro-supports.
- Light Source and UV System
Beneath the LCD panel sits the UV light source, commonly rated between 40–50 W. This light engine projects 405 nm ultraviolet light upward through the liquid crystal display. Angled LED lenses maintain the beams within ±5° of vertical alignment, ensuring even curing across the full build area. This uniform exposure pattern prevents undercuts and maintains accuracy even on complex model geometries. Without proper control of the UV light source, you risk inconsistent curing that can compromise both dimensional tolerances and part quality.
- Build Platform and Resin Vat
The build platform, also known as the construction platform, moves vertically along the z axis. After each layer cures, the platform lifts 6–10 mm to allow fresh resin to flow beneath. The resin vat holds liquid resin and incorporates a transparent non-stick membrane, typically FEP or nFEP film less than 150 µm thick, to minimize suction forces during layer separation. Replacing these films every 2–3 liters of resin use helps avoid cloudy zones, preserving consistent curing and surface finishes. Consumer-grade vats often accommodate up to 500 mL of resin, but maintaining a resin depth of less than 5 mm above the LCD ensures even light distribution.
What are the Common Materials Used in LCD 3D Printing?
Choosing the right materials is essential for achieving optimal results in LCD 3D printing. The available resins cover a broad spectrum of mechanical properties and applications, enabling you to produce both functional prototypes and detailed consumer goods.
- Photosensitive Resins
Most LCD 3D printers rely on photopolymer resins that solidify when exposed to UV light. “Standard” resins provide balanced detail with moderate brittleness, offering tensile strengths around 40 MPa. If you need parts that can withstand more stress, tough resin formulations allow elongation beyond 50%, making them suitable for load-bearing designs. Flexible and rubber-like resins achieve Shore A ratings between 60 and 90, enabling you to create elastic components like gaskets or grip-enhancing accessories.
Specialty resins serve professional applications. Dental and jewelry resins, for example, cure effectively at wavelengths between 385–405 nm. When working with multiple resin types, you must verify wavelength compatibility to avoid incomplete curing. Some high-resolution resins designed for 8K LCD panels incorporate nano-fillers, reducing shrinkage and improving XY accuracy by as much as 20%, which is crucial for producing precise prototypes or detailed parts.
Plant-based resins derived from soybean oil offer a more environmentally conscious option by reducing odor and volatile organic compounds. However, their mechanical strength generally trails behind ABS-like resins by approximately 10%, which may limit their use in demanding product design applications.
- SLA-Compatible Materials
While LCD printers and SLA systems share the vat polymerization process, not all SLA resins are compatible with LCD 3D printers. SLA machines often operate with 355 nm laser wavelengths, while LCD technologies use 405 nm UV LED sources. Resins formulated exclusively for SLA’s shorter wavelengths will under-cure in an LCD printer, resulting in weak or failed prints. Always check the manufacturer’s datasheet to confirm material compatibility before loading a new resin into your lcd 3d printer.
What are the Advantages of LCD 3D Printers?
A major strength of LCD printers is its ability to cure entire layers at once. Thanks to the lcd screen and parallel-ray optics, you can achieve printing speeds between 2 to 4 cm per hour along the z axis, which closely rivals digital light processing (DLP) printers and often outpaces laser-based stereolithography (SLA) systems.
When you invest in an lcd 3d printer, you access resolutions that were once limited to industrial equipment. Sub-$600 8K desktop models now achieve pixel sizes as small as 29–33 µm. This level of precision allows you to produce intricate resin parts suitable for applications like dental aligners and jewelry masters without paying industrial price points. The lcd panels ensure that pixel distortion remains minimal, keeping tolerances within 0.05 mm across the entire build platform.
Another advantage you benefit from is flexibility. Open material ecosystems enable you to switch between more than 50 third-party resins, giving you far more freedom than proprietary SLA workflows. The ability to fine-tune firmware settings, such as lift distance and anti-aliasing levels, allows you to optimize your printing process without needing specialist training or external support.
What are the Limitations of LCD 3D Printers?
One of the most significant drawbacks is the lifespan of the lcd screen. Monochrome panels typically last around 2,000 hours. If you print frequently, you should expect to budget between $50 and $150 annually for replacement screens to maintain consistent print quality.
Another limitation relates to light bleed. Because lcd printers use uniform back-lighting, some light may scatter at pixel borders, especially on fine geometries. You can minimize this by adjusting slicer settings or adding 1-pixel-thick anti-bleed walls to your 3d model layers. When printing large flat surfaces, suction forces on the FEP film can cause layer delamination. Designing parts with escape holes or perforated floors helps reduce these peel forces and improves printing reliability.
Build volumes also trail behind some filament-based 3d printers (FDM). The maximum build area often peaks around 220 × 124 × 245 mm. If you need to print massive parts, you may have to segment and bond multiple sections. Finally, photopolymers used in resin 3d printing tend to be brittle, with Izod impact resistance below 3 kJ/m² unless you select specialized tough grades.
What are the Applications of LCD 3D Printing?

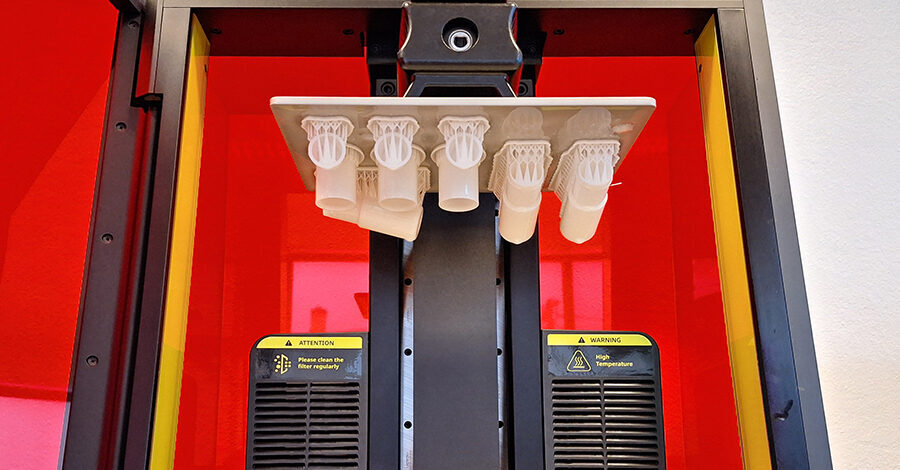
In the dental field, labs use lcd 3d printers to fabricate up to 24 orthodontic aligner arches in a single 90-minute print job. With dimensional accuracy reaching ±50 µm, these models meet the tight fit standards required for patient-specific treatments. The high resolution offered by lcd panels ensures that every curve and tooth detail is captured precisely.
Jewelry professionals also rely on lcd 3d printing to produce burnout-ready wax-like patterns. These specialized resins leave less than 0.01% ash, ensuring clean investment molds for casting. You achieve intricate designs while maintaining the surface finishes and tolerances needed for fine jewelry production.
For hobbyists and tabletop gamers, miniature models benefit from pixel sizes around 30 µm. You can replicate facial details and fine geometries below 1 mm, making your gaming pieces highly detailed and visually impressive.
Engineers use lcd 3d printing for rapid prototyping of functional housings, snap-fit clips, and enclosures. Functional prototypes can be printed within 24 hours, allowing you to verify part quality and dimensional tolerances down to 0.2 mm gaps.
In the DIY space, makers create custom keycaps, camera mounts, cosplay props, and consumer goods. After sanding and UV polishing, surface finishes reach Ra values under 2 µm, delivering near-commercial product design quality right from your desktop resin printer.
What are Safety Precautions When Handling LCD Resins?
Always wear nitrile gloves and safety glasses when working with uncured resin. Direct skin contact can lead to dermatitis or allergic reactions. Even small splashes of resin should be cleaned immediately to prevent irritation. To minimize inhalation of vapors, operate your lcd printer in a well-ventilated area or install a carbon-filter hood. In smaller rooms, uncured acrylate vapors may exceed concentrations of 0.05 ppm, posing long-term health risks.
You should also handle isopropyl alcohol (IPA), used for post-processing, with care. IPA has a low flash-point of approximately 12°C, making it highly flammable. Always keep wash containers sealed to prevent vapor buildup that could create fire hazards.
If minor spills occur, absorb the liquid with paper towels, cure the contaminated material under UV light, and dispose of it as solid waste according to local regulations. Proper resin storage is equally important. Keep your resin bottles between 15°C and 25°C. Exposure to temperatures above 35°C accelerates polymerization, reducing shelf life from 12 months to less than six.
What are the Common Issues and Troubleshooting in LCD 3D Printing?
One frequent challenge is first-layer separation, where the model fails to adhere to the build platform. To resolve this, you can raise the bottom exposure time by 20% to 40%. If problems persist, rough-sanding the build platform surface or applying a thin layer of PVA glue can improve adhesion.
Another issue is surface rippling, often called “elephant skin,” which results from overexposure. In this case, lowering the exposure time by 0.3 seconds or reducing UV light power by 10% usually smooths the layers and restores surface finishes. Managing your light engine settings properly can prevent this issue from recurring.
Clouding of the FEP film in the resin tank also affects print quality. When haze covers more than 30% of the film area, replace the FEP to avoid under-cured resin parts caused by scattered UV light. A clear optical path ensures uniform layer curing throughout your 3d model.
If you notice horizontal or vertical pixel lines on your prints, it may indicate a failed lcd screen row or column. Resin seepage into the lcd liquid crystal display can cause permanent damage, requiring a screen replacement.
Wide parts printed near the edges of the build area sometimes show edge distortion due to thermal gradients. You can mitigate this by adding 1 mm anti-warp chamfers to your designs or printing fewer objects per batch to reduce heat buildup.
What are the Post-Processing Steps for LCD 3D Prints?
Begin with washing to remove uncured resin from the model’s surface. Use a dual-stage wash system: immerse your print for one minute in a container of “dirty” IPA followed by two minutes in fresh IPA. Sonic agitation can boost resin removal efficiency by about 30%, ensuring that even recessed areas of the 3d model are thoroughly cleaned.
Next, move to UV post-curing. Place the washed parts under a 405 nm UV light source at 60°C. Standard resins achieve over 95% polymer conversion after 5 to 10 minutes, enhancing mechanical strength and stabilizing surface finishes. The light source ensures complete curing across all model layers.
When removing supports, clip them while the resin parts remain slightly warm to reduce the chance of leaving white stress marks. For delicate miniatures, soaking the supports in hot water beforehand softens the resin, allowing cleaner removal with minimal damage to fine details.
Surface finishing includes wet-sanding with 800 to 2000 grit sandpaper. After sanding, apply a UV-blocking primer before painting to prevent yellowing over time. If you’re printing clear parts, dipping them for five minutes in optical epoxy produces glass-like transparency with haze levels below 2%.
How Much Does LCD 3D Printing Cost?
Entry-level desktop lcd 3d printers are now widely available, with prices starting around $200. Mid-tier 8K models, offering resolutions fine enough for detailed consumer goods and dental models, typically cluster near $600. More advanced prosumer lcd 3d printers may cost up to $2,500, offering larger build platforms and more stable lcd panels.
Consumable costs vary based on the resin types you select. Standard resins used for general-purpose resin 3d printing usually cost between $25 and $40 per liter. Specialty resins, such as dental and castable formulations, range from $100 to $200 per liter. These materials allow you to tailor the properties of your resin parts for specific applications, whether you’re producing prototypes, engineering designs, or jewelry patterns.
You also need to account for periodic replacement of lcd screens and FEP sheets. A replacement monochrome lcd screen (9-inch 4K) costs roughly $50. FEP sheets, which protect the resin tank, cost about $10 each and generally require replacement after every 1–2 liters of resin usage to maintain print quality.
Power consumption remains low, with lcd 3d printers typically drawing less than 0.1 kWh per hour. In most regions, this equates to operating costs under $0.02 per hour. When batch printing tabletop miniatures, your total material cost averages approximately $0.30 in resin plus $0.05 in consumables per part.
What is the Environmental Impact of LCD 3D Printing?
Uncured resin remains classified as hazardous waste due to its chemical composition. Always fully cure failed prints, paper towels, and contaminated items under UV light before disposal to prevent environmental harm. This step transforms liquid waste into solid, non-reactive forms that can be discarded safely according to local regulations.
Isopropyl alcohol (IPA), used during post-processing, can be partially recycled. After multiple print jobs, you can allow resin particles to settle at the bottom of the container. Sun-curing the sludge and filtering the liquid allows you to reuse a 5-liter batch up to 3–4 times, reducing IPA consumption by nearly 60%.
Switching to plant-based resins offers further environmental benefits. Derived from soybean oil, these resins lower volatile organic compound (VOC) emissions by about 30% compared to standard acrylates. However, even plant-based cured resin remains non-biodegradable, requiring proper disposal.
From an energy standpoint, lcd 3d printers are efficient. Their 50 W LED light engines consume less than 0.05 kWh per hour, significantly less than heated-bed fdm printers. Modern monochrome lcd panels also use 30% less power than older color screens, minimizing standby energy consumption.
What Maintenance Does an LCD 3D Printer Require?
After each extended printing session, filter your resin through a 125 µm paint strainer. This simple step removes cured flakes and debris from the resin tank, preventing clogs and surface imperfections on future prints. Filtering helps preserve both the liquid crystal display and the optical clarity required for uniform uv light exposure.
Cleaning the lcd screen weekly is equally important. Wipe the lcd screen gently with a lint-free cloth and 90% IPA to remove resin residue. Failure to do so may increase exposure times by up to 15% and affect layer accuracy. As part of your routine, run a pixel-test image monthly to check for dead rows or columns, early indicators of lcd screen failure.
You should also re-level the build platform whenever you replace the fep film or switch resin vats. Even a small offset of 0.03 mm can double first-layer failure rates. Keeping the construction platform correctly aligned ensures consistent model layer adhesion throughout the print job.
Lubricating the z-lead-screw every 50 hours of operation with PTFE grease preserves movement precision, keeping layer height consistency within 10 µm. Proper lubrication minimizes friction and stabilizes your z axis performance over long print cycles.
How Does LCD 3D Printing Compare to the Other 3D Printing Techniques?
When you look at 3d printing technologies, lcd 3d printing fits within the broader family of resin 3d printing alongside SLA and DLP. Each method uses vat polymerization but differs in how light is projected to cure resin layers.
SLA, or stereolithography, uses a laser spot in the 355–405 nm range to trace each model layer point-by-point. This method offers the highest resolution for micro-channels smaller than 50 µm but operates at slower printing speeds due to its sequential process.
DLP, or digital light processing, employs digital micromirror devices (DMDs) from companies like Texas Instruments to reflect an entire layer pattern at once. This approach excels in producing narrow parts with sub-pixel compensation but can introduce distortion at the edges when printing wide objects.
In contrast, lcd 3d printing uses a liquid crystal display as a static mask illuminated by a 405 nm UV light engine. The lcd screen allows you to cure entire layers simultaneously, achieving 2–4 times faster print speed compared to SLA at similar layer heights. The parallel-ray optics ensure uniform pixel size across the full build platform, even for larger parts.
When it comes to maintenance, lcd screens wear out sooner, typically around 2,000 hours, while DLP projectors may last 10,000 to 20,000 hours but are more expensive to replace. This balance of speed, resolution, and operating cost makes lcd printing an accessible middle ground between SLA precision and DLP industrial performance.
What is the Difference between SLA and LCD 3D printing?
If you’re deciding between SLA and LCD 3D printers, it’s helpful to compare them across key performance factors. Both fall under vat polymerization but rely on different light projection systems and hardware designs:
Light Source:
- SLA: 355–405 nm laser beam with galvanometers to direct the laser spot.
- LCD: 405 nm UV LED array projected through an LCD mask.
Printing Speed:
- SLA: Cures one voxel at a time, making large prints slower.
- LCD: Cures millions of voxels simultaneously, completing jobs 2–5 times faster.
Resolution:
- SLA: Achieves spot sizes down to 20 µm, excellent for micro-detailing.
- LCD: Offers consistent pixel sizes, typically ~30 µm for consumer 8K models, across the entire build area.
Materials Compatibility:
- SLA: Often restricted to proprietary resins matched to specific laser wavelengths.
- LCD: Supports a wide range of open 405 nm resins, offering you more flexibility.
Maintenance:
- SLA: Galvanometer mirrors are highly durable with minimal service needs.
- LCD: Screens require periodic replacement after roughly 2,000 hours of use.
Cost:
- SLA: Entry-level models usually start at $2,000 or more.
- LCD: High-resolution consumer models are available for $600 or less.
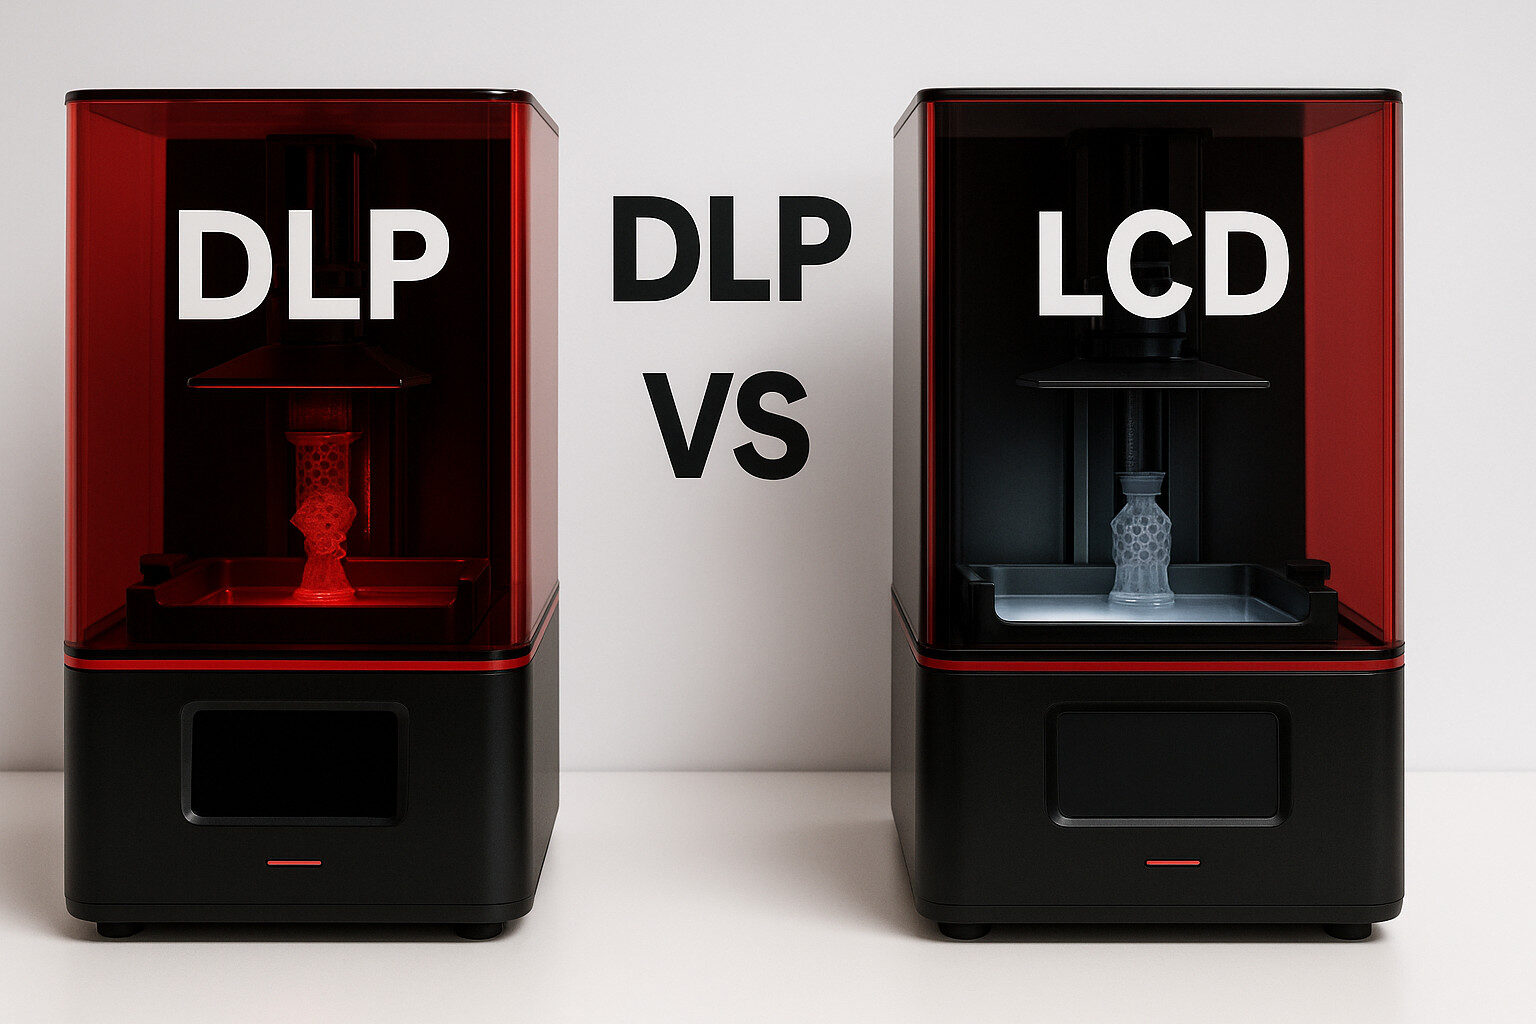
What is the Difference between DLP and LCD 3D Printing?
In DLP (digital light processing), a digital micromirror device (DMD), produced by companies like Texas Instruments, reflects UV light through a lens system. These tiny mirrors pivot to direct the light, projecting each model layer as a complete image. In contrast, LCD 3D printers use an LED light engine shining through a liquid crystal display (lcd screen), where each pixel acts as a mask to block or allow UV light. This fundamental difference leads to distinct advantages and trade-offs in practice.
To help you clearly see the differences, here’s a detailed comparison:
| Factor | DLP 3D Printing | LCD 3D Printing |
| Light Projection | Digital micromirror device (DMD) reflects UV light through lens | LED back-light passes through LCD mask (liquid crystal display) |
| Curing Process | Full layer projected at once with high light intensity | Entire layer exposed simultaneously through LCD panels |
| Resolution | Consumer units: full-HD (1920×1080); higher cost for industrial | Consumer units: up to 8K (≈33 µm pixel size), even at lower price points |
| Print Quality | Excellent on narrow parts; distortion increases at wide edges | Uniform pixel size across entire build platform; minimal edge distortion |
| Speed and Throughput | Slightly faster on thick layers (≥50 µm); higher light intensity reduces exposure time by 10–20% | High speed for entire layer curing; 2–4× faster than laser SLA at equivalent layers |
| Cost | Ranges from $500 hobby kits to $100,000 industrial systems | Available from $200 to $2,500 depending on resolution and build volume |
| Accuracy | Superior for micro-jewelry details and fine features | Maintains consistent detail across larger prints like dental arches |
| Print Volume | Industrial models reach up to 300 × 200 × 500 mm | Large LCD printers exist but industrial-scale sizes remain less common |
| Material Options | Compatible with higher-viscosity engineering resins | Works better with lower-viscosity, faster-curing resin chemistries |
| Post-Processing Requirements | Same wash and UV cure process as other resin 3d printers | Same wash and UV cure process as DLP and SLA |
| Applications | Ideal for jewelry casting, micro-medical parts, small precision objects | Suitable for dental models, engineering prototypes, tabletop miniatures, and consumer goods |
| Surface Finish | May show voxel stepping (blocky layer edges) on curved surfaces | May show minor anti-aliasing blur; easily polished to smooth finish |
| Maintenance | Projectors last ~20,000 hours; few consumables | LCD screens last ~2,000 hours; require regular screen and FEP film replacements |
What are the Emerging Trends in LCD 3D Printing?
LCD 3D printing technologies are rapidly evolving, bringing you improvements in resolution, speed, and industrial capabilities that just a few years ago were limited to expensive systems.
Monochrome lcd panels, first introduced to consumer printers around 2020, revolutionized curing speed and screen durability. Now, the next generation of high-resolution panels is already in development. Prototype 12K lcd screens, offering pixel sizes below 23 µm, are paired with collimated UV-laser back-lights that achieve layer exposure times as short as one second. This allows you to print even finer resin parts while cutting total print time significantly.
New multi-vat continuous printing platforms are also emerging. These systems alternate between multiple resin tanks, boosting your throughput by more than 40% without compromising print quality or layer consistency.
AI-powered slicers represent another major advancement. By dynamically adjusting pixel grayscale, these tools sharpen internal corners and improve part quality without increasing exposure time.
Additionally, closed-loop light sensor arrays now monitor LED aging in real time. These systems automatically compensate for gradual light source degradation, extending your lcd screen’s useful life by up to 30%.
Industrial lcd printers are also expanding into new fields like bio-resin research, using nitrogen-inert chambers to stabilize oxygen-sensitive materials.
How To Choose the Right LCD 3D Printer for Your Needs?
Start by matching pixel size to your application. If you’re producing dental aligners or jewelry masters, you should target ≤35 µm pixel resolution for precise detail. For tabletop miniatures, pixel sizes in the 35–50 µm range typically deliver excellent surface finishes and facial details under 1 mm. When you’re making props or larger consumer goods, resolutions above 50 µm may still meet your part quality needs while reducing file sizes and print times.
Next, review the build platform dimensions. Make sure your printer’s build volume exceeds the tallest part by at least 120 mm to avoid segmenting models unnecessarily. Larger construction platforms help when printing multiple resin parts at once.
You should also prioritize printers with monochrome lcd screens rated 4K to 8K, offering at least 350:1 contrast ratios. These lcd panels cure resin 3d layers faster and provide superior print quality compared to older color screens that slow printing speeds by 3–4 times.
Consider software compatibility as well. Many lcd printers operate with ChiTu-based mainboards, allowing you to use third-party slicers like Lychee or ChiTuBox. Proprietary firmware may lock you into specific resins and slicers, limiting flexibility.
Finally, always calculate long-term ownership costs. Account for screen replacements, resin prices, FEP film consumption, and overall maintenance. By balancing all these factors, you can select an lcd 3d printer perfectly matched to your budget, application, and production demands.
Conclusion
When we talk about 3D printing today, it’s only right to give LCD 3D printers its recognition. They’ve taken what used to be expensive and complicated, and made it something you can actually bring into your own workshop or home. Whether you’re just starting out or you’re running a small business, you get to create parts with incredible detail without paying industrial prices. And with 8K printers already on the market, and 12K models just around the corner, you’re seeing print quality that not long ago was only possible with high-end DLP machines.
Of course, like any tool, getting the best results means you’ll need to take care of your machine, handle the resins safely, and choose the right equipment for your projects.
But once you dial it all in, LCD 3D printing opens the door to so many possibilities, from dental models and jewelry to gaming miniatures and functional prototypes. It’s amazing how much we can build today, right from our desktops.