


Reading Time: 18 Minutes
If you’ve spent any time with a 3D printer, chances are you’ve already printed with PLA. It’s usually the first filament people try, and not by accident. Made from renewable crops like corn starch and sugarcane, PLA keeps things easy. You don’t need a heated bed, the print temperatures are forgiving, and there’s far less warping to worry about. That’s why it’s everywhere, from school classrooms to home workshops and rapid prototyping labs.
Most desktop 3D printers even come with a starter roll of PLA because it works straight out of the box. It’s safe, affordable, and prints clean on almost any machine. Plus, it comes in over 160 colors and gives off a light, sweet smell when printing, just one of those little details that makes it stand out.
In this article, we’ll focus on what makes PLA such a reliable material, how to use it better, and how it compares to other 3D printing options.
What Is PLA and Why Is It Used in 3D Printing?
PLA, or polylactic acid, is a widely used bioplastic that plays a central role in 3D printing today. If you’re working with fused deposition modeling (FDM) technology, you’ve likely printed with PLA filament already. It’s made from renewable resources like corn starch or sugarcane, and that bio-based origin is what sets it apart from petroleum-based 3D printer filaments like ABS or nylon.
This material is favored not just for its sustainability profile but for its simplicity in use. You can print PLA at relatively low nozzle temperatures, usually between 190 °C and 210 °C, without needing a heated chamber. That’s one of the main reasons why PLA is recommended for beginners. Its low printing temperatures also reduce energy consumption and extend the lifespan of brass nozzles.
Chemically, PLA is an aliphatic polyester formed from lactic acid. The polymer’s predictable thermal behavior and stable extrusion characteristics make it a go-to choice for 3D models that demand surface quality and dimensional accuracy. It performs well on various build surfaces like PEI, glass, and blue tape, giving you strong bed adhesion with fewer print failures.
You’ll also benefit from PLA’s excellent layer bonding and minimal warping. Its shrinkage is low, so large prints stay true to design—even without a heated bed. Because of these characteristics, PLA is a preferred option for visual prototypes, test fixtures, and fitment models. Its glossy finish gives printed objects a polished look right off the build plate, reducing the need for post-processing in many cases.
Compared to styrene-based plastics, PLA emits significantly fewer volatile organic compounds (VOCs). That makes printing with PLA safer in enclosed environments such as classrooms or home offices, provided you maintain proper airflow. Additionally, the low moisture uptake helps preserve print quality even in moderately humid environments.
On a broader level, the environmental impact of using PLA filament is considerably lower. Its cradle-to-gate carbon footprint is roughly 60% less than ABS, according to available manufacturing data.
Production and Sustainability of PLA
The production of PLA begins with biomass feedstocks like corn or tapioca roots. These are converted into dextrose, then fermented into lactic acid. Through polymerization, this lactic acid transforms into long-chain poly-lactic acid, forming the base material used in PLA filament. Once cooled and pelletized, it’s extruded into the 3D printer filament you use at home, in schools, or for prototyping.
From a sustainability standpoint, PLA offers several advantages over traditional thermoplastics. Its renewable origin helps reduce dependence on fossil fuels and lowers the overall environmental cost of 3D printing materials. When processed under industrial composting conditions, around 58 °C, with over 50% humidity and active oxygenation—PLA breaks down into water and carbon dioxide in approximately 90 days. That makes it one of the few commercially available 3D printer filaments with industrial-compostable certification.
However, it’s important to account for its limitations in uncontrolled environments. In standard landfill conditions, PLA may take 50 to 80 years to degrade. Some sources even place this timeline between 100 and 1,000 years, especially when moisture levels and microbial activity are low. For this reason, end-of-life PLA waste needs special handling, and mixing it with conventional plastics can compromise recycling streams.
Mechanically, PLA is a non-Newtonian pseudoplastic. It becomes less viscous under pressure, allowing it to flow smoothly through nozzle sizes ranging from 0.2 mm to 0.8 mm. This shear-thinning behavior helps you maintain strong interlayer adhesion even at moderate print speeds and lower extrusion temperatures.
Despite its benefits, PLA raises ethical and agricultural concerns. Growing crops for bioplastics, particularly on land suitable for food, can strain agricultural ecosystems. There’s a rising debate about monoculture farming and the diversion of food-crop acreage to bioplastic manufacturing. While the environmental benefits of using PLA are tangible, they must be weighed against the broader consequences of feedstock sourcing and global land use.
What are the Key Properties and Characteristics of PLA?
Thermally, PLA maintains a glass transition temperature around 53 °C and a melting point between 170 – 180 °C, making it ideal for 3D printing on open-frame FDM printers without needing a high bed temperature. Its heat deflection temperature at 1.8 MPa pressure is approximately 80 °C, which defines the upper limit for practical part use in warm environments.
Mechanically, PLA delivers dependable strength and stiffness. You’ll find a tensile strength ranging from 38 to 47.8 MPa, a tensile modulus of around 4,200 MPa, and a flexural strength close to 85 MPa. It exhibits limited flexibility, with elongation at break between 41.3% and 63.8%, and elongation at yield near 2.00%. Hardness measures about Shore D 66, and the density lies between 1.08 – 1.12 g/cc.
PLA’s chemical profile shows good resistance to dilute acids but weakness against strong bases and organic solvents. While standard blends meet most durability needs, “prime-grade” PLA can achieve tensile values near 60 MPa, while decorative or heavily filled blends may drop below 40 MPa.
The shelf life of PLA is typically 12 months or more when stored at 15–25 °C in a sealed container. Exposure to moisture can degrade filament quality, affecting extrusion and layer adhesion. This makes dry storage a key factor in maintaining print quality.
Mechanical Properties
PLA is known for its stiffness, which often exceeds 4 GPa in tensile modulus. That makes it excellent for parts requiring shape stability and dimensional accuracy, especially when you’re testing visual models or snap-fit assemblies. However, it’s important to keep in mind that PLA is relatively brittle when compared to plastics like ABS. Its impact resistance is typically about one-third that of ABS, which means parts can fracture under sudden load rather than flex.
Because of the nature of FDM printing, PLA’s weakest axis is typically in the Z direction, layer-to-layer adhesion is more fragile than XY plane strength. To compensate for this, you should orient critical features in the XY plane whenever possible. For structural items or prototypes subject to stress, increasing the number of perimeters to four or more can significantly boost resistance to cracking along the edges. This adjustment enhances part strength without the added weight or energy consumption that comes from increasing infill density.
Printing Properties
Printing with PLA is considered one of the most forgiving processes among all 3D printing materials, which is why so many beginners and professionals alike prefer it. If you’re aiming for reliable results with minimal tuning, PLA filament gives you consistent quality across a wide range of desktop 3D printers.
The standard nozzle diameter for PLA is 0.4 mm, and flow rates should be kept between 95% and 100% to maintain detail without over-extrusion. For optimal surface sharpness and dimensional accuracy, set your cooling fan to 100% after the second layer. This helps reduce stringing and improves the sharpness of overhangs.
Print speed matters, especially when you’re balancing print quality and time. The sweet spot sits at or below 55 mm/s, though with specialized matte or high-flow PLA, speeds above 80 mm/s are possible. However, print layer adhesion may suffer if you exceed your extruder’s volumetric flow rate.
For temperature, PLA performs well between 190 °C and 200 °C. This low nozzle temperature range not only supports better printability but also extends the life of brass nozzles. Bowden setups typically require a retraction distance of 3–5 mm, while direct-drive extruders can be tuned closer to 1–2 mm. Adjusting your retraction settings and retraction speed helps eliminate oozing and artifacts during travel moves.
PLA sticks well to build surfaces like PEI sheets, textured steel, and glass. A heated bed set to 50–60 °C improves adhesion and minimizes warping. On printers without a heated bed, you can still get strong first-layer bonding using painter’s tape, glue stick, or a light release agent like PVA. These solutions improve bed adhesion on basic setups and are especially helpful for larger items with wide bases.
What are the Benefits of PLA 3D Printing?
When you print PLA, you’re working with one of the most energy-efficient 3D printing materials. Its low printing temperatures (around 190–210 °C) reduce overall energy consumption and extend the life of common brass nozzles. You can also avoid the added hardware requirements of a heated chamber or high-powered bed, although using a heated bed at 50–60 °C still improves bed adhesion on glass or textured build surfaces.
Here are the core benefits of printing with PLA:
- Affordability: Standard spools typically cost between €20–€30 per kg, making PLA a low-risk option for testing, prototyping, and design projects.
- Sustainability: PLA is made from renewable crops like corn starch and sugarcane. It’s biodegradable under industrial composting conditions, lowering environmental impact.
- Ease of Use: You don’t need a specialized printer. Most 3D printers, even budget models, are optimized for PLA out of the box.
- Surface Quality: You get sharp details, glossy or matte finishes, and smooth curves, ideal for display-ready 3D models and concept items.
- Minimal Warping: Its low shrinkage rate means large parts can be printed flat on glass without adhesives or rafts.
- Color and Type Variety: From silk PLA to wood-filled and metal-filled blends, you can find a PLA filament that suits nearly any aesthetic or mechanical goal.
- Shelf Stability: When sealed and stored between 15–25 °C, PLA resists moisture better than materials like nylon, offering a longer shelf life.
- Safety: PLA releases fewer hazardous fumes than styrene-based plastics. Many users even enjoy the mild caramel-like aroma during extrusion.
- Software Compatibility: Most slicer settings for PLA are pre-configured by manufacturers, reducing guesswork and setup time for new users.
What Types of PLA Filament Are Available?
From display models to functional parts, there’s a PLA type to match your specific project goals. These filaments differ in mechanical strength, visual appearance, surface texture, and printing properties. Whether you need enhanced impact resistance, a metallic sheen, or faster print speed, the growing variety of PLA options gives you greater control over both aesthetics and performance.
Standard PLA remains the most affordable and widely used. But advanced types, like PLA+, matte PLA, or composite blends filled with wood, metal, or special additives, expand your range without the complexity of switching to materials like ABS or PETG. All of them retain the ease of printing associated with PLA, while offering unique traits tailored to different use cases.
Standard PLA
Standard PLA is the most accessible 3D printing filament on the market and serves as the default choice for beginners and professionals working on general-purpose parts. If you’re looking to print PLA quickly and affordably, this is where you start.
It typically prints cleanly at nozzle temperatures between 190 – 210 °C and performs well even on entry-level 3D printers without a heated bed. You’ll still get improved print bed adhesion by setting the bed temperature to 60 °C or applying blue tape or a glue stick on glass or smooth PEI sheets. With minimal stringing and low shrinkage, this filament type simplifies bed leveling and reduces warping—making setup faster and more forgiving.
In terms of appearance, standard PLA delivers glossy finishes and vibrant colors across a wide range of hues. Its predictable extrusion behavior ensures good dimensional accuracy and consistent print quality across different brands and machines. That’s why it’s often used for educational parts, hobby items, basic prototyping, and aesthetic 3D models.
What Makes PLA+ (Tough PLA) Different?
PLA+ is a modified version of standard PLA designed to improve mechanical properties while maintaining easy printability. Also known as “tough PLA,” this blend contains additives that increase both impact resistance and elongation at break, making it more durable for parts that experience stress or repeated use.
Compared to standard PLA, PLA+ can absorb more energy without snapping. Its impact resistance can be up to 50% higher, and elongation at break improves by roughly 30%, depending on the brand and formulation. This added flexibility doesn’t compromise print adhesion or dimensional stability, which means you can use PLA+ for stronger jigs, fixtures, or mechanical components without moving to complex filaments like nylon.
You’ll typically need to increase nozzle temperature by about 10 °C, so printing between 200 – 220 °C is recommended. Despite this, PLA+ still prints without an enclosure and doesn’t demand a higher bed temperature than the standard 60 °C range. Some premium PLA+ grades are engineered for high-speed printing, sustaining excellent layer adhesion at speeds up to 500 mm/s with the right extruder and cooling setup.
Silk PLA
Silk PLA is designed for projects where visual impact matters more than mechanical strength. If you’re printing with PLA and want your 3D models to have a luxurious, glossy appearance right off the build plate, silk variants offer an excellent material choice. These filaments are infused with light-diffusing additives that scatter reflections and create a satin-like surface finish, giving parts a smooth, almost metallic glow.
Silk PLA prints at typical PLA nozzle temperatures—usually between 200–215 °C—without requiring special hardware. You don’t need a heated chamber, and most 3D printers handle it well with basic setup. However, maintaining consistent fan speed and print bed temperature (around 60 °C) helps improve print adhesion and surface quality, especially on high-gloss layers.
This filament is ideal for decorative items, trophies, character models, cosplay accessories, and artistic designs where color and shine are more important than durability or heat resistance. Silk rainbow variants are especially striking, shifting across multiple hues as the filament unwinds. This effect is best seen on tall vases, figurines, or curved parts where gradual gradient changes can be fully appreciated.
Matte PLA
Matte PLA is engineered to reduce surface reflections, making it a strong option when you want a softer texture or when you’re printing consumer-facing objects. If glossy finishes aren’t right for your product or prototype, this material offers an effective solution. Matte PLA contains micro-fillers that scatter light, giving prints a muted appearance that hides fingerprints, layer lines, and minor imperfections.
You can print matte PLA using similar slicer settings to standard PLA. Set your nozzle temperature around 200–220 °C depending on the brand. Maintain a bed temperature near 60 °C for optimal print bed adhesion, and use textured PEI or painter’s tape if needed. These settings give you a consistent print surface while minimizing the need for touch-ups.
Matte PLA is often used in consumer product mockups, housings, desktop accessories, and artistic items that benefit from a subtle look. Some high-speed matte formulations allow print speeds up to 500 mm/s when paired with a full-metal hot end, offering both speed and surface finish in one product.
The muted tones, available in solid black, gray, and soft pastel colors, are popular with designers aiming for minimalistic aesthetics..
Wood-Filled PLA
Wood-filled PLA combines standard PLA filament with 5–15% powdered wood to mimic the look and feel of real wood. If you want to print objects that resemble handcrafted wooden items, this composite gives you that opportunity, while still maintaining the ease of printing with PLA. You’ll still be working with polylactic acid as the base polymer, but the addition of organic fillers adds a tactile, grainy surface that can be sanded, stained, or even engraved after printing.
To print wood-filled PLA effectively, use a nozzle size of 0.5 mm or larger to prevent clogs. A 0.6 mm brass nozzle or a hardened steel nozzle is ideal for maintaining flow consistency. Keep the nozzle temperature between 200–220 °C and the bed temperature at 50–60 °C. These settings help manage retraction distance and reduce stringing, which is common with fibrous filaments.
You can enhance the finish of wood PLA parts with post-processing. Light sanding brings out the grain effect, and wood stain or oil can deepen the tone, giving your parts a realistic wooden appearance. Models printed with high wood content (~40%) are especially useful for décor items, architectural mockups, or tools with a rustic aesthetic, though they require slower print speeds and abrasion-resistant nozzles.
Metal-Filled PLA
Metal-filled PLA gives your 3D printed objects a distinctly different character. These filaments are infused with fine metal powders, typically bronze, copper, or steel, which not only increase weight and density (often above 2 g/cc) but also alter the appearance and texture of the surface. When you hold a part printed with this filament, you immediately notice the heft compared to standard PLA. That added mass gives models a premium, almost machined feel.
You can polish or tumble-finish metal PLA to create a real metallic gleam. Over time, some prints can even develop a natural patina depending on the metal content. But printing with this filament does come with challenges. The embedded particles are abrasive, so you’ll need a hardened steel or ruby-tipped nozzle to protect your printer hardware. A standard brass nozzle will wear quickly, affecting print quality and extrusion consistency.
Use slower print speeds, and raise the nozzle temperature slightly, around 210–225 °C is often ideal. Keep the bed temperature near 60 °C for reliable adhesion to surfaces like PEI sheets or painter’s tape. Because the particles affect flow, make sure your retraction settings and fan speed are dialed in to minimize stringing and artifacts, especially for detailed prints.
Dichromatic PLA
Dichromatic PLA, also known as dual-color PLA, offers a unique optical twist in your prints. This filament is manufactured with two pigments blended side by side along the extrusion path. As a result, your object shifts colors depending on the angle of view or lighting conditions. You don’t need to change slicer settings or printer hardware, just use your usual setup, and the effect appears as the 3D model rotates.
These color-shifting prints are especially eye-catching on curved surfaces. That’s why figurines, fantasy sculptures, spiral vases, and geometric objects are ideal use cases. The contrast between pigments enhances the visibility of layers and gives parts a dynamic, kinetic aesthetic without requiring any post-processing or paint.
When printing with dichromatic PLA, maintain a nozzle temperature of 200–210 °C and keep your print bed temperature at 60 °C for strong adhesion. The filament behaves similarly to standard PLA in terms of extrusion, warping, and moisture sensitivity, making it accessible even for beginners. If you’re using a cooling fan, moderate fan speed helps to preserve layer adhesion while maintaining sharp visual transitions.
This type of PLA filament doesn’t just add color, it adds drama. Whether you’re preparing a portfolio piece or simply want to create eye-catching items, dichromatic PLA gives you an artistic advantage without increasing complexity or cost. You get ease, printability, and visual impact, all in one.
Eco PLA
Eco PLA addresses both environmental impact and material performance. Made from recycled PLA or PLA blends like Kimya PLA-R, this filament gives you a more sustainable way to approach 3D printing with PLA. The recycled feedstock, often sourced from post-consumer or post-industrial waste, is processed and compounded with virgin PLA to maintain reliability and dimensional stability. When the recycled content stays below 30%, mechanical properties remain comparable to standard PLA filament.
Eco PLA is ideal for rapid prototyping, design testing, educational models, and internal-use tools. You don’t need to modify your printer setup. Set your nozzle temperature around 200–215 °C, keep the print bed temperature close to 60 °C, and use build surfaces like blue tape, PEI sheets, or glue stick to support first-layer adhesion. Fan settings should follow typical PLA best practices to optimize cooling without compromising interlayer bonding.
There are trade-offs to consider. While the sustainability benefit is clear, Eco PLA tends to be slightly more expensive due to limited feedstock availability and processing costs. However, for environmentally conscious users and institutions, the added cost brings real value, less waste, fewer emissions, and a lower carbon footprint.
Glow-in-the-Dark PLA
Glow-in-the-dark PLA introduces a playful, functional layer to standard 3D printing materials. This filament contains strontium aluminate powder, a phosphorescent additive that stores light energy and releases it slowly over several hours. Once charged by daylight or LED exposure, printed parts glow green or blue in the dark, no electronics required.
To get the best results, print glow PLA at nozzle temperatures between 200 °C and 215 °C. A heated bed set to around 60 °C helps with print bed adhesion, especially on smooth build surfaces. Because the embedded particles are abrasive, use hardened brass or stainless-steel nozzles to avoid premature wear. Keep fan speed moderate to allow good layer adhesion while maintaining surface detail. Also, reduce infill complexity where possible to protect your nozzle and ensure consistent extrusion.
This filament isn’t just a novelty, it has practical uses. You can print emergency exit signs, night-time markers, toys, or costume accents that remain visible in low-light conditions. For designers working on safety-focused projects, or simply aiming to wow with aesthetics, glow-in-the-dark PLA brings both form and function.
It behaves like standard PLA in terms of retraction settings, moisture sensitivity, and print speed, making it accessible for both beginners and experienced users.
Gradient (Multicolour) PLA
If you want vibrant, evolving color effects without swapping filaments mid-print, gradient PLA is your answer. This filament type transitions smoothly between two to five colors along its spool length, creating an ombré appearance as your print progresses. The visual outcome depends heavily on how you orient your model, especially its height.
For best results, orient your 3D model vertically so its Z-height takes advantage of the entire color gradient. This way, you capture the full transition from base to top layer. Slicer previews can help you estimate where a color shift will appear during printing. If you’re using larger objects or tall vases, you’ll likely see the complete palette cycle unfold layer by layer.
Gradient PLA prints best at 200–210 °C, with the print bed temperature stable around 60 °C. Adhesion to glass, tape, or PEI sheets remains consistent with other PLA types. Like other visually focused PLA filaments, it’s ideal for non-functional prints: art pieces, display objects, or decorative home items.
How To Choose the Right PLA Filament for Your Project?
For showpieces, silk PLA is ideal. It offers a glossy finish and hides layer lines, making your 3D models stand out. For structural parts, matte or tough PLA variants provide better durability and interlayer adhesion. If you’re building something large or using fast print speeds, high-flow matte blends or PLA+ are better suited to handle the mechanical load.
Budget also matters. Exotic PLA filaments, like metal-filled, glow-in-the-dark, or eco PLA, can cost 1.5–2× more than standard PLA. They also have hardware requirements like hardened nozzles and slower extrusion speeds, increasing energy consumption and print time.
Use this basic matrix when making your decision:
- High impact or mechanical parts: PLA+ or matte tough PLA
- Visual displays or cosplay: Silk PLA or dichromatic PLA
- Educational or eco-conscious prints: Eco PLA or recycled blends
- Glow or novelty features: Glow-in-the-dark or gradient PLA
How To 3D Print with PLA: Step-by-Step?
Start with filament preparation. PLA filament absorbs moisture from the air, which affects extrusion and print quality. If you hear popping sounds or see bubbles, dry the spool at 60 °C for 10–12 hours. Proper filament care prevents stringing and improves interlayer adhesion. Use a sealed container with desiccant to reduce future water absorption.
Next, level the print bed. The process varies based on whether you’re using a glass plate, PEI sheet, or textured surface. Set the print bed temperature to 55 °C for glass and 60 °C for textured PEI. Bed adhesion is crucial, especially for the first layer. Apply a thin layer of painter’s tape, a light-duty glue stick, or a polymer spray if your build surface struggles with PLA bonding. These solutions help PLA grip even when the heated bed is off, which is common on lower-cost 3D printers.
Preheat the nozzle to the correct temperature. Standard PLA prints well at 200 °C, while enhanced blends like PLA+ may require 210 °C. Make sure your nozzle size matches your design; 0.4 mm is standard, but larger nozzles handle faster flow with lower detail. If you’re using metal-filled or glow-in-the-dark PLA, swap your brass nozzle for a hardened alternative to avoid excessive wear.
Before printing your actual 3D model, perform a dry-run extrusion. Extrude 100 mm of filament to flush out moisture and residue. Then, print a calibration cube to check dimensional accuracy. If results are off, adjust the flow rate ±5%. Ensure fan speed reaches 100% after the second layer. Early fan activation can reduce first-layer adhesion, while delayed airflow may lead to stringing or overheating.
During printing, leave the enclosure door open. PLA doesn’t require high ambient temperatures and may warp from heat-stacking if confined. Use a brim or raft only when your object includes overhangs closer than 15 mm to the bed, otherwise, avoid them to conserve material and reduce post-processing.
Once printing is complete, don’t rush. Allow the part to cool naturally to at least 30 °C before removal. Trying to force PLA off a warm glass bed risks chips and cracking. After removal, trim stringing if necessary and inspect the surface finish. If you’re switching between dark and light colors, perform a cold pull at 90–120 °C. This clears pigment from the extruder, preventing color contamination.
How to Change PLA Filament Safely?
First, heat the nozzle to 200 °C. Once the filament reaches this extrusion temperature, retract it about 20 mm to release tension and reduce pressure inside the melt zone. Then, reduce the extruder temperature gradually to 120 °C.
At around 100 °C, grasp the filament firmly and pull it out in one clean motion. This cold plug will remove residual material from the nozzle and help clear debris that may have built up. Reheat to 200 °C before feeding in your new spool.
After loading, extrude until the old color is completely flushed. If you’re transitioning from a dark to light pigment, run extra filament to avoid tint contamination, especially on sensitive projects like prototypes or pastel display items.
What are the Ideal Settings for Printing PLA?
Set your bed temperature between 45–60 °C. A heated bed improves first-layer adhesion, though it’s optional on textured or PEI-coated plates. For the extruder temperature, aim between 180–220 °C. Standard PLA prints cleanly at 200 °C, while modified blends like PLA+ may require slightly higher nozzle temperature. You don’t need a specialty hot end, most standard 3D printers are compatible.
For best surface results, activate the cooling fan to 100% after the first few layers. This helps reduce stringing and supports smoother overhangs. You should also set a minimum layer time of at least 15 seconds for small objects to avoid thermal artifacts or warping.
Retraction settings will vary by setup. For Bowden tubes, begin with a retraction distance of 2–5 mm and a speed of 30–80 mm/s. If your printer uses a direct drive, reduce the distance to 1–2 mm. Always tune retraction and coasting together to eliminate stringing, especially on detailed miniatures and small-scale models.
To avoid under-extrusion, maintain a volumetric flow rate below 9 mm³/s when using a 0.4 mm nozzle. Slower print speeds ensure better detail retention and interlayer adhesion..
What Tips Will Help You Print Better with PLA?
Begin by adjusting your slicer to reduce unnecessary travel moves. Enabling combing mode will help keep the nozzle inside the printed perimeter, reducing stringing and avoiding scars on outer layers. To handle blobs or zits, apply a coasting volume of 0.064 cm³ with a minimum volume before coasting set at 0.8 mm³. This lets the filament pressure taper off before movement ends.
If your prints look overly glossy or tend to string, try reducing the flow rate in 5% increments. This fine-tuning helps maintain consistent extrusion across multiple objects and layer transitions.
You can also improve cooling performance by printing two or more identical parts in parallel. This allows each layer to cool before the nozzle returns, especially helpful for thin columns and sharp corners. Installing an all-around part-cooling shroud ensures balanced airflow, which improves overhangs, layer bonding, and surface finish, especially in complex 3D models.
What is the Suggested Environment for PLA 3D Printing?
Your printer must operate under stable, well-ventilated, and thermally neutral conditions.
Keep your workspace draft-free. PLA doesn’t require a sealed chamber like ABS or nylon, but stray airflow from windows or HVAC vents can disturb layer adhesion and promote warping. Ideally, print in an open enclosure with airflow that avoids directly hitting the print bed.
Avoid placing the 3D printer near heat sources or direct sunlight, which can cause uneven layer temperatures and skew part geometry. Aim to maintain a room temperature between 20 to 25 °C. Anything under 15 °C can increase shrinkage forces and compromise dimensional accuracy.
Good ventilation is also necessary, even though polylactic acid emits fewer fumes than other 3D printing materials. It ensures safe working conditions, especially if you’re running multiple prints or using blended PLA composites with additives.
What Hardware Do You Need to Print PLA Successfully?
A heated bed is optional for PLA, but maintaining a print bed temperature between 50 and 60 °C improves adhesion and minimizes first-layer warping. Depending on your build plate type, glass, smooth PEI, textured spring-steel, or even painter’s tape, you’ll see different textures on the base of your printed items. Each of these build surfaces interacts uniquely with PLA’s polymer properties and extrusion behavior.
Most 3D printers come with a brass nozzle, which is suitable for basic PLA. However, if you’re using additive-filled or composite blends (like wood, carbon, or glow-in-the-dark variants), upgrading to a hardened steel nozzle is a smart material choice. Brass nozzles wear quickly with abrasive 3D printing materials, which affects nozzle size, print layer height, and dimensional accuracy over time.
PLA prints best with PTFE-lined hot ends at standard printing temperatures. That said, all-metal hot ends offer better thermal stability at higher speeds or when working with advanced PLA blends that require tighter thermal margins. Your extruder temperature should be set to around 200 °C for basic PLA and 210 °C for PLA+, depending on brand and additives.
Installing a filament run-out sensor is another hardware enhancement that reduces failure rates, especially on longer prints. These sensors monitor filament usage and pause the job if the spool runs empty, a helpful feature when printing large 3D models or multiple parts.
For cooling, make sure your printer includes a dedicated part-cooling fan. PLA benefits from high fan speed after the first two layers to lock in sharp features, overhangs, and corners. This added airflow improves interlayer adhesion and surface finish while preventing overheating or artifacts caused by residual heat buildup.
What Software and Slicer Settings Should You Use for PLA?
Tools like Cura, PrusaSlicer, and Bambu Studio come with built-in profiles optimized for PLA filament, making setup faster and easier for both beginners and experienced users.
If your 3D model features curves or organic surfaces, enable adaptive layer height. This adjusts resolution dynamically, preserving detail at 0.12 mm or finer while reducing overall print time. It balances surface quality with speed, especially useful in prototyping and display models.
For support material, use tree supports to minimize scarring on visible areas. They break away cleanly and reduce post-processing.
To tighten corners and prevent blobbing during fast moves, fine-tune pressure advance (Klipper) or linear advance (Marlin). These features pre-compensate for nozzle pressure, improving dimensional accuracy across sharp turns.
Getting slicer settings right is as important as bed temperature or nozzle diameter. With the right software, you improve print adhesion, cooling efficiency, and layer bonding—making the most of polylactic acid’s low glass transition temperature and easy-to-use printing properties.
What are Common PLA 3D Printing Problems and How Can You Troubleshoot Them?
You might run into poor print bed adhesion, especially when using smooth build surfaces or a cold bed. In those cases, tweaking bed temperature, using adhesives, and adjusting fan speed for the first few layers can help.
Stringing and oozing happen when retraction distance or retraction speed is set too low. Try increasing retraction values gradually and enabling combing to keep the nozzle inside the printed area.
Inconsistent extrusion or under-extrusion may be caused by wet filament or improper nozzle temperature. Make sure your PLA filament is dry and that your extruder temperature matches the manufacturer’s specs, usually between 190 °C and 215 °C depending on additives.
You may also see curling at edges or corners. This is often due to overcooling or drafts, which affect layer adhesion. Make sure your printer is in a draft-free environment and reduce cooling fan speed on early layers.
How Do You Fix Poor Bed Adhesion with PLA?
If the print doesn’t bond properly to the bed, the rest of the part is compromised. PLA usually performs well on many build surfaces, but sometimes adhesion still fails without proper setup.
Start by leveling your bed precisely. Even slight variations in nozzle distance can prevent proper bonding. Clean the print bed thoroughly with isopropyl alcohol to remove oils or residue. If you’re using PEI, lightly scuff the surface with 600-grit sandpaper to increase grip.
Limit the heated bed to no more than 65 °C for the first two layers, as excessive heat can soften the base too much. After those layers, you can turn it off entirely if needed.
Apply a thin coat of PVA-based glue stick or hairspray when adhesion remains unreliable. For textured surfaces, a release agent isn’t necessary, but on smooth glass or blue tape, these adhesives improve reliability. Also, reduce fan speed during the first layers to prevent early cooling, which can lift corners or cause layer separation.
What Causes Stringing or Oozing and How Can You Fix It?
Stringing in PLA prints happens when melted filament leaks from the nozzle during travel moves, leaving behind unwanted threads between parts of your 3D model. It’s usually the result of poor retraction settings, excessive nozzle temperature, or moisture in the filament.
Start by drying your PLA filament until its weight loss is below 0.2%. Even small amounts of moisture increase internal pressure, causing extrusion during non-print moves. PLA is hygroscopic and absorbs water from the air quickly—filament care matters.
Next, tune your retraction speed and distance. A setting of 40 mm/s or higher and a distance of 4–6 mm is effective for most Bowden setups. For direct drive, shorter retraction may work better.
Lower your nozzle temperature by 5–10 °C to reduce oozing and slow plastic flow. Then, increase travel speed to 150 mm/s or higher if your printer’s mechanics allow it. Fast non-extrusion moves reduce the time available for stringing.
Lastly, boost cooling fan speed to solidify the PLA polymer more quickly after extrusion.
How Do You Eliminate Zits and Blobs in PLA Prints?
To effectively eliminate zits and blobs, increase your retraction speed and distance. This pulls the melted PLA filament back faster before the nozzle changes direction. Settings like 50 mm/s and 5 mm (for Bowden tubes) help reduce leftover pressure.
Enable “coasting” in your slicer. Coasting stops extrusion slightly before the end of a segment, letting the remaining pressure push out the final amount of material. This setting reduces blob formation and improves the finish of outer layers.
Activate the “wipe” feature. It moves the nozzle over the last part of a print path while retracting, smearing away any leftover material before travel.
Reduce flow rate slightly, by 1 to 3%, if you still see consistent over-extrusion. Small tweaks in flow settings can improve print layer consistency without compromising part strength.
Why Does PLA Warp and Lift at the Edges?
Although PLA is less prone to warping than ABS or nylon, edge lifting can still occur, especially on large prints, thin parts, or low-temperature beds. This is often caused by inconsistent temperatures across the build plate or sudden changes in ambient air conditions.
Preheat the print bed to 60 °C and maintain it at that level throughout the job. Before you start printing, let the bed soak at this temperature for at least 10 minutes. This reduces the center-to-edge thermal gradient and improves interlayer adhesion at the base.
If you’re printing in an open environment, use an enclosure or cardboard draft shield to block cross-breezes. Airflow disrupts the cooling pattern of the PLA filament, creating stress in the outer layers and causing them to curl.
Check that your build surface promotes proper adhesion. Smooth PEI, painter’s tape, or glass with a glue stick provide consistent grip. If necessary, apply a thin release agent to allow easier part removal without damaging the first layer.
How Does Layer Height Affect PLA 3D Print Quality?
When printing with PLA, you’ll generally want to stay within a layer height range of 0.1 mm to 0.25 mm, depending on your goals.
If you want sharp detail and a smooth surface, choose a fine layer height, around 0.12 mm. This setting improves vertical (Z-axis) strength by up to 15% compared to 0.28 mm layers. That increased overlap between layers reduces chances of delamination and boosts interlayer adhesion.
Coarser layers, such as 0.25 mm, are ideal when speed matters more than finish. You’ll complete prints faster and use less energy over time. These are good for prototypes, functional testing, or larger PLA filament items where appearance is secondary.
When choosing the right slicer settings, balance your 3D model’s requirements with your 3D printer’s mechanical limits. Layer height is not just a detail—it’s a critical factor in optimizing print quality, strength, and total print time for each PLA-based project.
How Can You Prevent Layer Shifting with PLA?
To prevent layer shifting, start by checking your belt tension. You can use the “pluck test”, tight belts should produce a note in the 50–60 Hz range. Loose belts cause stepper motors to skip steps, while overly tight belts wear bearings or lead to heat buildup.
Also, reduce your print speed if you’re noticing frequent skips. While PLA prints well at high speeds, excess acceleration can cause momentum shifts that affect positioning. Lower speeds improve control, especially on taller models.
Check that your bed temperature remains stable and that your heated bed isn’t wobbling under the print. Movement in your build plate introduces variation layer by layer, which accumulates over time.
What Can You Do When PLA Gets Stuck to the 3D Print Bed?
Sometimes your PLA part adheres a little too well to the build plate. This is especially common when using PEI sheets, glass plates, or painter’s tape, which are all designed for high print adhesion. But what happens when the print won’t come off?
Let the print bed cool to room temperature if you’re not in a rush. The PLA polymer naturally shrinks during cooling, helping to loosen its bond with the surface. This passive method works well for most flat-bottomed items.
If the part still won’t budge, reheat the bed back to about 55 °C. At this temperature, the base material softens slightly, making it easier to release without cracking or warping the object.
Use a wide plastic scraper at a shallow angle, working gently under one edge. Avoid metal tools, they damage build surfaces and may stress the print.
Why are Your PLA Prints Weak or Brittle?
When your PLA prints snap under minor stress, it’s often a sign of poor filament care, suboptimal slicer settings, or flawed structural planning. Drying your PLA filament before use is essential. Even a slight amount of absorbed moisture can degrade layer adhesion and weaken the final product. Aim for a moisture loss of less than 0.2% for stable interlayer bonds.
Next, revisit your slicer settings. Increase infill density and pattern complexity for mechanical strength. Gyroid infill at 30% offers consistent internal structure and disperses stress better than grid or lines. For load-bearing 3D printed parts, use at least four perimeters to reinforce the outer shell.
Orientation also plays a role. Rotating your 3D model can enhance vertical strength, especially when the load path follows the Z-axis.
How to Cope with Elephant’s Foot
If the first layer of your PLA print flares outward, you’re likely dealing with “elephant’s foot.” This effect not only impacts dimensional accuracy but also makes part removal difficult and can distort your 3D model’s base.
Start by lowering the heated bed temperature. PLA typically adheres well between 50 °C and 60 °C. Excess heat at the first layer can soften the base material, causing horizontal bulging. Allow your build plate to stabilize for at least 10 minutes to equalize surface temperature across the print bed.
Make sure your print bed is properly leveled. Uneven nozzle pressure on the first layer causes material to squish and spread. In your slicer settings, apply a negative initial horizontal expansion of -0.1 mm. This compensates for over-extrusion at the base without compromising adhesion.
How Can You Avoid Nozzle Collisions with PLA Prints?
Unexpected nozzle collisions can drag parts or damage layers, especially when using complex support material or printing tall objects with thin features. These crashes are often caused by uneven layer buildup or travel path inefficiencies.
To prevent collisions, enable Z-hop in your slicer. This temporarily lifts the nozzle during travel moves, avoiding contact with raised print surfaces. It’s especially useful when working with dense 3D printer filaments like PLA.
Next, activate “avoid supports when traveling.” This tells your printer to re-route moves around delicate areas and limits contour island crossovers. Uneven drafts or temperature gradients can also cause layers to warp, raising one side of the model. Use an enclosure or barrier to block airflow.
Incorrect PLA Printing Temperature
One of the most frequent causes of failed prints with PLA filament is running the extruder at the wrong temperature. PLA performs best between 190 °C and 215 °C, but that range can vary depending on the brand, additives, and even ambient temperature in your workspace.
If the nozzle temperature is too high, you might notice:
- Overhangs drooping or sagging
- Fine strings of plastic between parts (stringing)
- A glossy or overly shiny surface finish
Lowering the nozzle temperature in 5 °C increments can help reduce stringing and improve definition. Increasing fan speed or adjusting retraction distance also helps control heat buildup.
If the nozzle is too cold, symptoms include:
- Poor layer adhesion
- Brittle or weak parts
- A rough or matte surface finish
First Layer Not Sticking
The first layer sets the foundation for the entire print. If it fails to adhere to the print bed, you’ll face warping, lifting corners, or total detachment. This is especially common with 3D printer filaments like PLA, which need precise first-layer control to bond well with the build plate.
Several factors can cause poor adhesion:
- The nozzle may be too far from or too close to the bed
- Bed temperature may be incorrect or uneven
- The print bed may not be level, causing inconsistent height across the build surface
To fix this:
- Re-level the build plate and check all four corners
- Adjust the Z-offset to set the optimal nozzle height
- Make sure you’re printing the first layer slowly (15–20 mm/s) to give the filament time to bond
Poor Internal Layers or Top Surface Quality
When the outer shell looks fine but internal layers are rough or top surfaces appear unfinished, there’s likely a mechanical issue or an extrusion inconsistency. Printing with PLA requires consistent tension and precise flow control, especially when printing small details or solid fill layers.
Check your nozzle and heated bed temperature first. If either is outside the ideal range, the upper layers may cool too quickly or fail to bond completely. The recommended print bed temperature is around 60 °C, while nozzle temperature should match your PLA brand’s spec, usually 200 °C ± 5 °C.
Uneven filament tension can also introduce artifacts into your prints. If the filament spool doesn’t rotate freely, the extruder may struggle to feed material consistently. Also inspect the drive gear inside the extruder. A partially clogged or dirty gear can chew on your filament and disrupt flow, leading to voids or rough finishes.
You’ll often fix this by:
- Recalibrating your extruder steps/mm
- Cleaning out the drive gear teeth
- Ensuring the filament path is smooth with no resistance
Bumpy Outer Edges
If the outer perimeter of your 3D prints appears rough, inconsistent, or wavy, the problem may not be the design itself. Instead, it’s likely a performance bottleneck between your PC and printer. Many users overlook the fact that 3D printers depend on a constant stream of data to generate consistent movement. If commands arrive late or out of sync, the printer may pause, overshoot, or under-extrude at key points, creating visible artifacts.
This is especially common when printing large or detailed 3D models directly from a computer over USB. Combine that with inconsistent PLA filament diameter, and you’ve got a recipe for unpredictable edges.
Here’s how to fix it:
- Print from an SD card instead of streaming via PC. This ensures your printer receives clean, uninterrupted G-code.
- Use a higher-quality filament with better dimensional tolerance and lower moisture content.
- Fine-tune your retraction settings, especially retraction distance and restart distance. Bumps can result when too much filament is extruded after retraction.
Warped or Melted Tall Sections
Tall, narrow features are among the trickiest elements to print with PLA, even for experienced users. You may notice that some parts begin to warp, lean, or even melt slightly as the print gets higher. That happens because layers aren’t given enough time to solidify before the next one is applied. Since PLA has a relatively low glass transition temperature, thin vertical sections retain heat longer, causing structural deformation or warping.
You’ll often encounter this issue when printing items like towers, antennas, or figurine limbs. These designs concentrate heat in a small surface area, which makes airflow and layer cooling even more critical.
To prevent this:
- Set your part cooling fan to 100% after the first layer. PLA responds well to aggressive cooling, which allows each layer to stabilize faster.
- Print multiple parts simultaneously. This gives each object time to cool between layers, allowing the PLA to fully solidify before the nozzle returns.
- Reduce print speed slightly to extend cooling time and improve surface finish on tall sections.
No Material Being Extruded
It’s frustrating to watch your 3D printer run through an entire job without depositing any filament. Fortunately, this is one of the most straightforward problems to diagnose, especially with PLA. Often, the root cause lies between the extruder and hot end, where clogs, temperature mismatches, or mechanical issues can stop material flow altogether.
When no material is coming out, follow this step-by-step approach:
- Confirm the hot end has reached the correct temperature. PLA usually extrudes at 200 °C, so check your slicer and printer display to ensure that value is met.
- Inspect the drive gear. Make sure it’s clean and properly tensioned against the filament. Worn or loose gears can’t push material reliably.
- Unload and reload the filament. This helps rule out poor filament tip shape or inconsistent diameter.
- Check for clogs or jams. If filament is stuck, heat the nozzle to 80–100 °C to soften the blockage. Then use a tool like an Allen key to gently push it through.
- Be careful. Hot components can cause burns, and missteps near wiring could lead to electrical hazards. If unsure, seek help from someone with experience.
How To Finish and Post-Process PLA 3D Prints?
PLA is one of the easiest 3D printing materials to work with when it comes to finishing. You can use basic tools like sandpaper, adhesives, and primer to smooth surfaces, blend seams, or prep the object for painting.
Here’s a breakdown of the most effective techniques:
- Gluing: If your print is split into multiple parts, use cyanoacrylate (super glue) or two-part epoxy for strong, permanent bonds. First, sand the joining surfaces with 400-grit paper to improve adhesion.
- Sanding and Polishing: Begin with 400-grit wet sandpaper, then work your way up to 600, 800, and 1000 grit. Keep the part cool and wet to prevent softening or warping. Wet sanding reduces dust and leaves a smoother surface that’s easier to paint.
- Filler-Primer Application: Spray in light coats, allowing each layer to dry before sanding. This fills minor gaps between layers and helps smooth rough patches. Use a sanding block for better control on flat surfaces.
What are the Best Smoothing Techniques for PLA?
Sanding is the most accessible technique. Start with 400-grit and move up to 1000 grit for a matte-to-satin finish. Wet sanding is preferred because it keeps the PLA cool and avoids melting.
For more advanced users, chemical smoothing with ethyl acetate vapor is a proven option. It softens the surface and allows layers to blend. Use a sealed chamber, low volume of liquid, and proper PPE to avoid inhalation or skin exposure. This method is especially useful when sanding is impractical, such as with complex geometries or internal cavities.
How Can You Paint PLA Parts Effectively?
PLA’s surface properties accept most common paints, but preparation is key.
Begin by lightly sanding your object with 400–600 grit sandpaper. Then apply a filler-primer in multiple thin coats, sanding lightly between applications. This fills surface pores and ensures even coverage.
Acrylic hobby paints work well on PLA and bond easily without warping the plastic. For best results:
- Let the base coat dry for 24 hours before applying additional layers.
- Add a clear topcoat for durability and finish consistency.
- Avoid high-heat paint types unless the PLA has been annealed to resist softening.
How Does Annealing Improve PLA Strength?
Yes, annealing enhances the structural performance of PLA prints, especially for parts that require better temperature or impact resistance. While PLA already offers decent rigidity, its glass transition temperature is relatively low. That means printed parts can deform when left in hot environments, like a car dashboard or enclosed cabinet with poor airflow.
Annealing increases heat deflection temperature (HDT) and reduces internal stress by promoting polymer chain alignment. Here’s how to do it:
- Preheat your oven to 90 °C (about 195 °F).
- Place the PLA part on a flat, stable surface like a ceramic tile.
- Bake for 30 minutes, then turn off the heat and allow it to cool slowly inside the oven.
During this process, tensile strength may increase by 10–15%, and HDT can rise from around 60 °C to roughly 105 °C. Expect minor shrinkage or dimensional change, so it’s wise to run tests first, especially if your print includes tight tolerances or assembly features.
How To Make PLA Parts Stronger?
If you need to make your PLA parts stronger, then increase your infill density. Raising it to 40 percent or more using a gyroid or cubic pattern improves internal support while keeping weight manageable. Thicker wall settings, especially more perimeter lines, can also significantly improve impact resistance and interlayer adhesion. These tweaks often make a bigger difference than the material itself.
Filament storage is also key. Printing with wet filament weakens layer bonding. Using a filament-dry enclosure ensures consistent extrusion and better bonding across layers. For extra strength and higher thermal tolerance, annealing your prints is a good option. Heat parts at 90 °C for 30 minutes and let them cool slowly. This alters the internal structure of polylactic acid, boosting its tensile properties and increasing its glass transition temperature.
If you need better durability out of the box, switching to a PLA+ blend is a strong choice. These materials are modified for better toughness while retaining PLA’s benefits like printability, dimensional accuracy, and lower bed temperature requirements.
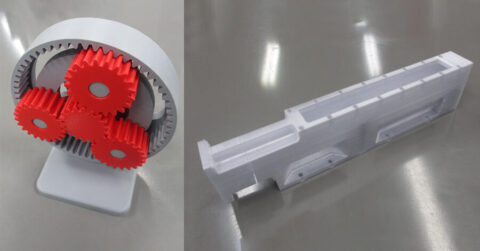
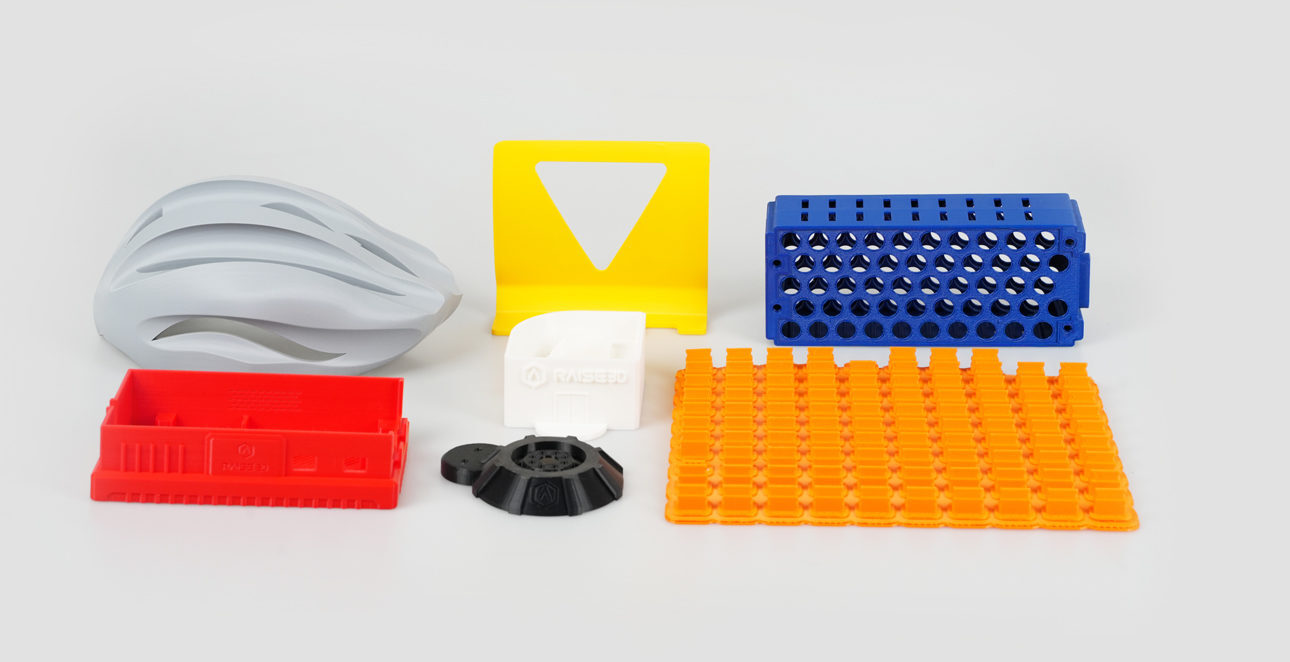
What Can You Make with PLA Filament?
You can use PLA filament for practical objects, functional designs, and decorative prototypes across both personal and industrial applications.
For everyday users, printing with PLA opens the door to custom items like smartphone stands, drawer organizers, mechanical toys, or household gadgets. It’s particularly popular among beginners and hobbyists because it sticks well to most build surfaces and delivers solid print quality without needing a heated enclosure.
On the industrial side, designers rely on PLA for form and fit testing, particularly in early prototyping phases. Since it’s made from renewable resources like corn starch or sugarcane, it’s also preferred for projects where sustainability is a consideration. It’s commonly used to create casing models, fixtures, or even sacrificial patterns for foundry work using investment casting methods.
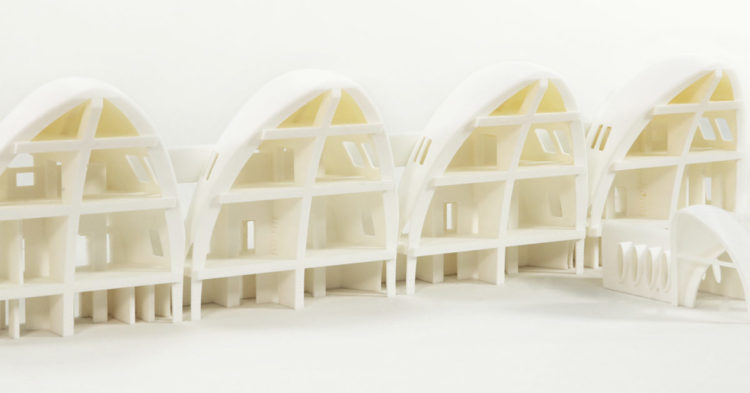
What are the Most Common PLA Applications?
Once you’re comfortable with the basics of printing PLA, it’s worth exploring just how many different things you can make with it. Although it’s often considered an entry-level material, its consistent results and wide compatibility with FDM printers make it a staple in many advanced setups too.
Here are several of the most common use cases:
- Toys and models: PLA’s bright colors, low warping, and smooth finish make it ideal for producing articulated toys, miniature figures, or stylized parts.
- Prototypes: For fast design validation, you can print components that test tolerances, shape, or assembly fit before moving to more advanced materials.
- Tools and jigs: Many light-duty tools such as alignment blocks or calibration aids can be printed in PLA to streamline workshop or lab setups.
- Decorative items: You can create vases, lighting enclosures, or seasonal decorations, especially when paired with metallic or silk-style filaments for visual impact.
- Sacrificial casting patterns: PLA burns out cleanly in kiln or oven setups, making it ideal for single-use investment casting molds in jewelry or metalworking.
Is PLA 3D Printing Expensive?
Compared to many other 3D printing materials, PLA offers an affordable entry point. Standard PLA filament typically ranges between €20 and €70 per kilogram, with some basic spools available for even less from bulk suppliers. If you’re interested in filled variants—such as PLA infused with wood fibers, metals, or carbon, the price can rise to €60–€120 per kilogram. These specialty filaments offer visual or performance benefits but come at a premium.
When you account for running costs, PLA remains economical. Its low extrusion and bed temperatures (about 200 °C nozzle and 50 °C heated bed) reduce energy consumption significantly, up to 15% less than what you’d expect with higher-temp materials like ABS or nylon. This difference adds up over time, especially in production environments.
PLA is also easier on your hardware. Many 3D printers don’t require an enclosure or upgraded power supply when printing with PLA, making it a budget-friendly material choice that balances print quality, safety, and accessibility.
How Does PLA Compare to Other 3D Printing Filaments?
PLA is known for its low melting point, dimensional accuracy, and ease of printing. But depending on your project’s needs, other materials like ABS, PETG, or nylon might offer better performance.
In terms of affordability, PLA wins. It’s cheaper to buy and less demanding on your 3D printer’s hardware requirements. It prints reliably without an enclosure, sticks well to most build surfaces like PEI sheets or blue tape, and offers excellent visual results straight from the print bed. Its base material, polylactic acid, is derived from corn starch or sugarcane, adding a sustainability benefit that other filaments lack.
However, PLA does have lower heat resistance and can become brittle under mechanical stress. For applications needing flexibility or impact resistance, PETG and ABS often perform better. Nylon, although pricier and more difficult to print, excels in load-bearing parts due to its strength and durability.
How Does PLA Compare to ABS?
PLA is easier to print, making it ideal for beginners. It adheres well to a variety of build plates and doesn’t require a heated enclosure. Its lower printing temperature and reduced warping make it highly predictable in use.
ABS, on the other hand, is tougher. It boasts a significantly higher impact resistance (Izod ≈ 15 kJ/m² versus PLA’s ~4 kJ/m²). That makes it more suitable for functional prototypes, automotive parts, or enclosures that may experience mechanical stress. However, printing with ABS involves more setup, like maintaining a 240 °C extruder temperature and using an enclosure to minimize warping.
The table below outlines key differences between the two:
| Property | PLA | ABS |
| Printability | Easy | Moderate to Difficult |
| Nozzle Temperature | ~200 °C | ~240 °C |
| Heated Bed Requirement | ~50 °C | ~100 °C |
| Impact Resistance | ~4 kJ/m² | ~15 kJ/m² |
| Warping Tendency | Low | High |
| Applications | Toys, Prototypes, Decor | Tools, Enclosures, Housings |
How Does PLA Compare to PETG?
If you’re deciding between PLA and PETG for your next project, you need to weigh ease of use against performance. PETG is often favored for prints that require better impact resistance, flexibility, and light chemical resistance, yet it still maintains printability close to PLA. You’ll notice it behaves like PET in strength but shares PLA’s accessibility, making it a popular option among intermediate users.
However, printing PETG comes with trade-offs. It typically requires a higher nozzle temperature around 230 °C and may need a heated bed around 70–80 °C. It also tends to string more, especially if your retraction settings or fan speed aren’t calibrated properly. PLA, in contrast, offers cleaner finishes, lower energy consumption, and more predictable interlayer adhesion.
Here’s a direct comparison across six key factors:
| Property | PLA | PETG |
| Printability | Easy for beginners | Moderate |
| Nozzle Temperature | ~200 °C | ~230 °C |
| Bed Temperature | ~60 °C | ~80 °C |
| Flexibility | Low | Moderate |
| Stringing Tendency | Low | High |
| Impact Resistance | Moderate (~4 kJ/m²) | Higher (~8–10 kJ/m²) |
How Does PLA Compare to Nylon?
Moving from PLA to nylon takes you into a different class of 3D printing materials. Nylon is valued for its toughness, high impact resistance, and excellent mechanical properties, but it requires precise control over both environmental conditions and hardware.
PLA is simpler. You can print PLA without a full enclosure, and it adheres well to most build plates with basic solutions like blue tape or a glue stick. Nylon, however, absorbs ambient moisture rapidly and warps without stable temperature control. You’ll likely need a dry box, enclosure, and reinforced build surface to ensure reliable results. Nylon also prints hotter, with extrusion temperatures typically above 250 °C.
Here’s how both filaments compare across major categories:
| Property | PLA | Nylon |
| Printability | Easy | Difficult |
| Nozzle Temperature | ~200 °C | ~250–270 °C |
| Bed Temperature | ~60 °C | ~90–110 °C |
| Moisture Sensitivity | Moderate | Very High |
| Impact Resistance | Moderate (~4 kJ/m²) | Very High (~15 kJ/m²) |
| Flexibility | Low | High |
Can PLA Be Used with Support Materials Like PVA?
Yes, PLA is compatible with dissolvable support materials like PVA or BVOH in multi-material 3D printing setups. If you’re working with dual-extrusion 3D printers, these water-soluble filaments can provide clean, easy-to-remove support structures for complex overhangs, internal cavities, and articulated models.
To ensure smooth results, set your support nozzle temperature about 10 °C lower than your main PLA nozzle to prevent clogging or heat creep. Most slicer settings allow this fine-tuning. You’ll also want to use proper retraction distance and speed to avoid stringing between the two materials.
PVA and BVOH dissolve in warm water, which makes post-processing safe and mess-free. Just make sure your filament is kept dry during storage and printing. High moisture levels can cause poor extrusion and weakened supports.
How Should You Store and Maintain PLA Filament?
If you’ve ever heard crackling during printing with PLA, it’s likely due to internal moisture boiling off as it moves through the hot end.
To avoid these issues, aim for a storage environment below 15% relative humidity. The easiest method is to keep your filament in an airtight container. Inside that box, include at least 200 grams of silica gel per kilogram of filament. You’ll also want to regenerate your desiccant every three months by drying it at 120 °C to maintain performance. This keeps the drying cycle consistent and extends the shelf life of your materials.
Poor filament care leads to artifacts, inconsistent extrusion, and even nozzle clogs. You might notice increased stringing or brittleness if the filament absorbs too much moisture. Over time, moisture buildup degrades PLA’s ability to retain accuracy, especially for parts with tight dimensional tolerances.
Keep your spools sealed when not in use, and use a dry box during longer print jobs. These small habits preserve mechanical properties and help you avoid problems before they start. Whether you’re prototyping or printing toys, proper filament storage ensures better adhesion, fewer defects, and longer-lasting products. It also reduces waste and improves results across different environments and applications.
How Safe Is It to Use PLA for 3D Printing?
PLA is generally considered one of the safest 3D printing materials to use. It emits very low levels of volatile organic compounds (VOCs), primarily lactide, which is a byproduct of its base material, polylactic acid derived from corn starch or sugarcane. When printing with PLA using a 0.4 mm nozzle, emissions stay below 0.5 mg/hr, which falls well within indoor air safety standards. Still, it’s recommended that you ventilate your workspace properly to reduce accumulation of airborne particles, especially if you print frequently.
Despite its chemical safety, there are physical hazards. A heated bed running at 60 °C, a hot nozzle at 200 °C, and rapidly moving printer components can cause burns or pinching injuries. Always follow manufacturer guarding guidelines, avoid reaching into the machine mid-print, and give hot surfaces time to cool before handling your items.
Conclusion
If you’re starting or growing in 3D printing, PLA probably feels like the go-to choice, and honestly, for good reason. It’s affordable, simple to use, and doesn’t ask much from your printer in terms of setup or hardware. Whether you’re printing toys, prototypes, or just experimenting with your first 3D model, PLA filament gives you solid print quality without all the fuss.
We’ve walked through how PLA stacks up against PETG and nylon, why storing it right really matters, and how you can use support materials like PVA to take your designs further. You’ve also seen that while it’s one of the safest 3D printing materials around, it still deserves some basic safety practices, like ventilating your space and staying clear of hot parts.
If you understand your settings, keep moisture in check, and learn how PLA behaves during printing, you’re set up for success. PLA might be made from crops like corn or sugarcane, but in your hands, it becomes everything from tools to toys to art.
That’s the beauty of 3D printing with PLA, you get reliability, creativity, and fun, all in one spool.


