Reading Time: 14 Minutes
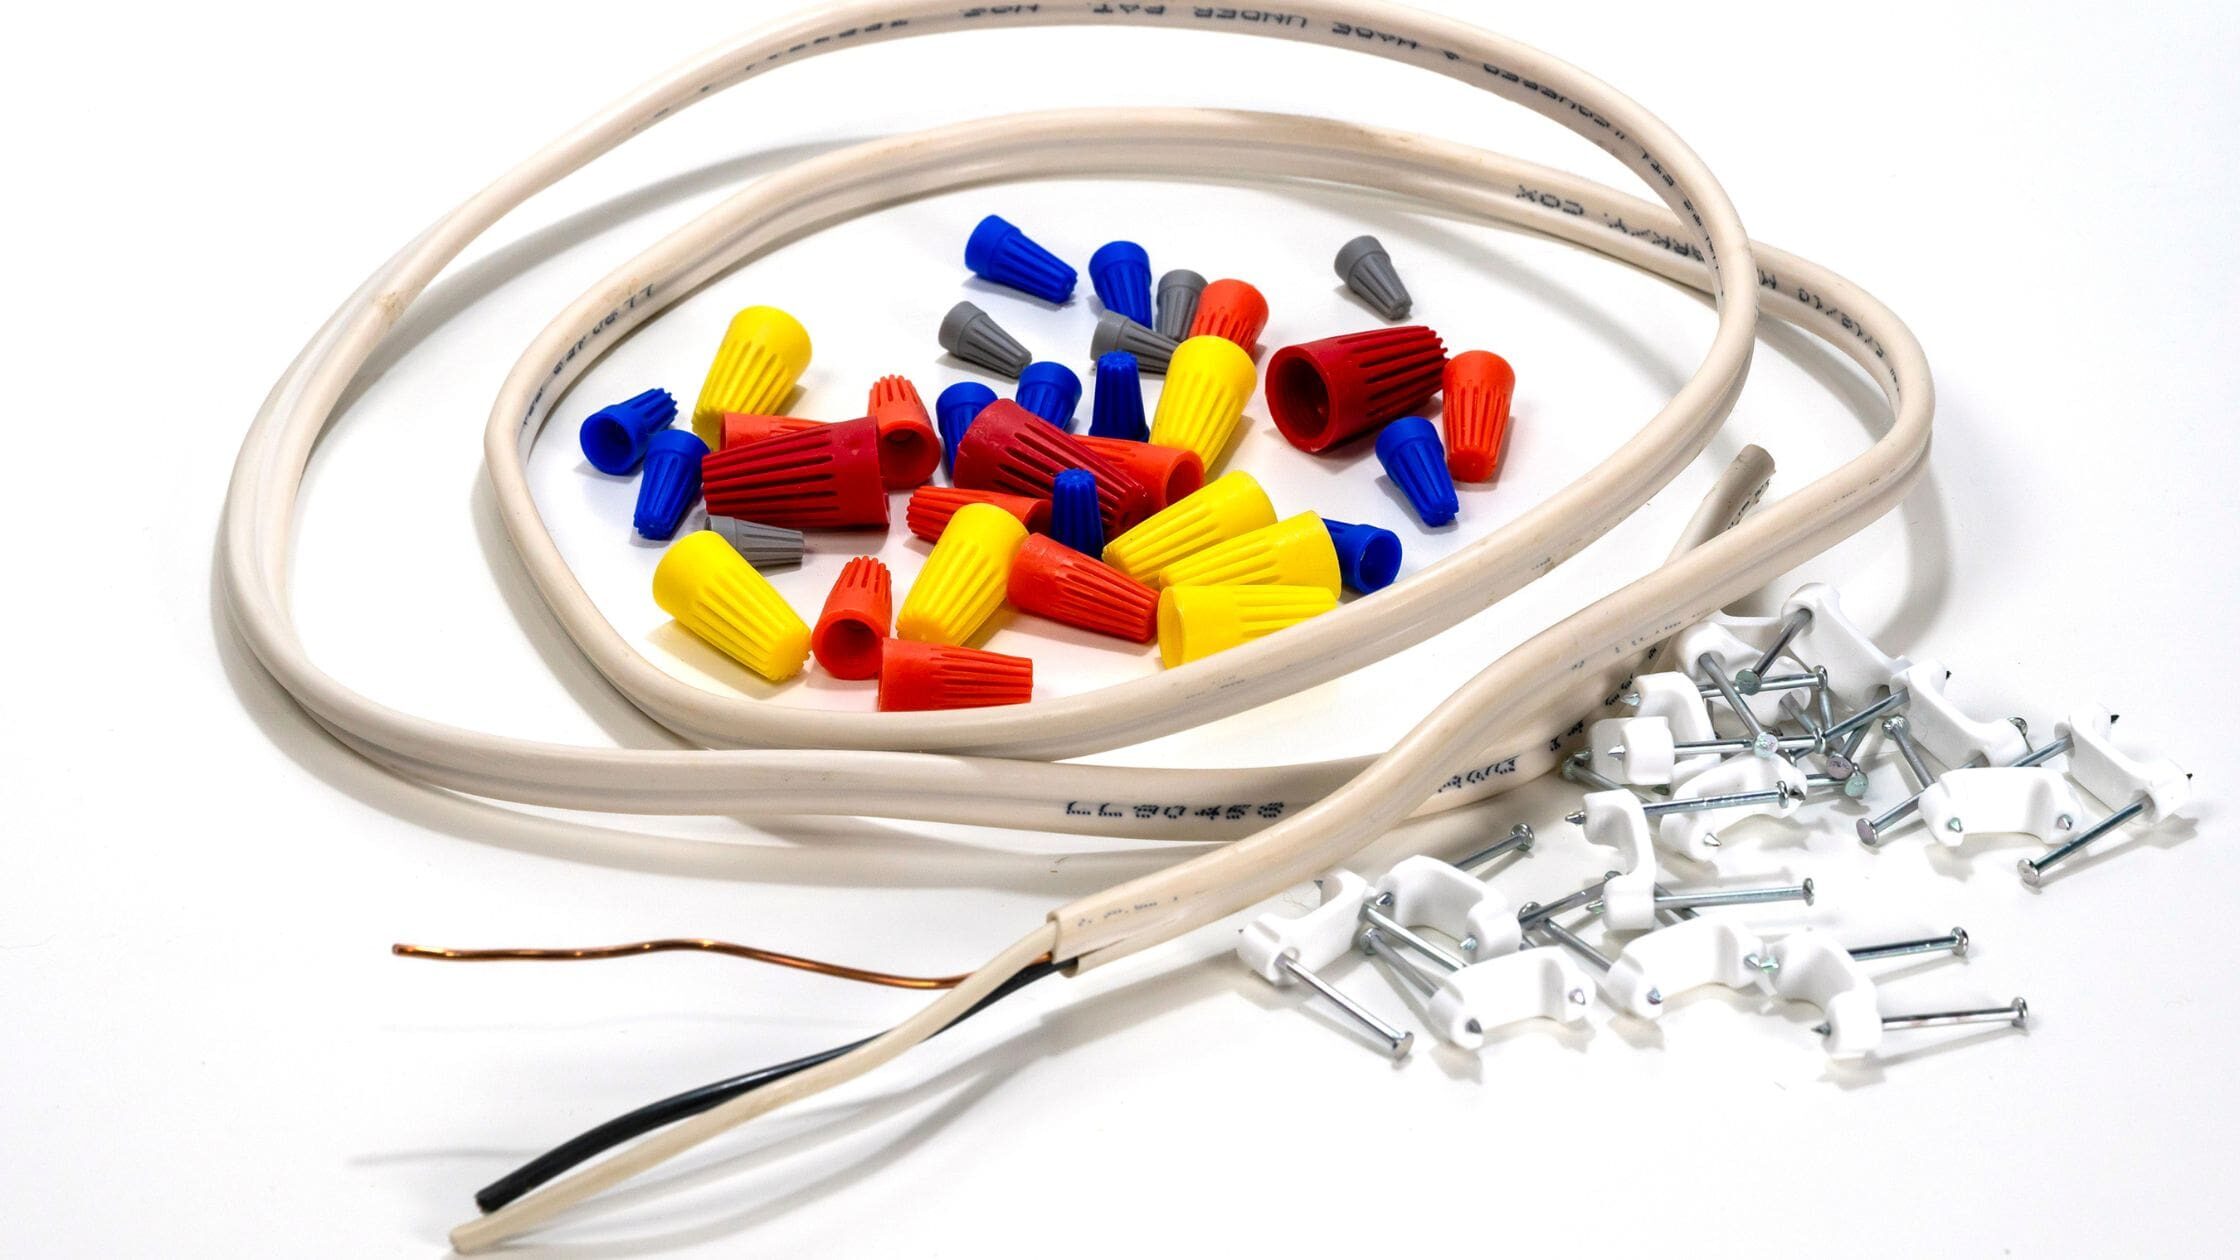
We’ve all been there, you need a fastener or cable clip that actually fits, clicks, holds, and survives real use. Maybe it’s for a harness snaking through a compact enclosure. Maybe it’s for a wire bundle that gets rattled all day in a high-vibration setup. Either way, you need it fast, and you need it to work. That’s where things usually get frustrating.
Injection molding? Sure, it’s great for mass production, but not when you’re stuck waiting on tooling just to test one tweak. Machining? It struggles with tiny, intricate features like snap arms or nested clip paths, and eats up budget quickly. You either lose speed or flexibility, and most of the time, it’s both.
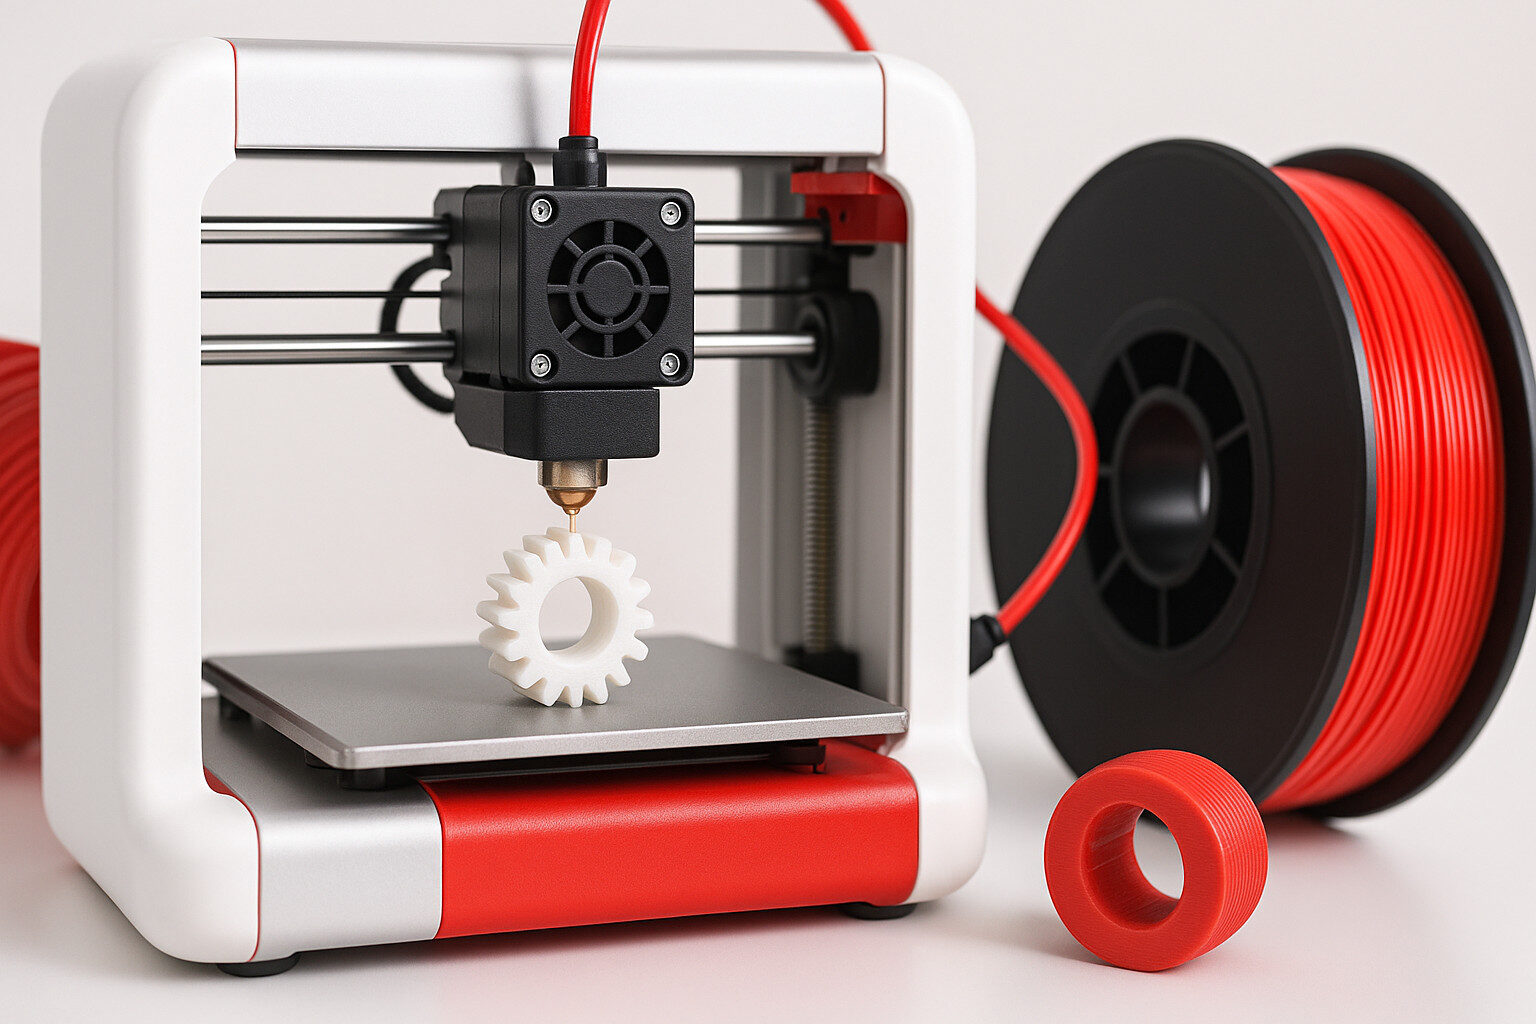
But here’s where things start to shift. With high-resolution resin printing, you’re no longer boxed in by those trade-offs. You can go from idea to testable part in under 24 hours, with surface detail sharp enough to support living hinges, tight-click geometry, and even stress-critical flex zones. And since the resins now match real-world performance, you’re not just prototyping, you’re building parts that hold up in real use.
In this article, we’ll focus on what makes these cable fasteners print-ready, production-worthy, and how you can move from sketch to snap-fit clip without the usual manufacturing headaches.
What are the Performance Requirements for Cable Clips & Fasteners?
Performance requirements are what define whether a fastener will work in its intended environment. They reflect how the part behaves under stress, how precisely it fits, and whether it maintains integrity during operation. Without meeting these benchmarks, your clip might look good in CAD and still fail in real-world use.
In the context of resin 3D printing, these requirements become even more critical. You’re working with layer-based processes and resin chemistries that vary in strength and ductility. That means you need to match your design, material, and printing method to specific targets.
Let’s break down what those targets are.
- High Tensile and Flexural Strength
When a cable fastener bends or flexes, its structural integrity must remain intact. Tensile strength refers to how much pulling force the part can withstand before it begins to stretch or snap. Flexural strength relates to how the part performs under bending forces. These traits are essential if your clip includes a cantilevered snap arm, latch, or any portion expected to bend during use.
Parts printed with high-performance resins maintain their form under load, even when subjected to stress over time. This minimizes the risk of creep, where the clip might slowly deform and loosen its grip on the cable.
- Impact and Fatigue Resistance
Every time you open or close a snap-fit, you’re applying repeated force. In industrial environments, clips are often subject to vibration, bending, and torsion from nearby motion or handling. Fatigue resistance measures a part’s ability to survive this repeated stress without cracking or weakening.
Similarly, impact resistance protects the clip from sudden blows, think tool contact during installation or components bumping against each other in transport. A fastener that can’t handle impact or fatigue will degrade over time, increasing the chance of wire damage or disconnection.
- Smooth Surface Finish and Dimensional Accuracy
You might not think of surface texture as a performance trait, but when you’re dealing with electrical cables, it absolutely is. A rough surface can abrade insulation over time, especially in parts that vibrate or move. Surface finish also affects how well the part snaps into place, whether it glides during insertion, or if it scrapes and catches.
Dimensional accuracy is just as important. If your printed part is even slightly out of spec, it may not fit into a predesigned housing or hold wires securely. Tight tolerances ensure that multiple copies of the same design perform identically, critical if you’re planning to scale from prototype to low-volume production without switching technologies.
What are the Different 3D-Printing Technologies Suitable for Cable Fasteners and Clicks (What’s on the Market)?
When you’re working on cable fasteners and snap-fit clicks, selecting the right 3D-printing technology can dramatically affect performance, production time, and downstream costs. These parts need to be strong, precise, and repeatable, qualities not all technologies can provide equally.
Now, let’s go deeper into what makes each of these technologies suitable, or unsuitable depending on your fastener design and production goals.
- FDM / FFF: This extrusion-based method works well for basic, large-format prototypes. It’s affordable and broadly accessible. But for high-detail clips or snap arms, the coarse resolution and visible layers often interfere with fit and function.
- SLS / MJF: Powder-bed fusion platforms print with nylon-based materials that are strong and isotropic. This is helpful when strength is your top priority. However, the rough surface finish and per-part costs make it less practical for short runs of small fasteners that need tactile precision.
- SLA / LCD: Resin-based SLA and LCD printers can achieve very fine detail. For cable clips with tight tolerances or smooth engagement zones, this is a step up. But thin parts made with SLA materials can be brittle, and the long post-processing cycle slows turnaround time.
- DLS (Carbon): Carbon’s DLS approach enables fast, high-performance prints with impressive material properties. Still, the high entry cost and vendor-locked resin ecosystem make it more suitable for large companies running frequent, high-value production cycles.
- DLP (Raise3D DF2): This is where DLP stands out. It combines resolution, speed, and mechanical integrity in one platform. With Raise3D’s DF2, you can print durable, accurate parts using open-material options that include engineering-grade resins. Unlike SLA, DLP prints entire layers at once, offering much faster print times. It’s faster than SLA, comparable to LCD, and the exact speed depends on resin choice and exposure settings.
Here is a compact comparison of the most relevant 3D-printing methods currently used for this category:
| Technology | Typical Materials | Strengths | Weaknesses (for small fasteners) |
| FDM / FFF (Stratasys) | ABS, Nylon, TPU | Low-cost, large build volume | Visible layer lines, limited fine detail |
| SLS / MJF (3D Systems, HP) | PA12, PA11, TPU | Tough nylon parts, isotropic strength | Grainy finish, higher unit cost for low volume |
| SLA / LCD (Formlabs) | Tough 2000, Durable | Smooth surfaces, good resolution | Longer post-cure, brittle in thin sections |
| DLS (Carbon) | RPU 70, EPX 82 | Excellent mechanical performance | High cost, closed subscription model |
| DLP (Raise3D DF2) | IND417, 3843, Tough 2K | Strong detail-mechanical balance, fast | No notable weakness in low-to-mid volume usage |
Why Choose DLP (and DF2) for Cable-Management Hardware
At the heart of the DF2 is its 1440p light engine, which enables detailed part resolution across the entire build plate. This is supported by a proprietary contour compensation system that actively corrects image distortion, delivering repeatable tolerances as tight as ±0.1 mm, even on flexible components like snap arms. These tolerances aren’t theoretical. They’re consistently met thanks to frame-size stability, high-contrast projection, and anti-aliasing algorithms optimized for thin walls and micro-features.
What truly sets the DF2 apart, though, is its closed-loop build process. Each step, from printing to washing to curing, is tied together using RFID traceability. Every resin cartridge, build plate, and process parameter is automatically tracked. This is critical if you’re working in regulated sectors like automotive or aerospace, where documentation and consistency aren’t just nice to have, they’re mandatory.
This traceable, automated workflow simplifies the print process and minimizes human error. It also improves throughput. You can go from STL to a functional cable clip in less than 24 hours. That’s a huge shift compared to outsourcing, where you’re often waiting three to five business days just for a test print.
Air-Peel Platform & Heavy-Duty Z-Axis: Reliable, High-Precision Builds
Mechanical reliability in 3D printing often comes down to what happens between layers. With flexible cable clips or snap-fit arms, the way layers are separated during printing can make or break a part, literally. Many resin printers rely on suction-based systems, which generate high peel forces that can damage thin sections or cause failed prints. Raise3D’s DF2 addresses this issue with its Air-Peel platform and a reinforced Z-axis structure designed for industrial-grade loads.
Air-Peel reduces the mechanical stress that typically occurs when separating each printed layer from the vat film. This becomes especially important when printing parts with embedded flex zones or snap arms that could otherwise warp, tear, or delaminate. Combined with the heavy-duty Z-axis, the DF2 offers not only better print stability but also higher throughput and part accuracy, essential for producing nested clips or multi-catch assemblies.
Key Features:
- Air-Peel Layer Separation: Applies reduced peel force to each layer, minimizing stress on the part during the lift phase.
- Heavy-Duty Z-Axis Assembly: Built to support up to 200 kg of static load, ensuring vertical stability even for tall or densely packed prints.
- Large-Format Part Support: Maintains consistent precision across prints weighing up to 10 kg without introducing Z-banding or surface irregularities.
Benefits:
- Reduces the chance of layer delamination or tearing, especially in thin snap arms and fasteners with embedded flex zones
- Maintains dimensional accuracy on tall prints and high-density batches.
- Increases first-print success rate across complex geometries and rigid-flex parts.
Comparison to Other Systems:
- Many desktop resin printers use suction-based peeling platforms and lightweight Z-guidance systems that can’t handle large or complex builds reliably.
- The DF2’s Air-Peel and reinforced Z-axis design ensure smoother detachment, better vertical accuracy, and consistent performance, even on demanding, flexible hardware geometries.
ideaMaker Print Optimizations: Boosting Print Success
Raise3D’s ideaMaker software includes intelligent automation features that minimize human error and streamline the entire print preparation process, especially helpful for small, geometry-sensitive parts like cable fasteners.
These tools are designed not just to save time, but also to improve your chances of a successful first print by adapting support, orientation, and risk detection automatically.
Key Features:
- Auto Support: Generates support structures based on geometry, ensuring delicate features are properly reinforced with minimal contact.
- Auto Orientation: Automatically positions parts to reduce warping and maximize adhesion, ideal for snap-fit parts with curved or cantilevered sections.
- Suction Cup Detection: Flags areas of geometry that may trap air or resist peel cycles, helping you prevent print failures before they happen.
Benefits:
- Reduces print prep time by automating repetitive tasks.
- Improves first-time success rate, even on detailed or flexible geometries.
- Enables less experienced users to prepare complex parts without advanced training.
- Shifts engineering focus from setup to design refinement.
RFID-Powered Traceable Workflow: Confidence & Compliance
When your application involves strict documentation or repeatable production, traceability becomes just as important as print accuracy. Raise3D’s DF2 integrates RFID-based tracking into the entire workflow, from the build plate to the resin cartridge to post-processing stations, creating a seamless, auditable chain of custody.
Key Features:
- RFID-Tagged Build Plate: Automatically identifies job-specific configuration, linking print data to physical components.
- RFID-Tagged Resin Cartridge: Ensures the correct material is used for each print, reducing the risk of mismatch or contamination.
- Automated Parameter Loading: Once a resin is detected, DF2 pre-loads, the correct print recipe, wash settings in DF Wash, and cure settings in DF Cure
Benefits:
- Prevents manual input mistakes that can lead to failed prints or off-spec parts.
- Delivers consistent results across repeated builds.
- Simplifies traceability for automotive Tier-1 documentation, aerospace component validation, and medical device prototypes
- Reduces operator training time through guided workflows.
- Supports regulated industries with a built-in compliance-friendly process.
Overall Comparison
This section outlines how DF2’s integrated features impact accuracy, reliability, and efficiency when printing cable fasteners and snap-fit hardware.
Each component contributes to a smoother workflow, fewer failed prints, and more precise output, especially when you’re dealing with complex flex zones, tight tolerances, or nested batches. The comparison below highlights what each key feature delivers and why it matters in this specific application.
| DF2 Feature | Concrete Data / Benefit | Why it Matters for Cable Clips & Fasteners | Advantage vs. Alt-Technologies |
| Industrial-grade 1440p light engine (Texas Instruments DMD) + Contour Compensation & Anti-Aliasing | Pixel resolution = 2,560 × 1,440; frame-size error ≤ ±0.1 mm; distortion rate ≤ 0.1% | Delivers ±0.1 mm tolerances on small features like thin snap arms or multi-catch clip zones | FDM/SLS typically ±0.25 mm; Carbon DLS rates ±0.2–0.25 mm |
| Air-Peel separation system | Reduces peel forces by over 60% vs. conventional resin platforms | Protects delicate features from tearing during lift cycles | SLA and LCD printers often require thicker supports and rafts to survive peel force |
| Heavy-duty Z-axis | Rated for 200 kg static load; tested for builds up to 10 kg | Enables printing of tall, densely packed batches or tooling nests without Z-wobble or delamination | Desktop SLA/DLP units often cap out at ~1 kg builds, limiting throughput |
| Integrated RFID traceable workflow | Auto-recognition of resin type and build plate; pre-loaded print, wash, and cure settings | Reduces material mismatch errors, supports batch-to-batch consistency, and shortens operator setup time | Competing systems often require manual profile entry, raising error risk |
| ideaMaker automations | Auto-Support, Auto-Orientation, Suction-Cup Detection | Improves first-time print success and speeds file prep by 30–40% | Generic slicers lack peel-risk detection and intelligent feature alignment |
| Open-material but verified resin platform | Supports Henkel, BASF, Forward AM; adjustable material profiles | Lets you mix high-impact, ESD-safe, or high-temperature materials across one workflow | Carbon and Formlabs restrict access to third-party or custom materials |
| Surface finish | Layer resolution <25 microns; zero powder grain | Protects cable insulation from abrasion; enhances snap-fit feel | MJF/SLS requires tumbling and dyeing to get comparable finish smoothness |
| Throughput gain | In-house DF2 parts ready in <24 hours; outsourced equivalents take 3–5 days | Shorter development cycles reduce ECO delays and IP exposure | Outsourcing adds shipping, handling, and confidentiality risks |
Raise3D DF2 Hardware & Workflow Overview
The strength of the DF2 system is not only in its mechanical design or printing speed, but in how it manages the entire process from start to finish. Each part of the system is built to reduce error, enforce consistency, and simplify daily use, especially when printing functional components like cable fasteners that can’t afford failure.
Integrated Workflow Components:
- DF2 Printer: Industrial DLP system with high-resolution optics and an Air-Peel layer separation system.
- DF Wash: Automated resin removal with variable-speed agitation to avoid over-cleaning flex arms and delicate features.
- DF Cure: Dual-wavelength curing station (385 nm and 405 nm) optimized for resins from Henkel, Forward AM, and Raise3D.
ideaMaker Plug-ins and Software Tools:
- Auto-Support Generator: Smart support placement that protects functional geometries without creating post-processing headaches.
- Auto Orientation Tool: Optimizes print position based on part shape, stress zones, and peel behavior.
- Suction-Cup Detection: Flags enclosed geometries or surfaces prone to vacuum lock during print cycles.
Open Material Platform:
- Supports major resin suppliers with pre-validated profiles.
- Lets you adjust cure settings for specific mechanical needs.
- Compatible with high-impact, heat-resistant, or specialty-grade formulations.
Engineering Resin Selection Guide
When printing cable fasteners and snap-fit components, your choice of resin directly influences the performance, lifespan, and consistency of the final part. Not every resin is suitable for flexible arms or tight tolerance zones, and not every resin can balance cost, printability, and durability at once. That’s why it’s important to understand what materials work best for functional clips, and how they compare across platforms.
Typical engineering-grade resins for this application need to offer a combination of tensile strength, elongation, and fatigue resistance. If the resin is too brittle, the clip may crack under stress. If it’s too soft, it may lose holding force over time. For cable clips in particular, fatigue life and surface finish are just as critical as static strength.
Raise3D & Co-Branded Resins
Raise3D offers a curated group of high-performance resins optimized for the DF2 platform, each with a unique balance of strength, flexibility, and post-processing efficiency. These options allow you to match resin selection to your specific application, whether you’re optimizing for final part durability or speeding up your prototype loop.
Resin Options and Best-Fit Use Cases:
- Henkel Loctite IND417 (Best Choice for Production Clips)
- Best Fit: High-load, functional cable fasteners and click features
- Key Properties: 55 MPa flexural strength, 30% elongation, outstanding fatigue life
- Competitive Edge: Delivers mechanical strength similar to MJF PA12 while offering superior surface detail and post-process simplicity
- Loctite 3D 3843
- Best Fit: Latches and fasteners that require impact resistance
- Key Properties: 80 J/m impact resistance, low wear over time
- Competitive Edge: More cost-effective and UV-stable than Carbon’s RPU 70, with excellent dimensional retention
- Raise3D Tough 2K
- Best Fit: Early-stage prototypes and cost-sensitive short runs
- Key Properties: 45 MPa tensile strength, fast and easy post-cure cycle
- Competitive Edge: Delivers performance similar to Formlabs Tough 2000, but at 30–40% lower material cost per part
Competitor Materials vs. Raise3D
While many engineers are familiar with materials like PA12, RPU 70, and Tough 2000, those materials often come with compromises, either in downstream processing, license fees, or surface finish.
Below is a breakdown of how Raise3D’s material ecosystem compares with common alternatives from competitors.
| Material | Key Published Properties* | Post-Processing Burden / Hidden Costs | How Raise3D Resin Beats It |
| HP PA12 (MJF) | Tensile: 48 MPa; Elongation: ~20%; surface roughness: ~10–12 µm | Requires bead blasting and dyeing to smooth surface; nylon powder is hygroscopic and warps without sealing | IND417 matches strength and provides 3× smoother finish out of cure, no powder handling required |
| HP PA11 (Bio-Based) | Tensile: 45 MPa; Elongation: 40% | Similar finishing steps as PA12; 1.3–1.5× higher raw material cost | 3843 offers equivalent ductility, lower cost, and color-neutral prints ideal for inspection |
| Carbon RPU 70 | Tensile: 79 MPa; Modulus: 2.2 GPa; HDT: 121 °C | Printer subscription (~$20K/year); resin ≈ $350/L | IND417 delivers comparable modulus (2.0 GPa) and thermal resistance without license or high hardware cost |
| Carbon EPX 82 | Tg 120 °C; brittle in thin-wall parts | Requires 4-hour post-bake at 130 °C; high resin cost | 3843 cures in 15 minutes and maintains ductility for snap features |
| Formlabs Tough 2000 | Tensile: 46 MPa; Elongation: 15%; HDT: 53 °C | Requires 2× 60-minute UV cure; higher layer heights (25–50 µm) | Tough 2K costs 30% less, cures faster, and offers smoother DLP-native surface finish |
| Stratasys ABS-M30 (FDM) | Tensile: 32 MPa; limited interlayer adhesion | Requires vapor polish or sanding for smoothness | DF2 prints isotropic parts with no delamination and ready-to-use surface finish |
Design & Printing Best Practices (Practical Tips)
Printing cable fasteners with resin requires more than just material selection, it’s also about how you approach geometry, orientation, and finishing. Because these parts often contain flexible arms, snap-fit features, and embedded tension zones, subtle design choices can make the difference between reliable function and early failure.
Here are several practical guidelines that will help you get the most out of your DF2 setup and chosen material.
- Snap-Fit Geometry: You should aim for a capture clearance of 0.25 to 0.35 mm for reliable engagement without over-stressing the arms. For features that rely on deflection, such as flex tabs or living hinges, fillet all corners with a radius of at least 0.5 mm to prevent crack initiation and improve fatigue life.
- Orientation: Orient clip jaws at a 30–45° angle to the build platform. This setup minimizes peel stress during printing and helps distribute layer lines in a way that maximizes strength along the wear surfaces. Proper orientation also helps reduce the likelihood of cosmetic defects where parts are handled or snapped into place.
- Supports: Use ideaMaker’s Auto-Support feature to generate supports automatically, then adjust with manual blockers as needed. The goal is to maintain clean undercuts and keep support structures away from functional surfaces like snap arms. This improves appearance and reduces post-processing effort while preserving part performance.
- Wall Thickness: For general mechanical stability, you should use a minimum wall thickness of 1.2 mm when working with Raise3D Tough 2K. If you’re printing with a higher modulus resin like IND417, 1.0 mm is acceptable, this gives you more design flexibility without compromising strength.
- Post-Cure Process: To unlock the full mechanical performance of the resin, follow a consistent post-cure sequence: Begin with a 5-minute IPA rinse to remove uncured resin. Follow that with a 10-minute ultrasonic cleaning cycle, and lastly complete the process with a 15-minute cure in DF Cure at 60 °C.
End-to-End Post-Processing Workflow
Once a part leaves the build plate, it’s not finished until it’s washed, cured, and quality-checked. The Raise3D DF2 ecosystem simplifies this with a connected, RFID-based post-processing system that automates and controls every step, ensuring that even the smallest fastener is production-ready.
- RFID-Enabled Setup: When you insert the build plate, the system reads the RFID tag and auto-loads the correct wash and cure parameters based on the resin used. This removes guesswork and ensures the process stays aligned with material requirements.
- DF Wash Unit: Variable-speed agitation prevents damage to delicate features such as living hinges or flex arms. By tailoring intensity to the geometry, the system avoids over-cleaning or fatigue damage.
- DF Cure Station: Uses programmable light exposure at 385 nm and 405 nm to match Henkel resin recipes. This dual-spectrum curing ensures proper cross-linking and dimensional accuracy.
- Quick-Fit QA Jig: Once the part is fully cured, use a quick-fit test fixture to verify snap force consistency. Clip engagement force should fall within ±10% of the spec to pass batch QC.
Case Study – HellermannTyton
When HellermannTyton set out to improve its turnaround time for functional cable fasteners, the main constraint wasn’t design, it was the production loop. Their existing setup relied on external service bureaus using industrial DLP printers, which meant every design change carried a 3–5 day delay. This lag was especially problematic for clips with flexible arms used in tight-space automotive assemblies, where fit and feel often required multiple iterations.
To speed things up, HellermannTyton brought a Raise3D DF2 system in-house, paired with Henkel Loctite IND405 and Tough 2K resins. The result was a dramatic reduction in both lead time and iteration cost. Instead of waiting nearly a week for each revision, their team was able to produce validated samples in less than 24 hours, allowing for same-day testing and faster product evolution.
By leveraging DF2’s RFID-enabled workflow, they also eliminated manual tracking of STL files, resin settings, and cure cycles. This level of automation supported their compliance needs for Tier-1 automotive documentation. Just as important, it gave engineers full control over the print queue, eliminating downtime from external vendor delays and increasing overall project confidence.
Below is a side-by-side breakdown of the transformation:
| Phase | Before DF2 | After DF2 Implementation | Quantified Impact |
| Design Iteration | Outsourced industrial DLP; 3–5 day wait; €120–€150/iteration | In-house DF2; <24 h to functional part; €20–€30/iteration | 4–5× faster loops, 80% cost reduction |
| Material Versatility | Limited to one resin from service provider | Prints with Raise3D Standard White, High Detail, Tough 2K, and Henkel IND405 | Ability to select optimal resin per design |
| Mechanical Performance | FFF prototypes lacked flex strength; only validated fit | DF2 parts passed live bend and pull tests on hose clips | Brought functional testing in-house earlier |
| Workflow Traceability | Manual STL/resin/cure logs | RFID build plate + ideaMaker auto-logs | Ready for Tier-1 PPAP documentation |
| Support & Uptime | External printer downtime was invisible; created risk | Raise3D support <24 h response; internal control of schedule | Increased reliability and engineer confidence |
| Overall Time-to-Market | 4–6 weeks from concept to customer-approved sample | Less than 2 weeks end-to-end | Competitive edge in RFQ cycles |
Cost & ROI Snapshot
Adding in-house resin printing can seem like a capital investment, but for cable fasteners, the return on investment is often faster than expected. DF2 systems offer material and operational savings that quickly offset hardware costs.
Key ROI Drivers:
- Break-even point is reached at around 175 clips per month compared to outsourcing equivalent parts using industrial DLP.
- Unit cost savings range from 40–60% when switching from machined Delrin clips to DF2-printed parts.
- Material cost is 20–35% lower than proprietary DLS and Carbon resins, thanks to Raise3D’s open-material platform.
Getting Started with Raise3D
If you’re ready to build a workflow like HellermannTyton’s, Raise3D offers a streamlined path to get up and running. Whether you’re starting small or scaling up, their onboarding process is designed for practical implementation with minimal downtime.
What You Need to Begin:
- Material Starter Bundle: Includes Raise3D Tough 2K, Henkel IND417, and access to compatible DF2 printing profiles.
- DF2 Access Kit: Comes with RFID-enabled build plate, wash tray, cure tray, and supporting hardware integration.
- On-Site Training and Profile Hand-Off: Raise3D offers tailored workflow training, including:
- ideaMaker automation setup
- print-prep best practices
- support placement for snap features
- post-cure validation
- Optional Application Engineering Package: For teams with unique fastener geometries or material questions, Raise3D can review your design and recommend improvements before print production begins.