Release notes
New requested features and debugging based on user feedback.
New Features
· Slice Settings
1. Added Adaptive Layer Height
This feature can automatically choose the different layer height values for different structures. eg. smaller layer height for details and larger layer height for non-detailed structures, which can produce higher quality/accuracy in prints with a lower print time.
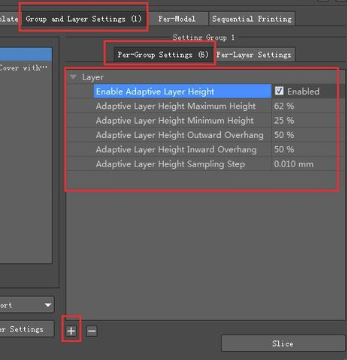
You can enable the feature under Per-Group Settings menu. This can be accessed when in the “Prepare To Slice” window.
Slicing result will be determined by the settings used in the “Per-Group Settings” tab. In this example, the extrusion width is 0.4mm. Using the information from the following image.
The height range is between 0.1mm to 0.248mm. The Inward and Outward Overhang won’t longer than 0.2mm. The sampling precision is 0.01mm. This means from 0.1mm to 0.248mm, each 0.01mm height will be a candidate.

2. Added Layer Height preview mode.
Visual representation for adaptive layer height. Can be viewed by selecting the drop-down in the bottom right of the ‘Preview’ window.
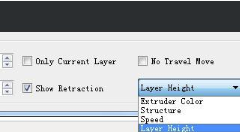
Layer Height Preview Drop Down Selection Location
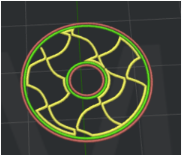
Thinner layer heights are represented by blue tones, and larger layers will be represented by red.
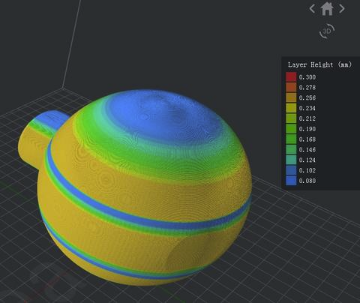
Adaptive Layer Height Slice Preview
3. Added Modifier Menu Icon
Can be used to modify the settings for a portion of a model, or allow you to use a model as support base for other models.

Modifier Option in ideaMaker Menu
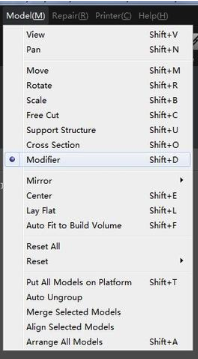
Modifier option in ‘Model’ Drop-Down
Example below: Using modifier to add shells.
Result before using modifier.
Intersecting model to identify modifier area.
Result after Modifier applied to add shells.
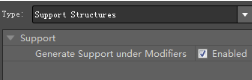
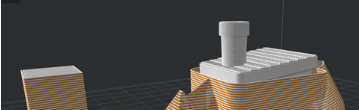
4. Support Structure under Modifiers
Enable Support Structures (located under the Modifiers Settings menu) to create supports underneath the modifier structure.
Example:
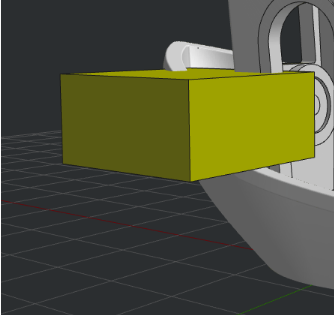
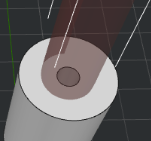
Yellow cube represents the original structure that will be modified
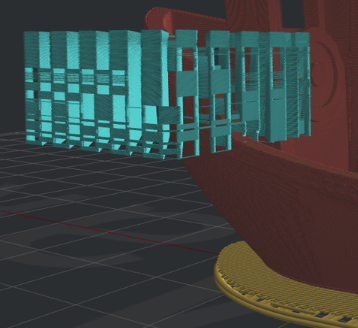
Structure with modifier applied
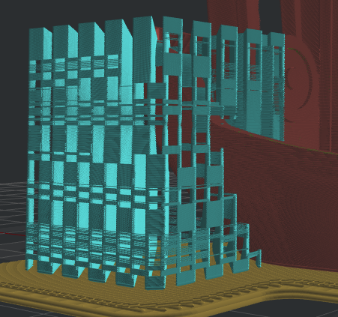
Generate Support Structures under Modifier enabled.
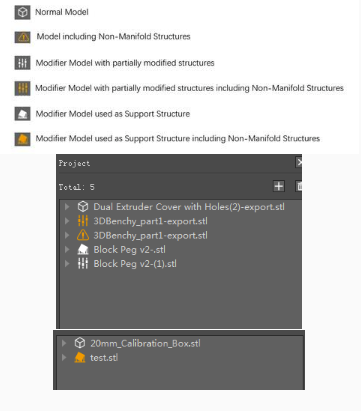
5. Updated icons to show model types in project list.
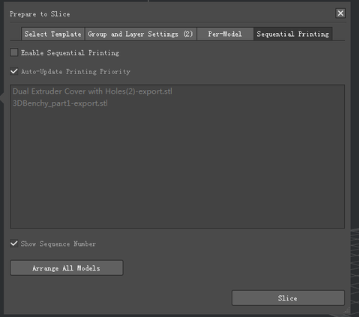
6. Sequential Printing
Sequential Printing will print multiple objects by printing one object completely before moving onto the next.
On completion of an object, the print head will remain in the printing area until the build plate lowers. It will then move to the next printing area, re-home the build plate, and begin printing the next object.
You can enable this feature under Prepare to Slice > Sequential Printing.
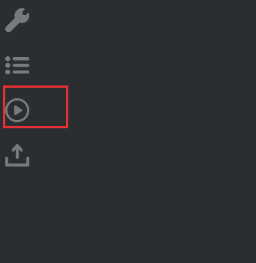
Prepare To Slice icon.
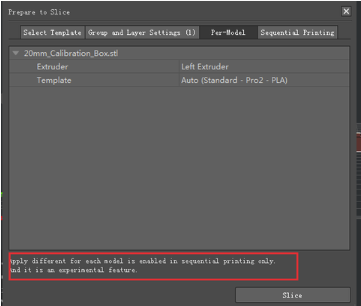
Once Sequential Printing has been enabled, you can choose different print templates for each model under the Per-Model tab.
Note: This feature is still under experimental.
7. Added printer settings for Sequential Printing.
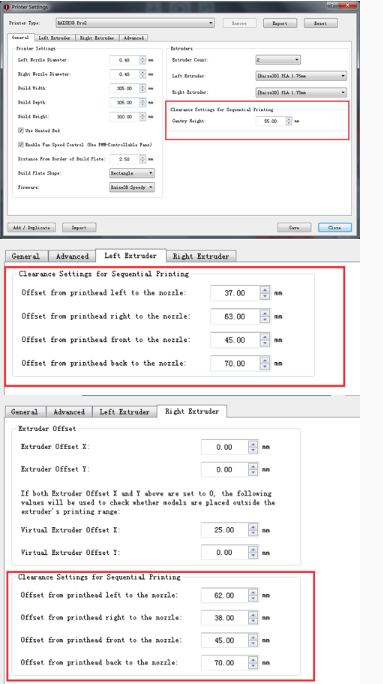
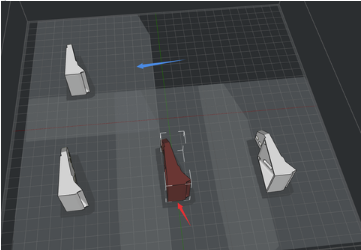
The red arrow will point to the model and platform printing area.
The blue arrow will point to the grey print area for the next model. This is where the printer will move once the previous print is completed. Ensure that there are no other objects in the moving area between objects.
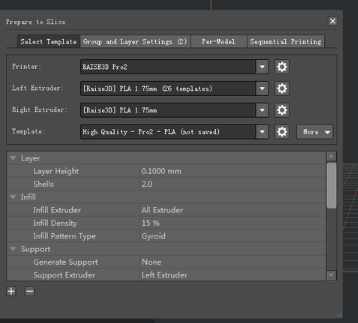
8. New Prepare To Slice menu
New layout for the ‘Prepare to Slice’ offers more information previews prior to slicing.
9. Per Layer Settings Z Selection
Added interface to adjust Start Z and End Z positions for Per-Layer Settings.

10. Solid Top and Bottom Layers
Added Top Solid Layers and Bottom Solid Layers into Per-Layer Settings.
11. Additional Per Layer options
Added options of Print Speed, Flowrate, Infill Type for Solid Layers under Per-Layer Settings.
12. Extruder Switch Settings
Separated Extruder Switch settings for each extruder and moved the settings from Ooze tab to Extruder tab.
13. Internal Brim
Added Add Brim on Internal Regions option to be able to add Brim structure around holes inside model.
14. Added Gyroid Infill Pattern.
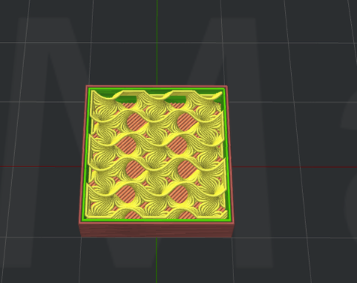
3D Gyroid Infill
15. Enable/Disable all fans
Added Enable Cooling Fans option to enable or disable all the controllable cooling fans instead of changing multiple options.
16. Added print speed settings for Brim and Skirt.
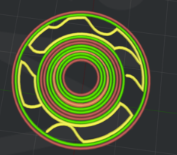
17. Added Concentric pattern for Support structure.
18. Added Concentric Infill Pattern for Infill structure.
19. Added Support Solid Base Layers Speed setting.
20. Added Dense Support Speed setting.
21. Added Concentric Fill Pattern for Dense Support Layer.
22. Wipe Wall Stop after color switching is completed
Wipe Wall and Wipe Towers will stop printing when there is only one extruder being used to complete the rest of the print. The inactive extruder will cool down as well.
Wipe Wall stopped after color switching completed
23. Added Solid Fill Outline Shells option
This option will print a few loops around the solid fill to decrease the chance of collapse of the solid fill structures.
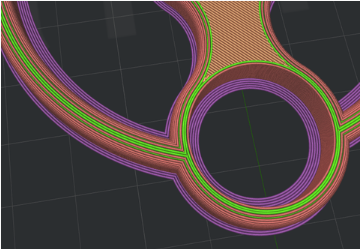
24. Added Infill Outline Shells option
Will print a few loops around the infill structures to improve the adhesion of infill structures. Especially when the model has been modified to use multiple infill patterns in one print, the option can improve the adhesion among different infill patterns.
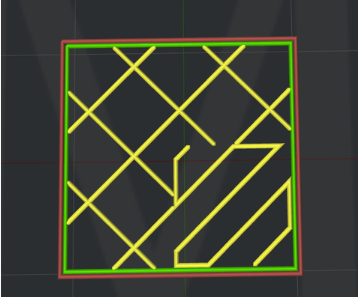
0 outline shells on model with different infills
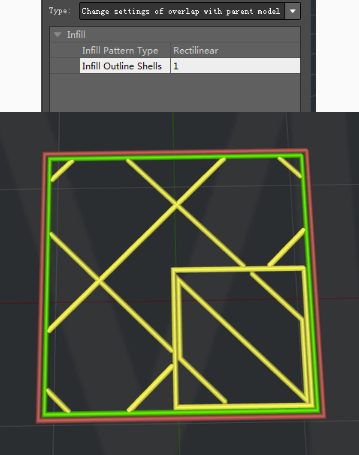
1 Outline shell added to infill
25. Improved heated bed setting flow. Once heated bed has been disabled, all the related settings of the heated bed will be not allowed to change.
26. Added Change Gcode E length by multiplying filament flow option.
Once enabled, the global flowrate will not be controlled by code M221 anymore but always keep at 100%. The E value in Gcode file will be edited directly, so that the motion board doesn’t need to calculate flowrate.
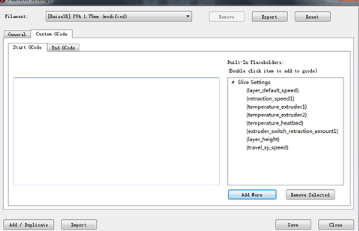
27. Added Start Gcode and End Gcode settings under Filament Settings.
The Start Gcode in Filament Settings will be executed after Start Gcode in print template. If the print will be printed by two extruders, the Start Gcode for Left Extruder will be executed before Right Extruder.
The End Gcode in Filament Settings will be executed before End Gcode in print template. If the print will be printed by two extruders, the End Gcode for Left Extruder will be executed before Right Extruder.
· User Interface
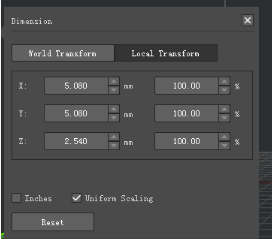
1. Added World Transform for Scale.
The default scale in old version of ideaMaker is a Local Transform. The newly added World Transform can help sync the model information even if the coordinates of model have been rotated before scaling
Note: The World Transform data generated in new version of ideaMaker may not be able to be recognized properly in old versions which may cause the scale value changes when importing this .idea file into ideaMaker with old version software.
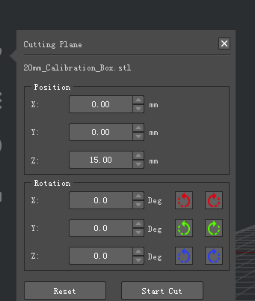
2. Added Rotation settings for cutting.
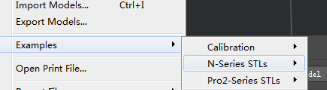
3. Added more example models
Models can be found in File>Example. These models are now separated into categories based on use.
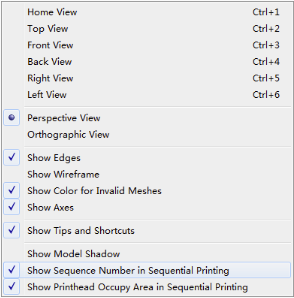
4. Added new options in View menu.
5. Added new options into Slice menu.

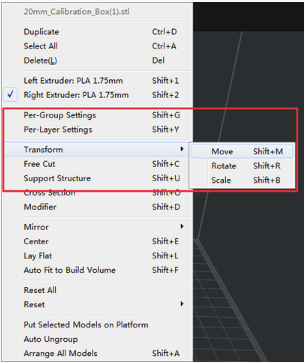
6. Added new options into the model setting menu.
Will appear when right-click the model.
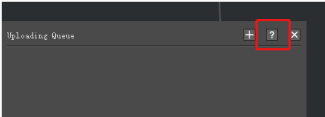
7. Added “?” button for all Operation Panels linked to our support page.
The “?” button for all Operation Panels will be located at right top corner and the “?” button for the other dialogue boxes will be located at the left bottom corner.
8. Added Slice Button Behavior option under Preferences -> Interface.
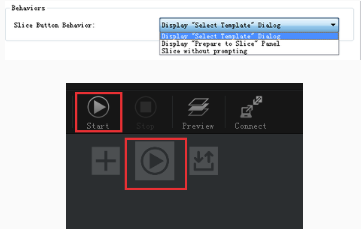
This option only affects the two start slicing buttons.
1. Display “Select Template” Dialog (for version 3.3.0 and lower versions).
2. Display “Prepare to Slice” at left Operation Panel
3. Slice without prompting
9. Added support for Polish language. Language settings can be changed under Preferences -> Language.
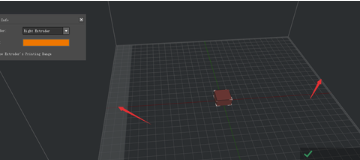
10. Optimized Extruder’s Printing Range interface.
The highlighted grey areas indicate the bounds where models can not be placed.
11. Added support for undo/redo print file rename.
12. Keep Manual Supports Confirmation
Added a confirmation option to keep or discard the current supports before creating Auto Support.
· Remote Connection
1. Added Sequential Printing information on Home page and Camera page under Remote Control.
(It can only work properly with RaiseTouch version 1.2.0 or higher.)
It can show that the print is currently under Sequential Printing Mode, which object it is currently printing, how many objects in total it needs to print and the name of the next object.
Note: If the .gcode file is generated by 3rd party slicing software, the Sequential Printing Mode won’t be shown in ideaMaker remote control page or on touchscreen.
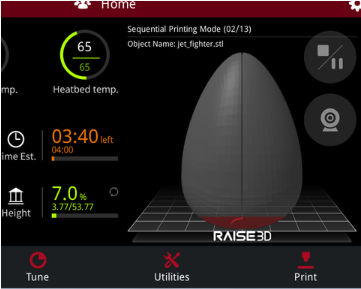
During Sequential Printing, the printing information shown on the touchscreen will still be the information for the whole print job (not the individual model).
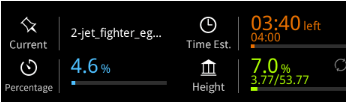
Time Est. shows the remaining time to complete the whole print, how much of the whole print has been already completed (not one single object).
Current shows the name of the print file.
Sequential Printing Mode can only print one object at a time and will display the height for the active model. The height is the only data that is listed for the individual model as opposed to the whole print.
2. Changed the estimated complete time under Remote Connection to be Est. Completion.
3. During .gcode file uploading, if ideaMaker can’t find the matched .data file for this .gcode file, it will try to pull necessary information from .gcode file.
4. Added Layer Height check switch button to switch between current real height(mm) and current layer number.

5. Added pause prompting information under Remote Control.
(It can only work properly with RaiseTouch version 1.2.0 or higher.)
6. Added Print Completion Time in Home page under Remote Control.
· Bug Fixes
1. Fixed the random crash issue caused by undo/redo.
2. Removed the max limitation for first layer height. The old limitation was 0.8 * Layer Height.
3. Fixed infill overlapping issue caused by Combine Infill Layer option.
4. Removed the extra structure generated at WipeTower’s area on Raft, Brim or Skirt when WipeTower is disabled.
5. Fixed the dislocation issue when changing the view.
6. Fixed Primary Extruder display issue under Select Template.
7. Removed the automatically slow down feature when the print speed has been already slower than Minimal Print Speed.
8. Fixed the number input issue under Print > Local Storage > Edit > Add under Remote Control.
9. Fixed the Inactive Extruder Cooling issue at the first layer.
10. Fixed Normal Type Support gap issue which caused the support structure have one-layer gap even when the Vertical Offset Top Layers has been set to be 0.
11. Fixed the Raft extruder width issue which would use the Left Extruder Extrusion Width even though the Raft has been set to print with Right Extruder.
12. Fixed the Bounding Box display issue.
13. Fixed the crash caused by importing file when Build Plate Shape is set to be Ellipse.
14. Fixed oversize rotation circle display issue under Local Transform.
15. Fixed the reversed clockwise and counterclockwise buttons of rotation in Z direction.
16. Fixed the small holes generation issue on Pillar Type support structures.