Reading Time: 14 Minutes
Mastering the myriad of 3D printing settings and parameters is akin to unlocking a secret code—one that can transform a good print into a masterpiece.
This guide is crafted to shed light on the crucial 3D printer parameters, ensuring every job not only succeeds but also achieves the desired outcome with finesse.
Whether you’re a seasoned pro or new to the 3D printing scene, understanding slicer settings and printing parameters is pivotal in navigating the complex, yet fascinating world of additive manufacturing.
Setting Up Your 3D Printer with the Correct Parameters

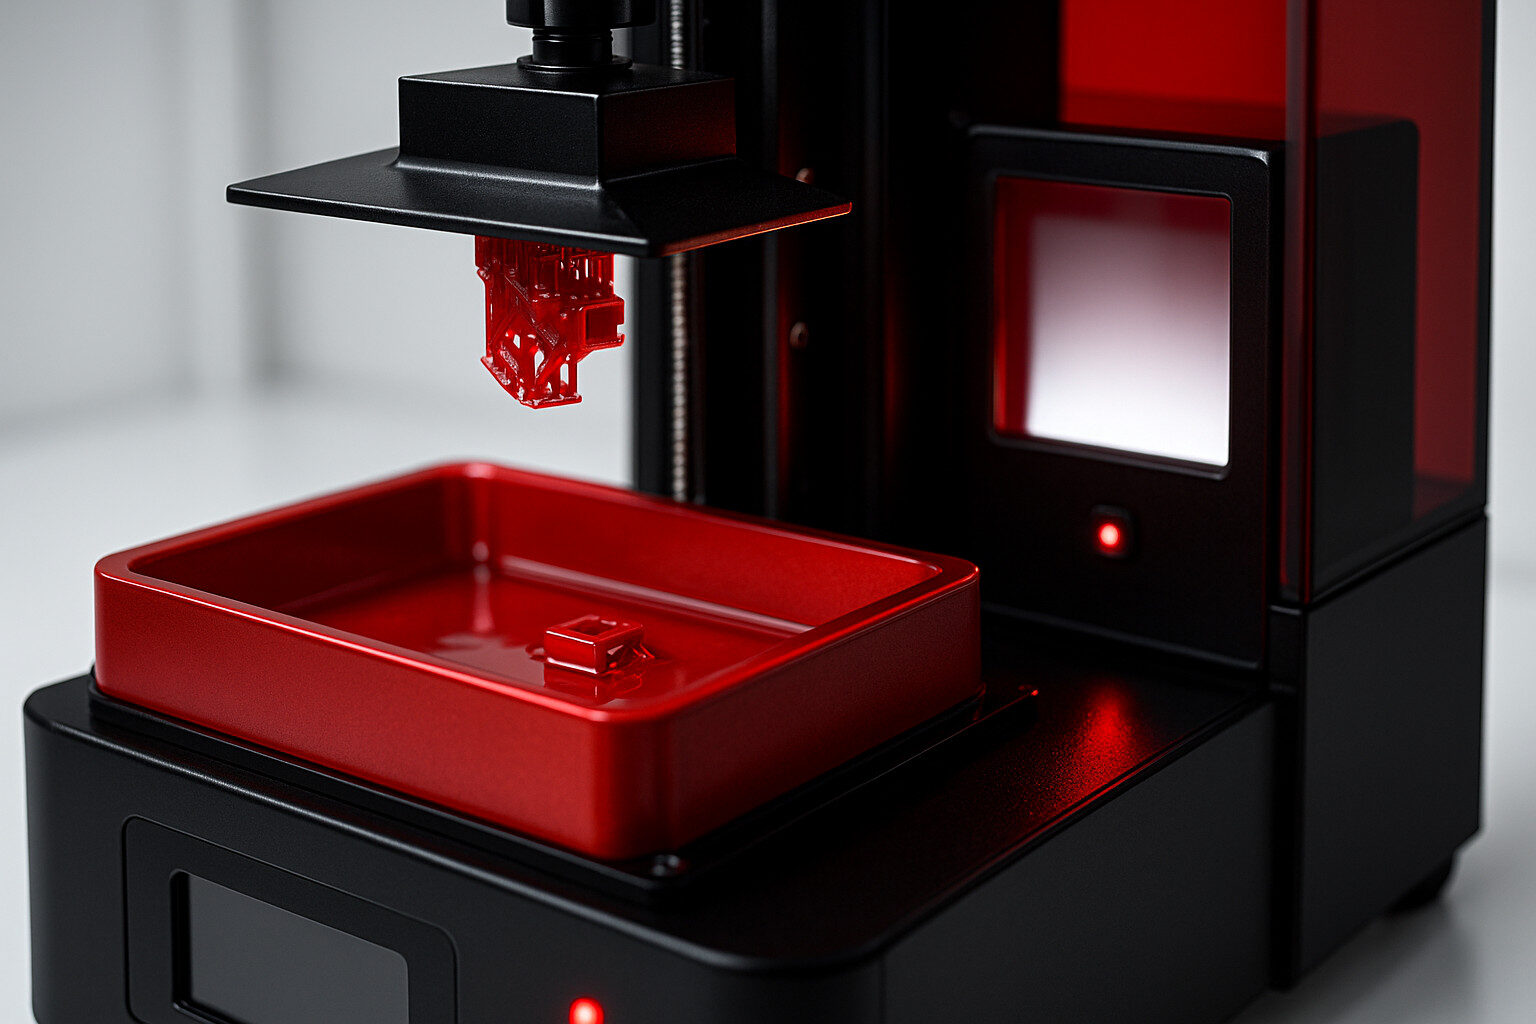
Navigating the world of 3D printing can be daunting, especially when confronted with the multitude of settings and parameters available in slicer software.
Understanding printer settings is crucial, as they directly influence the quality, strength, and appearance of your printed objects.
From the slicer settings that determine how your digital model is translated into G-code, to the precise control over each layer of filament deposited, every parameter plays a pivotal role in the success of your print.
Temperature
Printing temperature settings in 3D printing are foundational, impacting everything from material flow to layer adhesion.
This trio of temperatures—build platform, extruder, and nozzle—must be carefully managed to prevent common print failures such as warping or stringing.
Bed Temperature
The bed temperature is a balancing act; too hot, and your parts may deform, too cold, and they might warp or detach mid-print.
For materials like ABS, a heated bed is essential for ensuring the first layer sticks well, reducing warping. PLA, on the other hand, is less demanding but still benefits from a slightly heated bed to improve adhesion.
Nozzle Temperature
The extruder temperature governs how smoothly your filament melts and flows. Each material has its ideal temperature range: too high, and the material may burn or ooze excessively; too low, and it won’t extrude properly.
For example, PLA works well between 180°C and 220°C, while ABS requires temperatures around 220°C to 250°C.
Shell Thickness
Shell thickness, used used interchangeably with wall thickness, is integral to the structural integrity and surface quality of your 3D printed objects. It refers to the thickness of the outer walls of your print, measured in millimeters.
The ideal shell thickness must be a multiple of your nozzle’s print width to ensure a uniform exterior.
For instance, using a 0.4 mm nozzle, a shell thickness of 0.8 mm means the nozzle will pass twice, laying down two perfect lines of filament, enhancing the object’s durability and impact resistance.
A thicker shell means a stronger, more resilient part, especially critical for functional components or items that will handle stress or wear.
However, increasing shell thickness also means more material usage and longer print times, so finding a balance between strength and efficiency is key.
This setting is a testament to the precision required in 3D printing, where even the smallest adjustments can significantly impact the final product’s quality and functionality.
Infill
Infill is the internal structure of your 3D print, hidden within the shell. It’s not just about saving material or speeding up the print process; infill plays a crucial role in determining the weight, strength, and rigidity of your printed object.
Through the use of slicer software, you can adjust infill density and pattern, tailoring the internal structure of your print to meet specific needs without altering its external appearance.
Infill Density
Infill density is expressed as a percentage, indicating how much of the internal volume is filled with material.
A 0% infill means the object is hollow, while 100% is completely solid.
Most prints use an infill density around 20%, striking a good balance between strength and material usage. The choice of infill density affects not just the print’s weight and strength, but also its printing time and material consumption.
For functional parts that require high strength, a higher infill density is preferable. Conversely, decorative items can use lower infill densities to save on material and time.
Infill Pattern
The infill patern refers to the geometric shape of the infill. It plays a significant role in the print’s final properties. Common patterns include:
- Grid: A simple, fast-to-print pattern that offers moderate strength in all directions.
- Triangles, Hexagon: Provide greater strength due to their geometric stability, making them ideal for parts under stress.
- Concentric: Follows the shape of the perimeter, offering unique aesthetic qualities and uniform strength around edges.
- Zig Zag: Efficient for speed and material usage, suitable for less demanding applications.
- Gyroid: Offers high strength and uniformity without significantly increasing print time or material use.
Selecting the right infill pattern depends on the specific requirements of the print. Some patterns, like the gyroid, provide excellent strength and flexibility, making them suitable for a wide range of applications. Others, like the grid or concentric patterns, might be chosen for their speed or specific structural characteristics.
Flow Rate
Flow rate, often referred to as the extrusion multiplier, is a critical parameter that dictates the volume of filament extruded during printing.
It is essentially the heartbeat of 3D printing, ensuring that the filament flows consistently and accurately to create the desired object. By adjusting the flow rate, you directly influence the material’s deposition rate, impacting the print’s structural integrity and surface finish.
For instance, a 100% flow rate is the baseline, where the printer extrudes the exact amount of filament specified in the G-code.
Altering this to 90% reduces the filament used by 10%, which can help in cases of over-extrusion, where too much material leads to blobbing or stringing. Conversely, increasing the flow rate above 100% can compensate for under-extrusion, ensuring the print doesn’t have gaps or weak spots.
Top/Bottom Thickness
Top/bottom thickness is the parameter that sets the thickness of the uppermost and lowest layers of your print, acting as a shield that encases the infill. It is measured in millimeters or layers and plays a pivotal role in defining the print’s durability and surface smoothness.
The top/bottom thickness must be sufficient to cover the infill completely, preventing it from being visible on the print’s surface. This is crucial for aesthetic prints where the surface appearance is paramount.
Moreover, for functional parts subjected to stress or wear, a thicker top/bottom layer enhances the object’s strength and resistance to breaking.
Optimizing top/bottom thickness involves a balance.
Too thin, and you risk inadequate coverage over the infill, leading to a weak surface prone to damage.
Too thick, and you may unnecessarily extend print times and consume more filament.
The goal is to achieve a harmonious balance that suits the intended use of the printed object, ensuring durability without wasting resources.
Layer Height
Layer height is the measure of each layer’s thickness in a 3D print, directly correlating to the print’s resolution and surface quality.
Typically ranging from 10% to 75% of the nozzle diameter, layer height selections significantly affect the printing process’s duration and the final product’s aesthetics.
Lower layer heights (closer to 15% of the nozzle diameter) produce finer details and smoother surfaces but increase the printing time due to the greater number of layers required.
Conversely, higher layer heights (up to 75% of the nozzle diameter) speed up the printing process but can compromise surface quality and detail resolution.
The choice of layer height is a strategic decision based on the desired balance between print quality and time efficiency.
For prototypes or internal components where detail is not critical, a higher layer height may be preferred for speed.
For final products or models where detail and surface finish are paramount, a lower layer height is advisable, despite the longer print times.
Adaptive Layers
Adaptive layers are an advanced setting that automatically adjusts layer height throughout the printing process. This feature increases layer height in less detailed areas to speed up the print while reducing layer height in more detailed areas to enhance print quality.
Using adaptive layers can significantly reduce printing time without compromising the overall quality of the print, making it an invaluable tool for both rapid prototyping and final product creation.
Print Speed
Print speed refers to how fast the print head moves while extruding filament. It’s a pivotal factor that influences not just the printing time, but also the quality of the final print.
The speed at which you print can affect the appearance of layers, the strength of the printed object, and even the likelihood of printing errors.
For example, printing too fast can lead to under-extrusion, where not enough filament is deposited, resulting in weak layers that can easily break apart.
On the other hand, a slower print speed often results in better layer adhesion, smoother surfaces, and overall stronger prints. However, it also means longer printing times.
Printing speed isn’t a one-size-fits-all setting. It requires adjustments based on the complexity of the model, the type of filament used, and the desired finish of the print.
For intricate details, slowing down can help capture the nuances of the design.
For larger, less detailed parts, a faster speed can save time without sacrificing too much quality.
6. Retraction
Retraction is a crucial parameter designed to combat one of 3D printing’s most common issues: stringing.
When the print head moves between sections without printing, filament can ooze out of the nozzle, leaving strings that mar the print’s surface. Retraction works by pulling the filament back into the nozzle during these travel moves, preventing unwanted extrusion.
Retraction settings, particularly retraction distance and speed, need to be finely tuned. The retraction distance is how far the filament is retracted, while retraction speed determines how quickly this action occurs.
If set too low, retraction may not fully prevent stringing; set too high, and it can cause issues like clogs or missed extrusion points.
What Lack of Retraction Looks Like
Without proper retraction settings, prints can exhibit the dreaded “spiderwebs” or “z-scar” effect, where thin strands of filament stretch across empty spaces.
This not only affects the aesthetic quality of the print but can also impact its structural integrity, as these unintended extrusions can create weak points.
11. Cooling
Cooling is an essential aspect of 3D printing, particularly when it comes to materials that are prone to warping or deformation. The cooling rate refers to how quickly the material solidifies after being extruded. This is controlled by the fan speed on the extruder assembly, which can typically be adjusted from 0 to 100%.
Effective cooling is crucial for achieving sharp corners, bridging gaps without support material, and preventing model deformation.
For example, PLA benefits significantly from higher cooling rates to achieve crisp details and prevent warping.
Conversely, materials like ABS require careful cooling to avoid layer separation and warping, often necessitating a heated enclosure to maintain a consistent temperature.
Adjusting the cooling rate can drastically improve the surface finish of your prints. A well-cooled print will have smoother surfaces and more accurate details, especially in overhangs and thin walls. However, too much cooling can lead to brittle parts or poor layer adhesion, so finding the right balance is key.
12. Adhesion Resistant
Bed adhesion is a common challenge in 3D printing, with prints sometimes detaching from the bed mid-process or, conversely, sticking too well and becoming difficult to remove.
Achieving the right level of adhesion ensures that your print stays in place throughout the printing process, resulting in a successful, high-quality final product.
Adhesion Assistants
To combat adhesion issues, several techniques can be employed:
- Skirt: This is a single or multiple line of filament that’s printed around the object but not attached to it. It helps prime the nozzle and ensures a steady flow of filament before the actual print starts, also helping with bed leveling issues.
- Brim: A brim consists of extra lines of filament that are printed around the base of your object, connected to its edges. This increases the surface area of the first layer that’s in contact with the print bed, improving adhesion and helping to prevent warping on parts with small footprints.
- Raft: A raft is essentially a thick, flat lattice of filament that’s laid down first, on top of which your object is printed. It provides excellent adhesion and a level surface, especially for prints with irregular bottoms. Rafts can significantly reduce warping but use up more filament and can leave a rough surface on the bottom of the print.
Each method has its specific applications and can be the key to solving common printing issues related to bed adhesion.
2. Nozzle Diameter
The nozzle diameter is a fundamental parameter that directly influences the resolution of your prints and the speed at which they can be completed.
The most commonly used nozzle size is 0.4 mm, which offers a good balance between detail and print time.
Smaller nozzles, such as 0.2 or 0.3 mm, can produce higher-resolution prints with finer details but at the cost of longer print times.
Conversely, larger nozzles, like 0.6 mm or 0.8 mm, allow for faster printing but with lower resolution.
The choice of nozzle diameter affects not just the aesthetic aspects of your print but also its structural integrity, as it determines the minimum layer height and the width of the extruded filament.
13. Supports
Supports are critical for printing models with overhangs or complex geometries that cannot be printed without additional structure.
These supports act as scaffolding for the parts of the model that would otherwise be suspended in air during printing. The design and placement of supports are crucial; they must be strong enough to support the model during printing but also easy to remove without damaging the final print.
Slicer software provides various options for support density, pattern, and placement, allowing you to customize supports based on the specific needs of your print.
Skin Overlap Percentage
Skin overlap refers to the percentage overlap between the innermost part of the infill and the outer walls or skin of the print. This setting is crucial for ensuring a smooth outer surface and preventing gaps between the infill and the skin.
A higher skin overlap percentage can improve the appearance and strength of the outer surface but may also lead to over-extrusion if set too high. Finding the right balance is key to producing prints with smooth, strong outer layers.
14. Z Hop When Retracted
Z-hop is a retraction setting that lifts the nozzle away from the print when moving across open spaces or between print parts.
This prevents the nozzle from dragging across the print and potentially marring the surface or knocking over small features.
The Z-hop setting is particularly useful for prints with intricate details or when printing with stringy materials. However, excessive Z-hop can increase print times and may lead to oozing if the retraction settings are not adequately optimized.
-
Print Orientation
Print orientation is the direction in which a model is positioned on the build plate and is a critical factor in determining the strength, print speed, and surface quality of the final print.
Proper orientation can minimize the need for supports, reduce printing time, and ensure the best possible strength along the desired axis. It requires a strategic approach, considering the model’s geometry, the desired finish, and the mechanical stresses it will endure in use.
Here are the different print orientation options in 3D printing:
- Vertical Orientation: The object is printed standing up. This orientation can be beneficial for objects that need strength along the vertical Z-axis. It often results in a good surface finish on the sides but may require support structures for overhangs, which can leave marks that need post-processing.
- Horizontal Orientation: The object is laid flat on the build platform. This orientation can reduce the need for support structures, potentially leading to a smoother surface finish where the object contacts the build platform. However, it might weaken the object along its vertical axis.
- Angled/Diagonal Orientation: The object is printed at an angle relative to the build platform. This can be a compromise between vertical and horizontal orientations, often used to minimize the need for supports while attempting to optimize both surface finish and structural integrity. It can also help in printing complex geometries more successfully.
- Custom Orientation: Depending on the complexity of the model and the specific requirements of strength, surface finish, or geometric accuracy, custom orientations can be used. This involves strategically positioning the object to optimize for specific characteristics, such as minimizing supports, reducing layer lines visibility, or enhancing the strength of critical features.
How to Choose the Right 3D Printing Parameters/Settings?
Selecting the appropriate 3D printing settings is vital for achieving the desired print quality, efficiency, and functionality of your 3D models.
Here are some key factors to consider, each impacting the final outcome of your printed object.
- Material: Different materials require specific settings for optimal results. Materials like PLA, PETG, and ASA each have unique characteristics and are suited for different applications. Matching the material to your project’s requirements is essential for achieving the desired outcome.
- Infill: This parameter determines the internal structure’s density. A higher infill percentage increases structural integrity but also the print’s time and material consumption. Deciding on the right infill percentage is a balance between strength and resource efficiency.
- Resolution: Defined by the layer height and thickness, 3d printing resolution impacts the print’s detail and surface finish. Finer resolutions yield more detailed prints with smoother surfaces but require more time and material. The choice of resolution should align with the detail level required for your print.
- Nozzle Diameter: The size of the nozzle affects resolution and print speed. Smaller diameters allow for high-detail prints at the expense of print time, while larger nozzles can speed up the process with a compromise on detail. Nozzle size also dictates the optimal layer height, which should be adjusted according to the nozzle diameter to ensure smooth printing and proper layer adhesion.
- Layer Height and Magic Numbers: Layer height should be chosen based on the nozzle diameter, typically ranging from 15% to 75% of the nozzle size to avoid issues like clogging or poor surface quality. Magic numbers, which correspond to specific layer heights that align with the printer’s mechanical properties, can enhance print smoothness and accuracy.
- Printing Temperature: Critical for material flow and layer bonding, the printing temperature varies with the material type. It must be high enough to ensure fluidity but not so high as to cause material degradation. Printers with heated chambers can further optimize material properties by maintaining a controlled environment.
- Printing Speed and Application: Adjusting print speed can affect resolution, accuracy, and mechanical properties. The chosen speed should reflect the application’s requirements, whether for high-detail aesthetic pieces or functional parts with specific mechanical needs.
- Supports, Adaptive Layers, and Other Software Settings: Utilizing slicer software settings like supports for overhangs, adaptive layers for varying detail levels, and specific infill patterns can significantly impact print success. These settings allow for customization to meet the unique demands of each print.
What are the best 3d printer settings for some of the most popular filaments?

When it comes to optimizing 3D printer settings for various popular filaments, understanding the material-specific requirements is crucial for achieving the best print quality. Here’s a summarized guide based on the provided content structure:
What are the Best 3D Printer Settings for Some of the Most Popular Filaments?
For PLA, a biodegradable and widely favored filament due to its ease of use and good print quality, the recommended settings include:
- Print Temperature: Between 190-220°C, which balances print quality, layer adhesion, and minimizes stringing or oozing.
- Bed Temperature: Typically between 30-60°C to ensure good adhesion and prevent warping.
- Print Speed: Moderate speeds are suggested, around 60-150mm/s, to maintain a balance between print quality and speed. Some printers can handle faster speeds, but it’s generally advised to start slower and increase as needed.
- Layer Height: Ranges from 0.1mm to 0.3mm, depending on the desired level of detail.
- Retraction Settings: Proper adjustment of retraction distance and speed is necessary to reduce stringing and oozing.
- Bed Adhesion Techniques: Using a heated bed or adhesive like glue sticks can improve first layer adhesion.
What are the best 3d printer settings for PETG print?
- Temperature Settings: The nozzle temperature should ideally be set between 240°C and 265°C, depending on your printer’s extruder. The bed temperature works best at around 70-75°C, with a slight increase for the first few layers to ensure good adhesion.
- Bed Adhesion: PETG adheres well to many surfaces but can stick too well to smooth surfaces like glass, leading to removal difficulties. Applying a glue stick can prevent over-adhesion.
- Print Speed: It’s advised to print PETG at a speed not exceeding 60 mm/s to allow the material to bond properly with previous layers and cool sufficiently. The travel speed, or the speed at which the printhead moves when not depositing material, should be fast, around double the print speed (approx. 120 mm/s) to mitigate oozing and stringing.
- Retraction Settings: Adjusting retraction settings is crucial to counter PETG’s tendency towards oozing and stringing. A retraction distance of 3–7 mm is recommended, with a retraction speed of around 20 mm/s. Adjustments should be made in small increments to find the optimal settings for your printer.
- Fan & Cooling: A fan speed of 30-60% is generally sufficient for most prints, helping to prevent issues like oozing and stringing while ensuring good layer adhesion. It’s important to only use the fan after the first few layers to avoid warping.
- Infill Settings: For PETG prints, an infill density of 20% to 30% is typical. Choosing the right infill pattern is important due to PETG’s viscosity; patterns like rectilinear, honeycomb, and gyroid can help avoid issues with unwanted blobs of material.
- Filament Drying: TPU is highly hygroscopic, so drying the filament before printing is crucial. Using a dedicated filament dryer like PrintDry for 6-12 hours at 70-80°C is recommended to avoid moisture-related print issues.
What are the best 3d printer settings for ABS print?

- Nozzle Temperature: 240-270°C. It’s recommended to start with a lower temperature and adjust by increments of 5°C to find the perfect balance between print quality and part strength.
- Bed Temperature: 95-110°C is generally recommended to ensure good bed adhesion and minimize warping.
- Print Speed: 40-60 mm/s for most prints, with adjustments based on the complexity of the print. For the initial layers, a slower speed may help with adhesion.
- Cooling Fan: Generally, it’s best to keep the cooling fan off during the first few layers to aid in layer adhesion. If necessary, a low cooling fan setting of around 30% can be used after the initial layers.
- Retraction: Direct drive extruders may use a retraction setting of 2-3mm, while Bowden extruders may require 4-5mm. Adjust as needed to reduce stringing or blobbing.
- Layer Height: Standard 0.2mm layer height for a 0.4mm nozzle is typical, with adjustments for more detailed prints or quicker prototyping.
- Bed Adhesion: Brims, rafts, and ABS slurry can help with bed adhesion. Using a PEI sheet or blue painter’s tape on the print bed can also improve first layer adhesion.
- Enclosure: Using an enclosure is recommended to maintain a stable temperature and reduce warping.
What are the best 3d printer settings for TPU print?
- Extrusion Temperature: The recommended range for the extruder temperature is between 220°C to 240°C. This temperature range ensures proper filament melting and extrusion without causing issues related to under-extrusion or overheating.
- Bed Temperature: While a heated bed is not strictly necessary for TPU, setting it to less than 60°C can help improve print quality and adhesion if you choose to use a heated bed.
- Print Speed: A slower print speed is crucial for TPU to prevent issues like jamming and to accommodate the material’s flexibility. The advised speed range is between 15mm/s to 30mm/s.
- Layer Height: A standard layer height of 0.16mm is suggested for achieving a balance between print quality and consistency, especially when using a 0.4mm nozzle.
- Retraction Settings: Lower retraction is recommended to avoid clogging, with a starting point of disabling retraction or using a minimal retraction distance and speed (2mm at 20mm/s) and adjusting based on your printer’s performance.
- Cooling Fan Speed: For TPU, it’s generally best to turn off the cooling fan or set it to a low value (20-40%) since TPU does not warp significantly. Cooling can sometimes lead to adhesion problems.
- Infill and Density: A lower infill density is suggested if you’re aiming for flexibility in your print. However, this should be balanced with the need for structural integrity depending on the application of the printed part.
- Direct Drive Extruder: Using a direct drive extruder is preferable for TPU to minimize the distance the filament must travel, reducing the chance of bending and clogging.
- Filament Drying: TPU is highly hygroscopic, so drying the filament before printing is crucial. Using a dedicated filament dryer like PrintDry for 6-12 hours at 70-80°C is recommended to avoid moisture-related print issues.
What are the best 3d printing settings for lithophane?
- Infill or Shell/Wall Perimeters: Opt for 100% infill (99% to save time without losing solidity) or increase the number of shell/wall perimeters to ensure the print is solid, as lithophanes rely on varying thickness for the image to appear properly when lit from behind.
- Print Speed: Slower speeds yield better results for lithophanes. Recommendations vary, but a common consensus is to print at 30-40 mm/s to balance quality and time efficiency.
- Layer Height: A finer layer height captures more detail. A range of 0.1 mm to 0.2 mm is advised, with 0.12 mm often cited for high-quality prints.
- Orientation: Printing vertically is suggested to improve quality significantly.
- Temperature: Use standard PLA printing temperatures (around 200°C for the nozzle and 50-60°C for the bed) as PLA is preferred for its detail capture and translucency.
- Software and Tools: For software, ItsLitho is highly recommended for its ease of use and extensive editing options. Other tools include 3dp.rocks for simplicity and Lithophane Maker for basic design options.
What are the best 3d printing settings for nylon?
- Nozzle Temperature: 230°C to 300°C, with variations depending on the specific brand of filament. It’s common to start at the lower end and adjust upwards for better layer adhesion and surface finish.
- Bed Temperature: 25°C to 80°C, optimal temperatures tend to be in the 60°C to 70°C range for best adhesion without warping.
- Print Speed: Generally recommended between 30 mm/s to 60 mm/s. Specific speeds for infill, outer walls, and top/bottom layers can vary, with some recommendations suggesting 50mm/s for infill and 50% of the main print speed for outer walls and top/bottom layers.
- Fan Speed: 0% or up to 50% in some cases, though many sources suggest printing with the fan off to prevent warping due to the material’s sensitivity to cooling.
- Layer Height: 0.12mm to 0.28mm, with the specific choice depending on the desired balance between print quality and speed.
- Bed Adhesion: Using a PVA-based glue stick, PVP, or specialized adhesives like Magigoo is recommended to ensure the first layer sticks well to the bed. Surfaces like garolite and PEI are highly recommended for their strong adhesion qualities and durability over time.
- Filament Drying: Nylon is highly hygroscopic, so drying the filament before printing is crucial. Using a dedicated filament dryer like PrintDry for 6-12 hours at 70-80°C or even longer for materials like NylonX is recommended to avoid moisture-related print issues.
Conclusion
Mastering 3D printing settings transforms digital models into tangible masterpieces, addressing temperature management, bed adhesion, and infill strategies.
Key parameters like temperature settings are vital for material flow and layer adhesion, while infill density and pattern determine object strength and efficiency.
Adjustments in print speed, layer height, and retraction settings are crucial for overcoming printing challenges and enhancing detail.
Optimizing settings for various filaments is essential for achieving successful and high-quality prints in both functional and aesthetic projects